
Manage Users and Roles
This page provides an overview of User and Role management.
Before working with identity management in ONE, it is important to understand the following concepts:
-
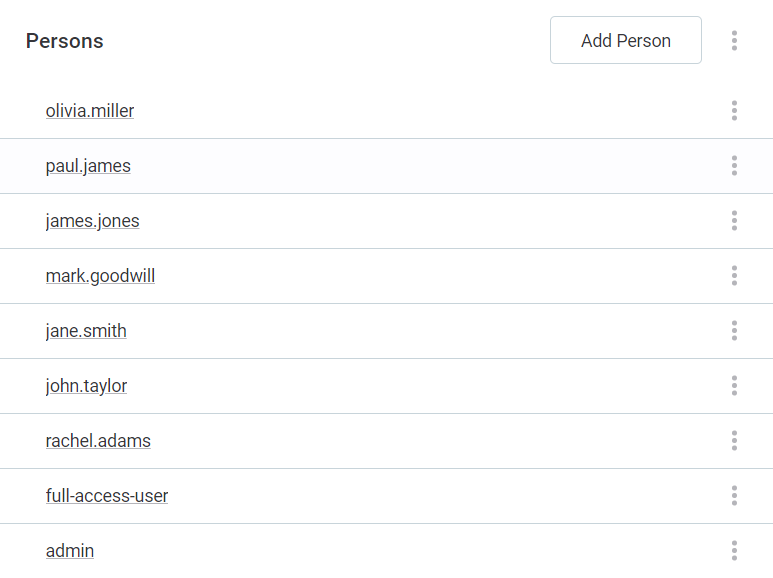
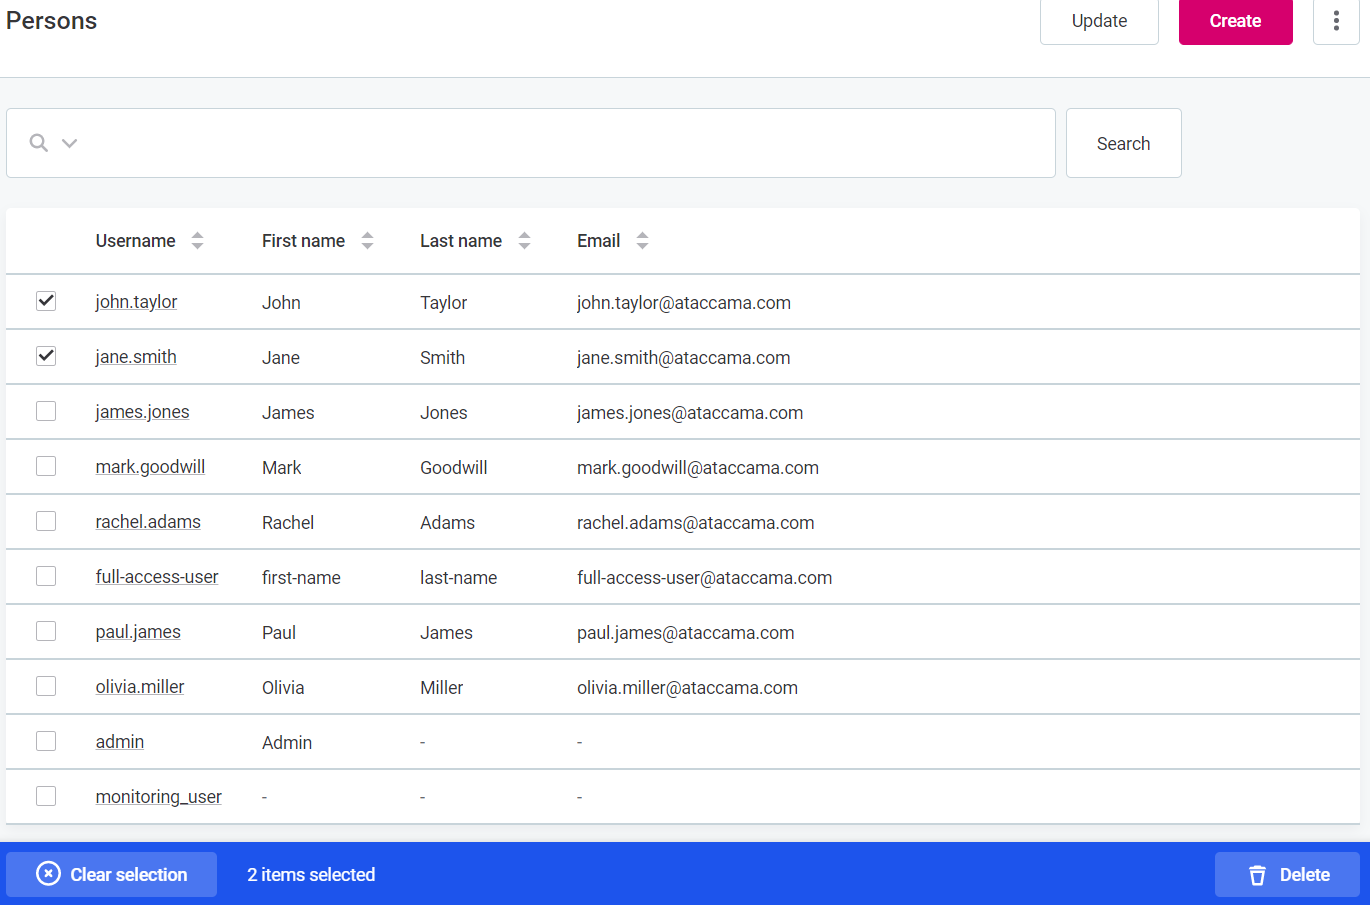
Users (Persons) identify people or services who have access to Ataccama ONE. For more information, see Manage users. You can see the list of active users by going to Global Settings > Persons.
-
Roles are the container for permissions that users can perform on entities in ONE in alignment with the company organization chart. Role refers to roles defined in Keycloak, for example,
MMM_ admin. For more information, see Manage roles. You can see the list of available roles by going to Global Settings > Roles.
Users need to be mapped to Roles, which will determine their node permissions based on the operations allowed for that role on individual nodes. You can assign more than one role to a user. Users and roles are managed primarily in the Keycloak service, then synced with ONE. Even though user-role mappings can also be edited directly in ONE, it is not recommended, and identities must be provided by a third-party solution such as Active Directory or LDAP. The integration is configured in Keycloak according to Keycloak documentation.
Default users and roles
This section describes the default users and roles mapping for the Ataccama ONE Web Application that are loaded on startup. It is also possible to configure custom roles and users or synchronize them with other authentication services, such as Active Directory and LDAP. For more information on custom configuration, see Manage roles and Manage users. For more information on synchronization with Keycloak from other services, see the official Keycloak documentation.
Users and Roles in Keycloak
There are two universal default Keycloak roles for application permissions: MMM_admin and MMM_user.
The MMM_admin role must be assigned to at least one user, i.e. a superuser who should have full access and editing rights across the whole application.
The MMM_user role must be assigned to every user in order for them to have view access to navigation.
However, these roles are composite roles, so it is actually the associated roles admin and default that will be assigned to users (consequently assigning MMM_admin and MMM_user).
|
In version 13.9 of ONE, a new Keycloak role MMM_creator was added to extend the Create permissions functionality.
Users with this role can create assets of any type.
Meanwhile, since this is an extension of the previous model, all the roles' create capabilities remain unchanged and valid.
That means that all admin users can still create the assets where they have permission to do that.
This new functionality is disabled by default and requires manual enabling via the JSON configuration file. For more information, see Configure Custom Permissions. For various |
When installing Keycloak, the default Ataccamaone realm is imported to Keycloak with default users, roles and mapping.
After you log in to the Keycloak admin console you can create and map new roles and users.
| In 13.9, it is possible to limit the access rights to specific nodes (terms, rules, etc.) for a user or all users allocated to a Keycloak role. For more information, see Configure Permissions Frequent Scenarios. |
Default role mapping: Keycloak and ONE User permissions
This section describes how default Keycloak roles are mapped to application permissions, that is, which capabilities are associated with which user role.
| Keycloak role | Description of permissions | ||
|---|---|---|---|
admin |
Admin permissions for all applications. |
||
AUDIT_admin |
Admin permissions for the Audit module. |
||
CS_admin |
Admin permissions for the configuration service |
||
default |
Default role for MMM, which allows viewing of roles in Keycloak. |
||
DPP_admin |
Admin permissions for the DPP modules (DPM and DPE), which allows the following:
|
||
DQIT_admin |
Admin permissions for DQIT. |
||
DQIT_supervisor |
Access and edit permissions for DQIT. |
||
DQIT_user |
Access permissions for DQIT, no edit permissions. |
||
MDM_admin |
Admin permissions for ONE MDM. |
||
MDM_user |
Access and edit permissions for ONE MDM. |
||
MDM_viewer |
Access permissions for ONE MDM, no edit permissions. |
||
MMM_admin |
Super admin permissions: full access and edit permissions for the application configuration and all assets. Can modify the catalog structure |
||
MMM_application-admin |
Can access and edit the application configuration. |
||
MMM_data-analyst |
Can access any node or section in the application and view the application configuration; any other permissions need to be explicitly granted (for example, viewing catalog items). Can access but not edit:
|
||
MMM_data-governor |
Can access and edit the application configuration. Can access but not edit:
|
||
MMM_data-manager |
Can access any node or section in the application and view the application configuration; any other permissions need to be explicitly granted (for example, viewing catalog items). Can access, edit, and create:
Can access but not edit:
|
||
MMM_dq-specialist |
Can access any node or section in the application and view the application configuration; any other permissions need to be explicitly granted (for example, viewing catalog items). Can access, edit, and create:
Can access but not edit:
|
||
MMM_creator |
Can create and own assets of any type in ONE.
|
||
MMM_metadata-manager |
Can access and edit the application configuration. Can access, edit, and create:
Can access but not edit: * Data sources (including their connections and credentials). |
||
MMM_read-only |
Can access the application configuration and all assets, as well as any node or section in the application. No edit permissions. |
||
MMM_user |
Can access any node or section in the application and view Global Settings without access to the Maintenance Center (that is, the System Changes, Metadata Model, Permissions, Database Backups, and Validations tabs). Any other permissions need to be explicitly granted (for example, viewing catalog items). |
||
ONE_PLATFORM_MONITORING |
Access permissions for Prometheus |
||
RDM |
Used for logging in to ONE RDM. |
||
RDM_admin |
Admin permissions for ONE RDM, including the Admin Console. |
||
RDM_user |
Access and edit permissions for ONE RDM |
| Capability | Description | ||
|---|---|---|---|
super-admin |
Users with this capability have full access and edit permissions for the application configuration and all assets in the application. |
||
super-viewer |
Users with this capability have full view access, but no edit permissions for the application configuration or any assets in the application. |
||
application-admin |
Users with this capability can modify the configuration of the application in the *Organization *settings but don’t have access to any asset by default. Assets should be shared with this user. |
||
application-user |
Every user should have this capability to be able to work with the application. People with this role can access any node and section in the application. They can view application settings but cannot edit settings of the application or add new entities. They do not have access to assets (for example, no access to catalog items when it wasn’t explicitly given to them) and cannot create new assets. |
||
catalog-admin |
Users with this capability have full permission to all locations and catalog items as well as their relationships. Any new catalog item is visible to this user by default. |
||
catalog-viewer |
Users with this capability have view permissions to all locations and catalog items as well as their relationships. All newly-created locations and catalog items are instantly visible. |
||
connection-admin |
Users with this capability have full permissions to all connections and credentials. |
||
connection-viewer |
Users with this capability have view permissions to all connections and credentials. All newly-created connections become instantly visible. |
||
component-admin |
Users with this capability have full permissions to all components. The user can create new components. |
||
component-creator |
Users with this capability can create new components and become their owner when create permission functionality is enabled.
|
||
component-viewer |
Users with this capability have view permissions to all components as well as their relationships. All newly-created components become instantly visible. |
||
dsl-query-catalog-items |
Users with this capability have full access to the DSL query catalog items. |
||
lookup-item-admin |
Users with this capability have full permissions to all lookups. The user can create new lookups. |
||
lookup-item-creator |
Users with this capability can create new lookup items and become their owner when create permission functionality is enabled. |
||
lookup-item-viewer |
Users with this capability have view permissions to all lookup items as well as their relationships. All newly-created lookup items are instantly visible. |
||
term-admin |
Users with this capability have full permissions to all glossary terms as well as their relationships. The user can create new terms. |
||
term-creator |
Users with this capability can create new glossary terms and become their owner when create permission functionality is enabled.
|
||
term-viewer |
Users with this capability have view permissions to all glossary terms as well as their relationships. All newly-created terms are instantly visible. |
||
rule-admin |
Users with this capability have full permissions to all rules as well as their relationships. The user can create new rules. |
||
rule-creator |
Users with this capability can create new rules and become their owner when create permission functionality is enabled.
|
||
rule-viewer |
Users with this capability have view permissions to all rules as well as their relationships. All newly-created rules become instantly visible. |
||
governance-admin |
Users with this capability have full permissions to all regulations, policy categories and policies. The user can create new ones. The user can enable automatic policy enforcement. |
||
governance-creator |
Users with this capability can create new regulations, policy categories and policies and become their owner when create permission functionality is enabled.
|
||
governance-editor |
Users with this capability have edit permissions to all regulations, policy categories and policies, and can create new ones. They can also access the impact analysis tab. They do not have permission to toggle automatic policy enforcement. |
||
governance-viewer |
Users with this capability have view permissions to all regulations, policy categories and policies, as well as their relationships. All newly-created regulations, policy categories and policies are instantly visible |
||
monitoring-project-admin |
Users with this capability have full permissions to all monitoring projects. The user can create new monitoring projects. |
||
monitoring-project-creator |
Users with this capability can create new monitoring projects and become their owner when create permission functionality is enabled.
|
||
monitoring-project-viewer |
Users with this capability have view permissions to all monitoring projects as well as their relationships. All newly-created monitoring projects are instantly visible. |
||
source-admin |
Users with this capability have full permissions to all data sources, their connections and credentials. The user can create new data sources |
||
source-creator |
Users with this capability can create new data sources and become their owner when create permission functionality is enabled.
|
||
source-viewer |
Users with this capability have view permissions to all data sources as well as their relationships. All newly-created data sources become instantly visible. |
Keycloak realm prerequisites
To manage users and roles, you need to log in to Keycloak Admin Console as the Ataccamaone realm admin.
| For general information regarding Keycloak, refer to the official Keycloak documentation. |
If the Ataccamaone realm does not yet exist, follow these steps:
-
In your browser, go to localhost:8080/auth/.
-
Create an initial admin user with the credentials
admin/admin.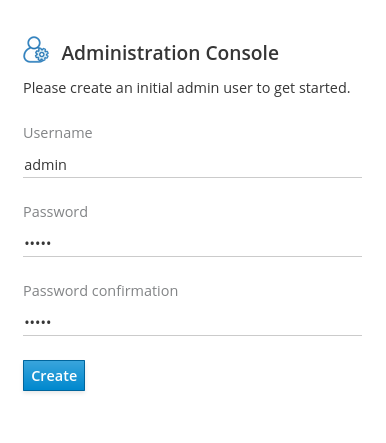
-
Log in to Administration Console.
-
Click Add realm.
-
On the Add realm screen, click Select file and upload the
ataccamaone.jsonfile. -
To finish importing, click Create.
|
If you want to use the Audit Module you need to also import the Audit Module clients and roles (
|
Manage roles
This section describes how to work with Roles in both Keycloak and ONE Web Application.
| We do not recommend managing roles in ONE Application to avoid synchronization problems. It is best, when all users and roles are managed in your ID management system. |
Manage roles in Keycloak
To manage users and roles, you need to log in to Keycloak Admin Console as the Ataccamaone realm admin.
For more information, see Keycloak realm prerequisites.
User-Role mappings are defined in keycloak.json and can also be edited directly in the configuration file.
For more information and general use guidelines, see the official Keycloak documentation.
|
Typically, users and roles in Keycloak are communicated from other authentication services, such as Active Directory and LDAP. For more information on synchronization with Keycloak, see the official Keycloak documentation.
Create roles
To create roles in Keycloak:
-
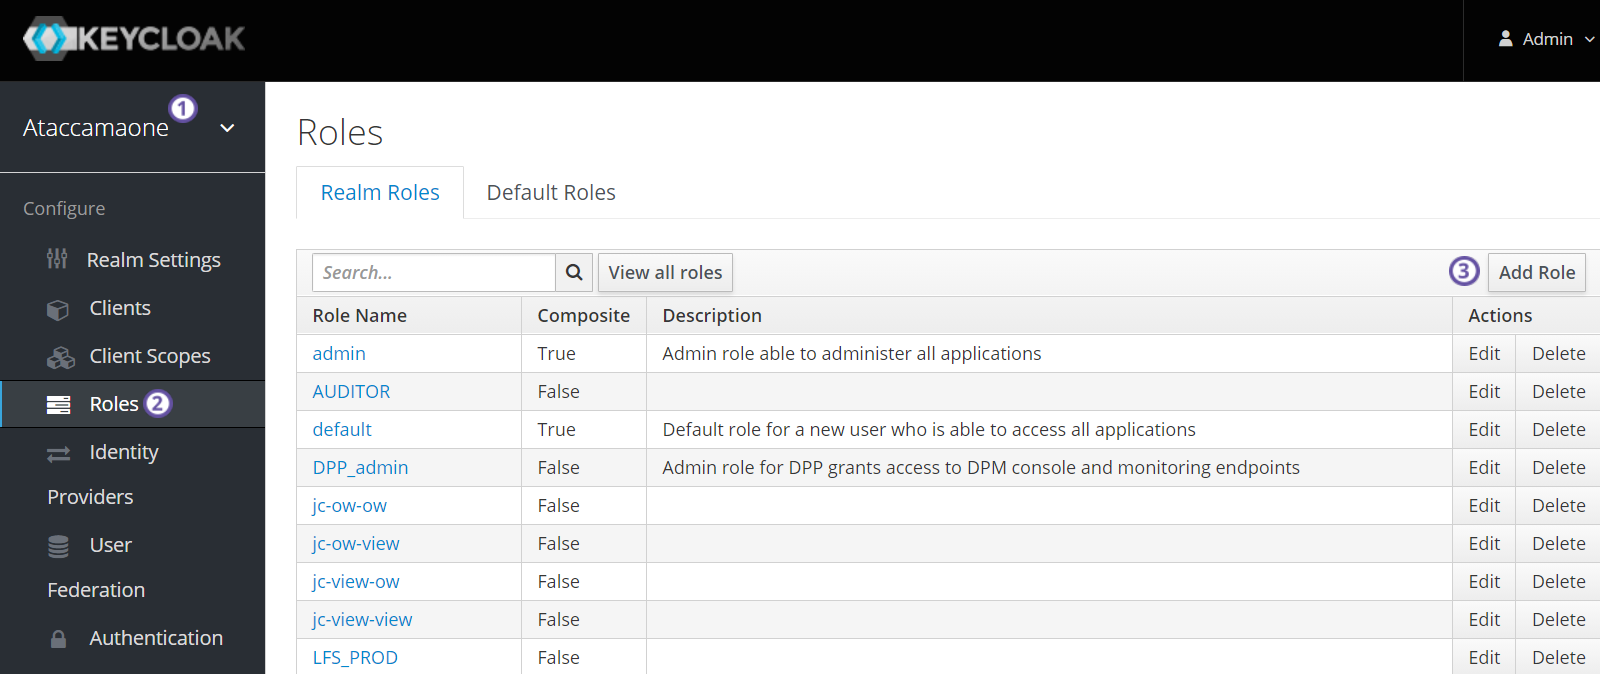
Make sure 'Ataccamaone' realm is selected at the top of the left navigation bar.
-
From the left navigation bar, click Roles.
-
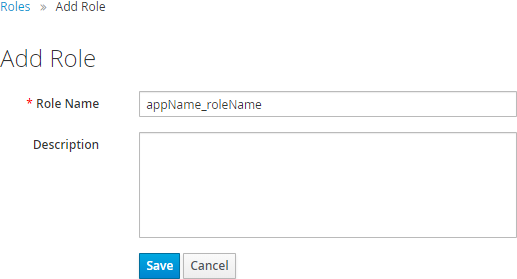
In the Realm Roles tab, click Add Role.
-
Fill in Role Name and Description.
Once a role is created in Keycloak, it is not possible to rename it. -
Select Save.
-
The role is now visible in the roles list.
Editing roles
To edit roles in Keycloak:
-
Navigate to the Roles screen and select the Realm Roles tab.
-
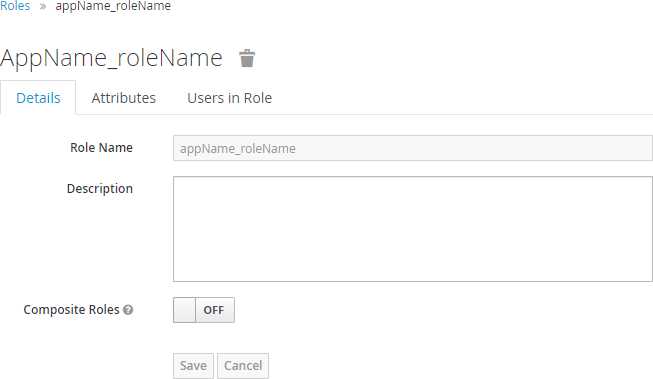
From the list of roles, click a role name to open its configuration page. There you can view and edit role Details, Attributes and view the list of Users in Role.
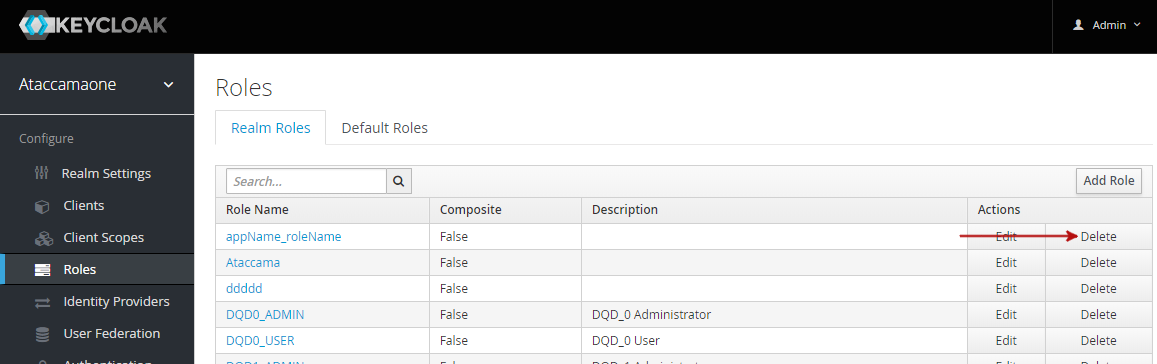
Remove roles
To remove roles in Keycloak:
-
Navigate to the Roles screen and select the Realm Roles tab.
-
For the role you want to delete, click Delete and confirm the action.
Role name prefixes
As Keycloak can simultaneously manage roles and users for web applications of multiple Ataccama products, roles in Keycloak are automatically mapped to a specific Ataccama web application using the role prefix defined for the application. It is possible to change this configuration, but only before the application is started for the first time. By default, the permission settings in ONE web app will only look at roles with the prefix `MMM_ `.
Roles without prefix are intended to be composite roles which comprise of prefixed roles (it describes what roles should apply in each module).
For example, admin is a composition
of MMM_admin, RDM_admin and others.
For more information on composite roles, see www.keycloak.org/docs/latest/server_admin/.
For different Ataccama ONE modules, use the following prefixes:
| Module | Prefix |
|---|---|
Metadata Management Module |
MMM_ |
Data Processing Platform |
DPP_ |
Reference Data Management |
RDM_ |
Master Data Management |
MDM_ |
Configuration Service |
CS_ |
Data Quality Issue Tracker |
DQIT_ |
The role name in Keycloak is created as <rolePrefix>_<roleName>, where:
-
rolePrefix: a role name prefix defined in theappNameelement in the web application configuration file.Make sure to start the role name with the <appName>_prefix. Otherwise, the application won’t recognize the role. -
roleName: a role name defined in the web application.Use kebab-case (all lowercase with dashes as separators of words), no diacritics.
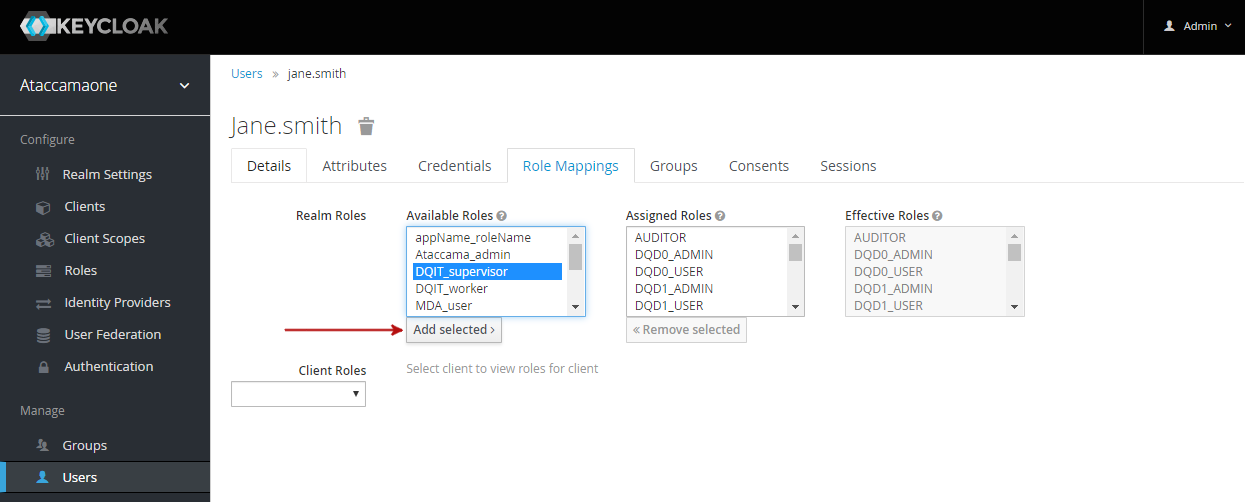
Mapping roles to users
To map roles to users in Keycloak:
-
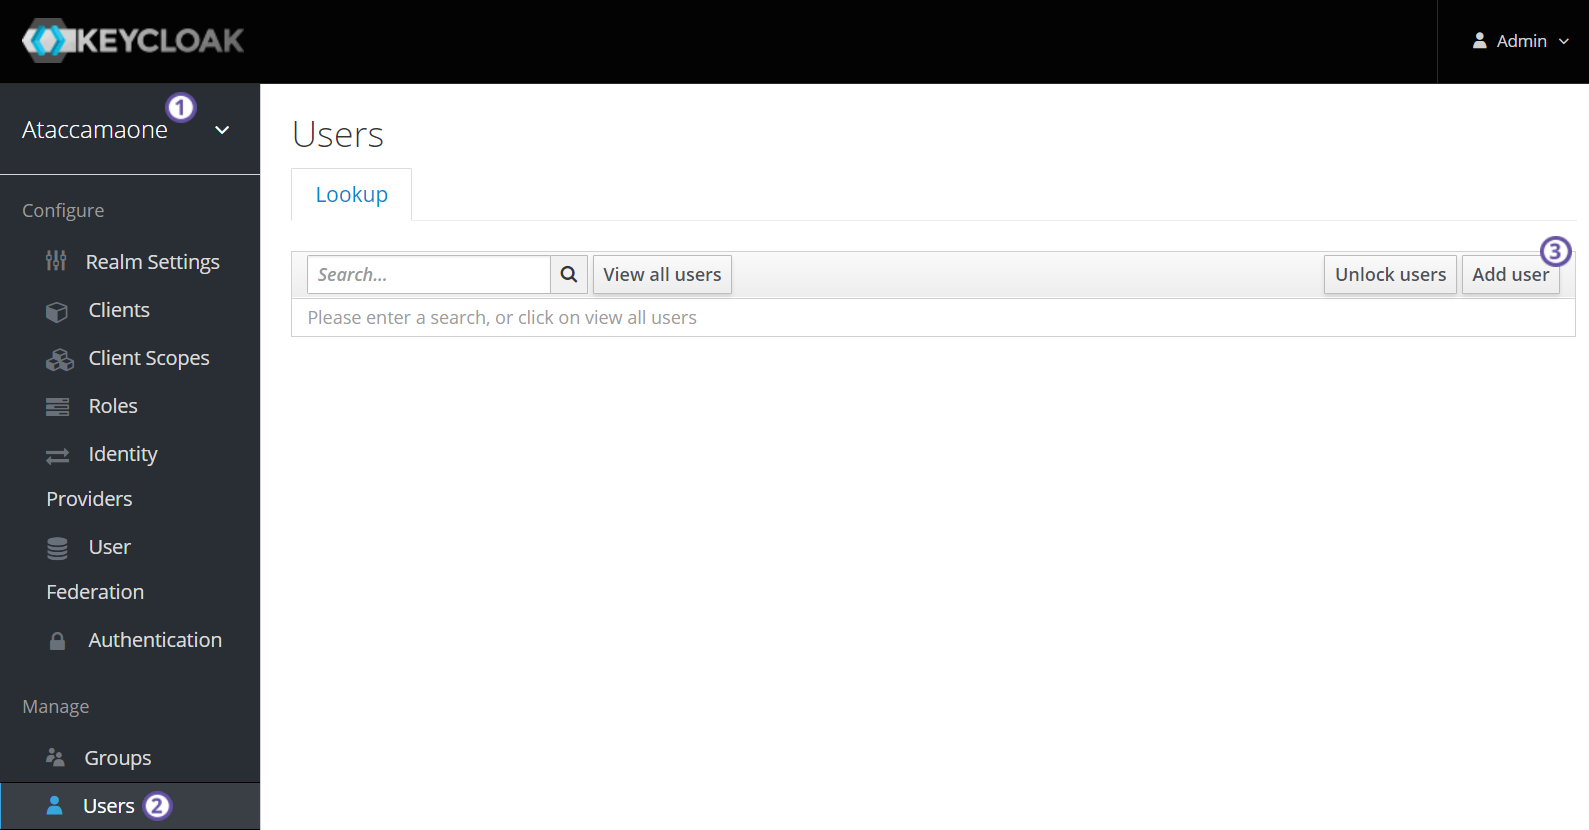
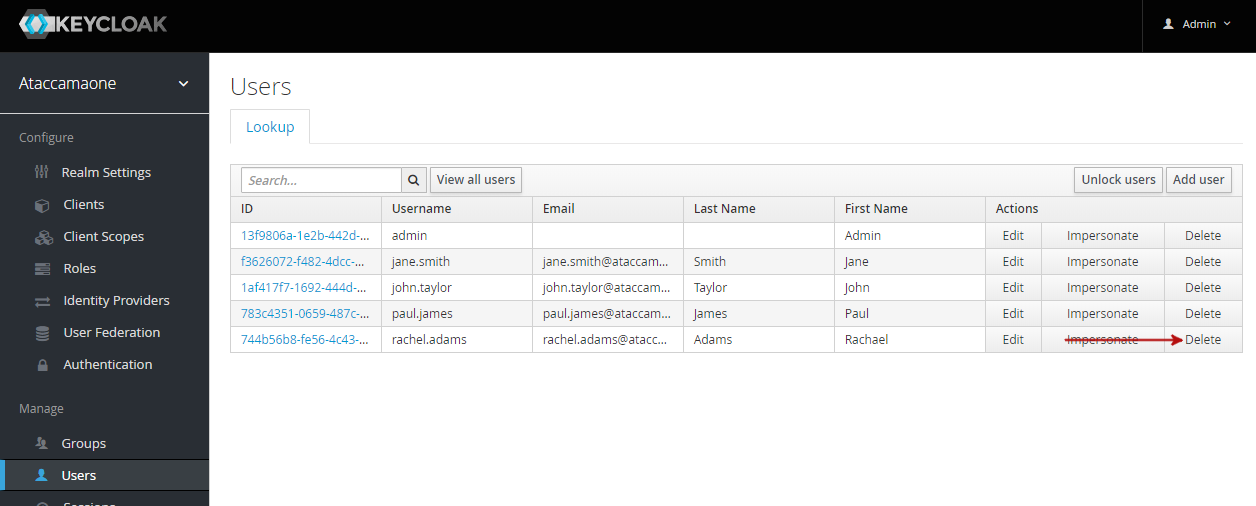
Navigate to the Users screen
-
From the list of users, click user ID to open its configuration page.
-
In the Role Mappings tab, select from Available Roles and click Add selected.
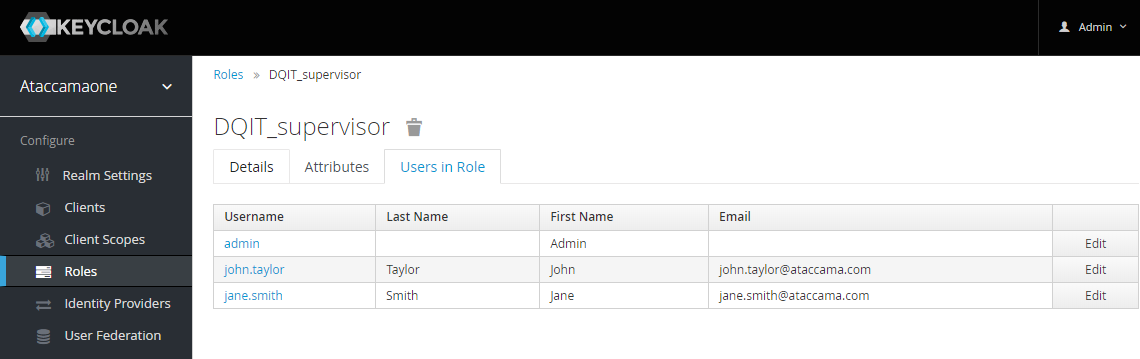
You can view all users with a role in the role configuration page, in the Users in Role tab. image::manage-user-roles-keycloak-users-in-role.png[Users in role,600]
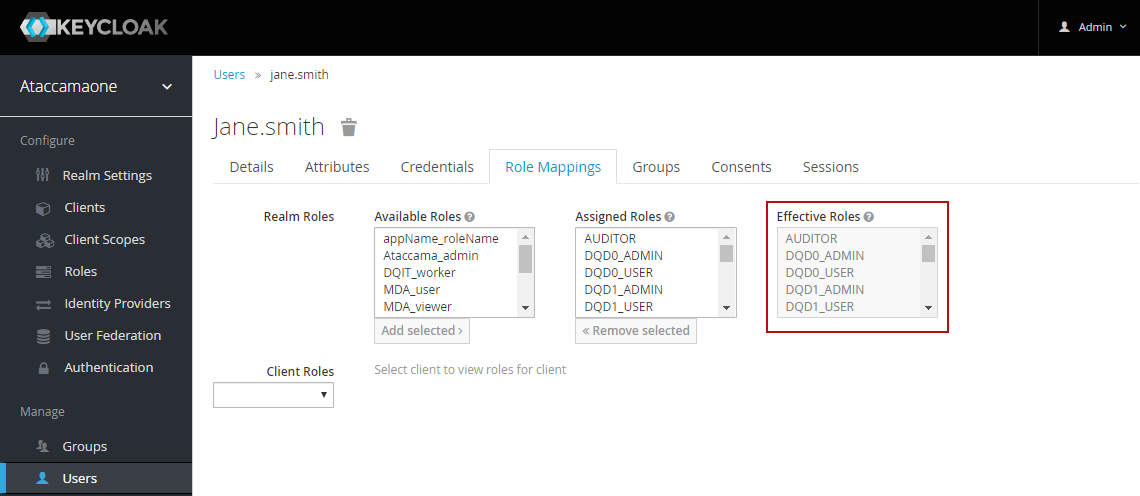
You can view all roles assigned to a user in the user configuration page, in the Role Mappings tab.

| Make sure that after each role change (manual or gained from group roles) all sessions of that particular user are logged out by Keycloak Administrator (Log out all sessions) using the Sessions tab in the Keycloak Administration Console. |
Managing roles in ONE web app
| We do not recommend managing roles in ONE Application. It is best, when all users and roles are managed in your ID management system. |
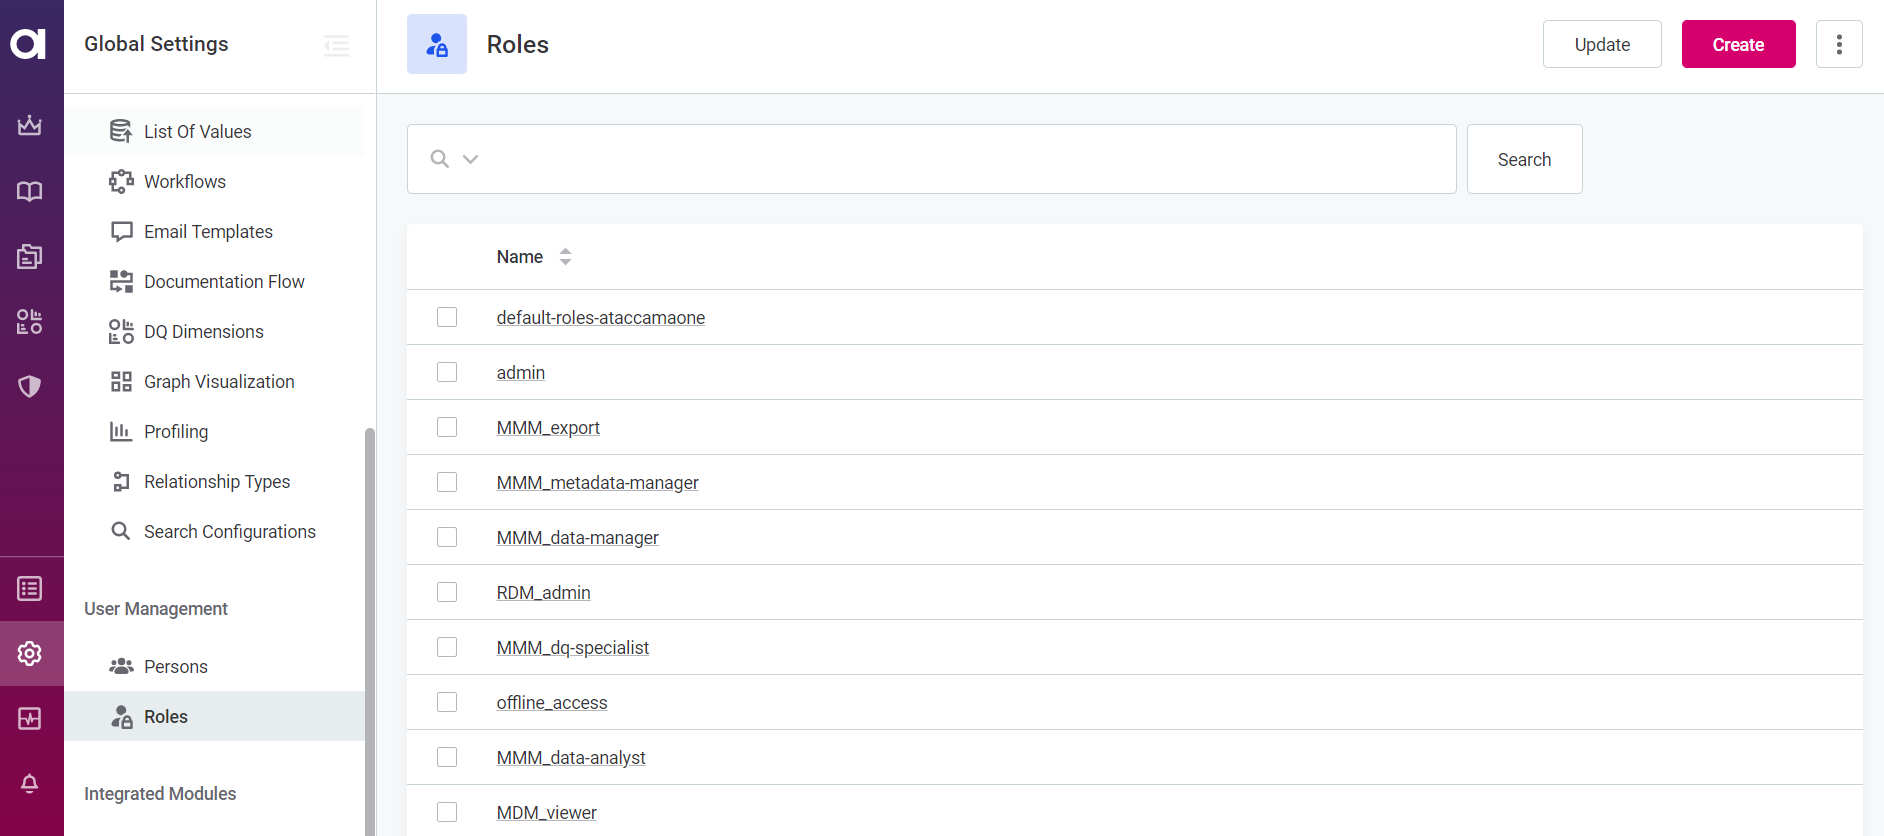
Creating roles in ONE web app
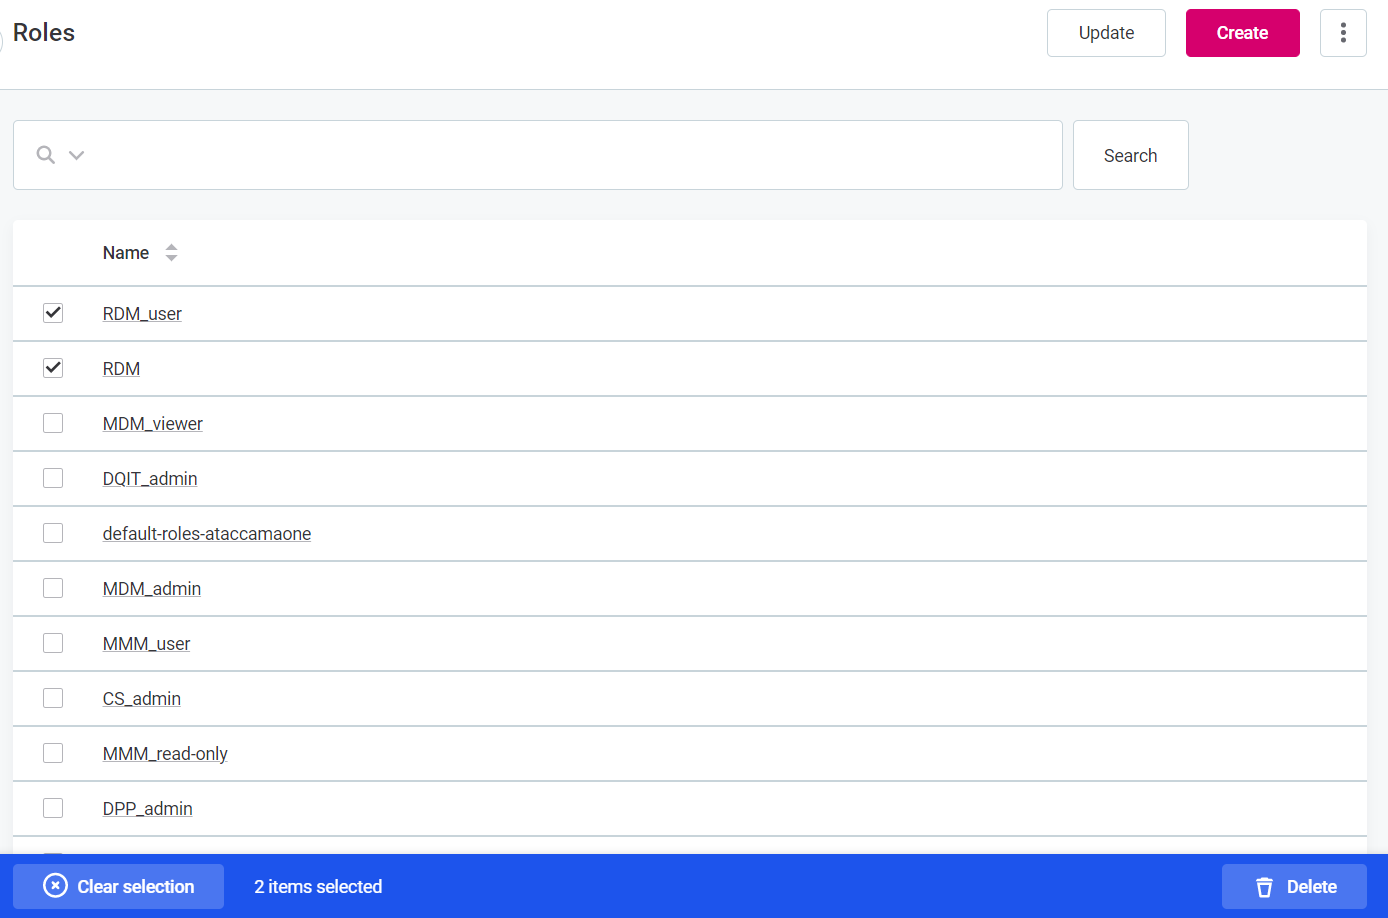
To create a new role, select Create in the upper right corner of the page and specify the following parameters:
-
Name: provide a unique name for the role.
-
Description (optional): provide a description of the role.
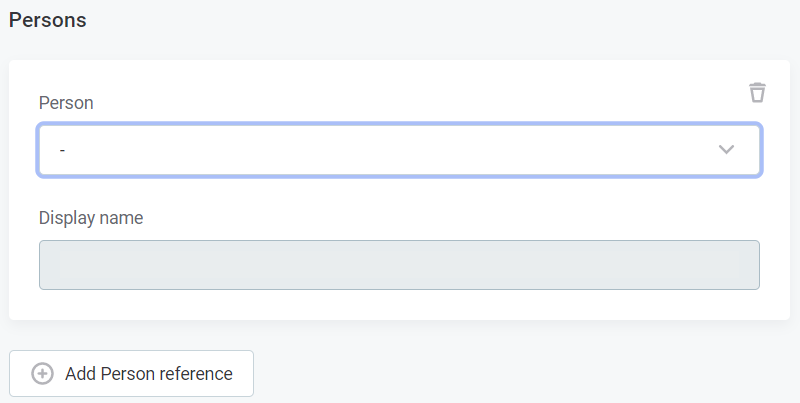
To assign users to the role, click + Add Person reference and select the user from the persons list. Display name is not editable.
Click Save to save the changes. After the role is added it needs to be published.
Editing roles in ONE web app
To edit the name or description of an existing role, open that role and click Edit in the upper right corner. Select Save to apply the changes.
To manage users that are assigned to the role, open that role and manage the list of persons:
-
Select Add Person and select person from the list to add a new user.
-
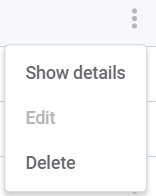
Use the three dots menu to either Show details of a user, or Delete.
After you are done editing, publish the changes.
Manage users
| As changes made in ONE are not propagated back to your ID management system, we strongly recommend managing all users and roles in Keycloak or your ID management system instead. |
Manage users in Keycloak
To manage users and roles, you need to log in to Keycloak Admin Console as the Ataccamaone realm admin.
For more information, see Keycloak realm prerequisites.
|
User-Role mappings are also defined in keycloak.json and can be edited directly in the configuration file.
Typically, users and roles in Keycloak are communicated from other authentication services, such as Active Directory and LDAP. For more information on synchronization with Keycloak, see the official Keycloak documentation.
Create users
To create users in Keycloak:
-
Make sure the
Ataccamaonerealm is selected at the top of the left navigation bar. -
Navigate to the Users screen.
-
Select Add User.
-
Fill in the user details.
-
Select Save.
Edit users
To edit users in Keycloak:
-
Navigate to the Users screen.
-
From the list of users, click user ID to open the configuration page. Using the tabs available, you can view and edit user details, attributes, and credentials, and view its groups and role mappings.

Removing users
| After a user is deleted from Keycloak, they can no longer log in to ONE with their credentials. However, to retain history of activity and drafts related to the deleted user, the user is not automatically removed from ONE. If you want to delete the user profile from ONE as well, see Removing users from ONE web app. |
To remove users in Keycloak: . Navigate to the Users screen. . Click Delete, and confirm the action.
Mapping roles to users
To map roles to users in Keycloak:
-
Navigate to the Users screen
-
From the list of users, click the user ID to open its configuration page.
-
In the Role Mappings tab, select from Available Roles and then Add selected.

To verify this user has been added, in the left-hand navigation menu select Roles, and then after selecting the required role, select Users in Role.
Or, in Users, see the user’s Role Mappings tab.
| Make sure that after each role change (manual or gained from group roles) all sessions of that particular user are logged out by the Keycloak Administrator (Log out all sessions) using the Sessions tab from Keycloak Administration Console. |
Managing users in ONE web app
| We do not recommend managing users in ONE web app. It is best, when all users and roles are managed in your ID management system. |

Creating Users in ONE web app
To create a new user, in Global Settings > Persons, select Create in the upper right corner of the page and specify the following parameters:
-
User id, which is the id of the user in Keycloak.
-
Username, which is the username from the user credentials.
-
First name
-
Last name
-
Email
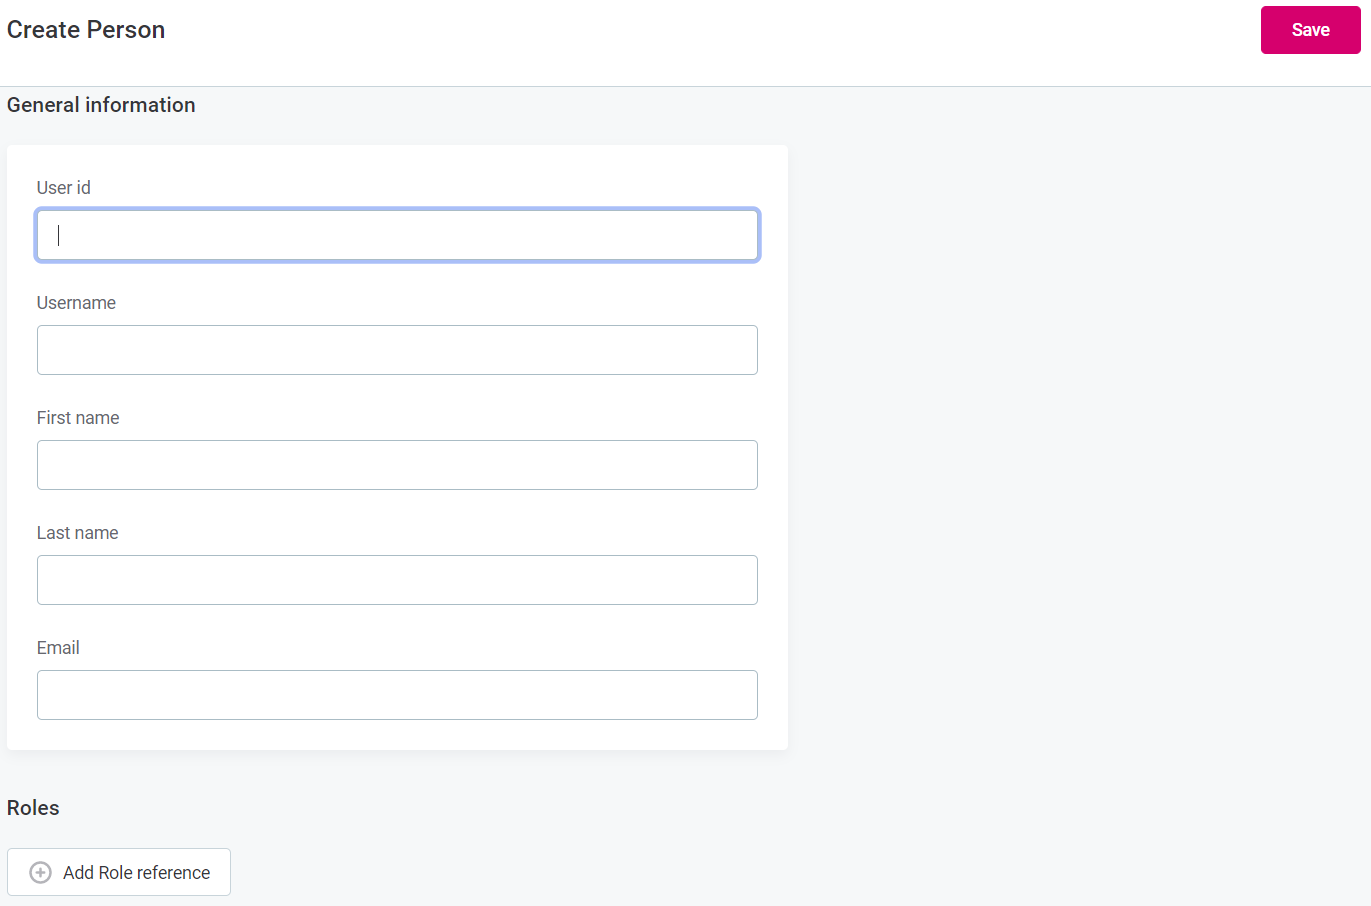
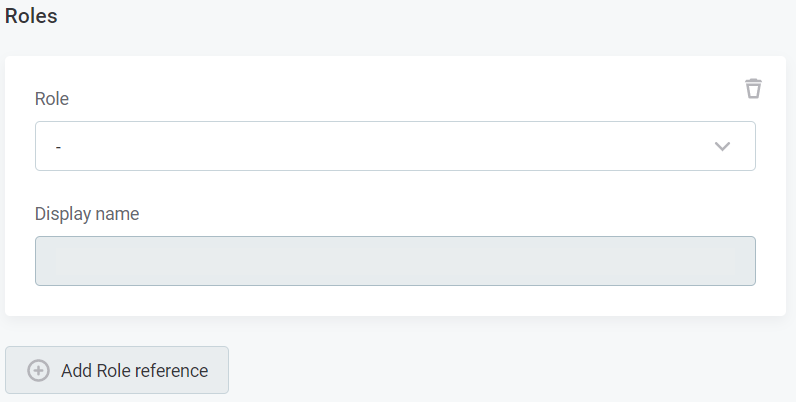
To assign a user to a role, select + Add Role reference and select the role from the list. The display name of the person is not editable.
Select Save to save the changes. After the role is added it needs to be published.
Editing users in ONE web app
To edit an existing user’s description or name, Edit in the upper right corner. Once you are finished editing, select Save to apply the changes.
To manage roles that are assigned to the user, view the user details, and in Roles:
-
Select Add Role to add a new role to the user.
-
Remove roles assigned to the user by using the three dots menu and selecting Delete.
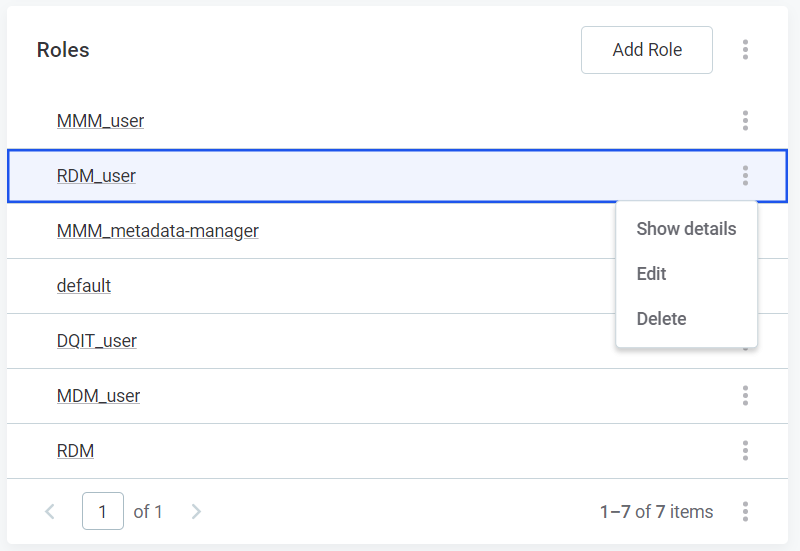
After you are finished editing, publish the changes.
Was this page useful?