
Import Monitoring Project Configuration
Test new rules on a catalog item in a monitoring project without risking unnecessary changes in a production project. Using monitoring project import, you can import only selected catalog items and also replace selected catalog items with alternatives.
Furthermore, on the attribute level, you can remap attributes (provided the new mapping fulfills data type constraints) or ignore selected attributes in the import.
Alternatively, copy entire monitoring project configurations. This is useful when, for example, you want to import configuration from testing to production project (to see this in action, see Monitoring project lifecycles).
Configuration import includes:
-
All rules and checks (structure checks, anomaly detection, DQ rules)
-
Invalid samples
-
Reports structure
-
DQ filters
Import a monitoring project
To import a monitoring project:
-
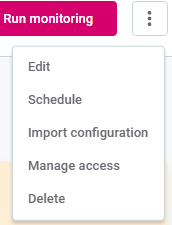
Select the project you want to import the configuration into. Using the three dots menu, select Import configuration.
-
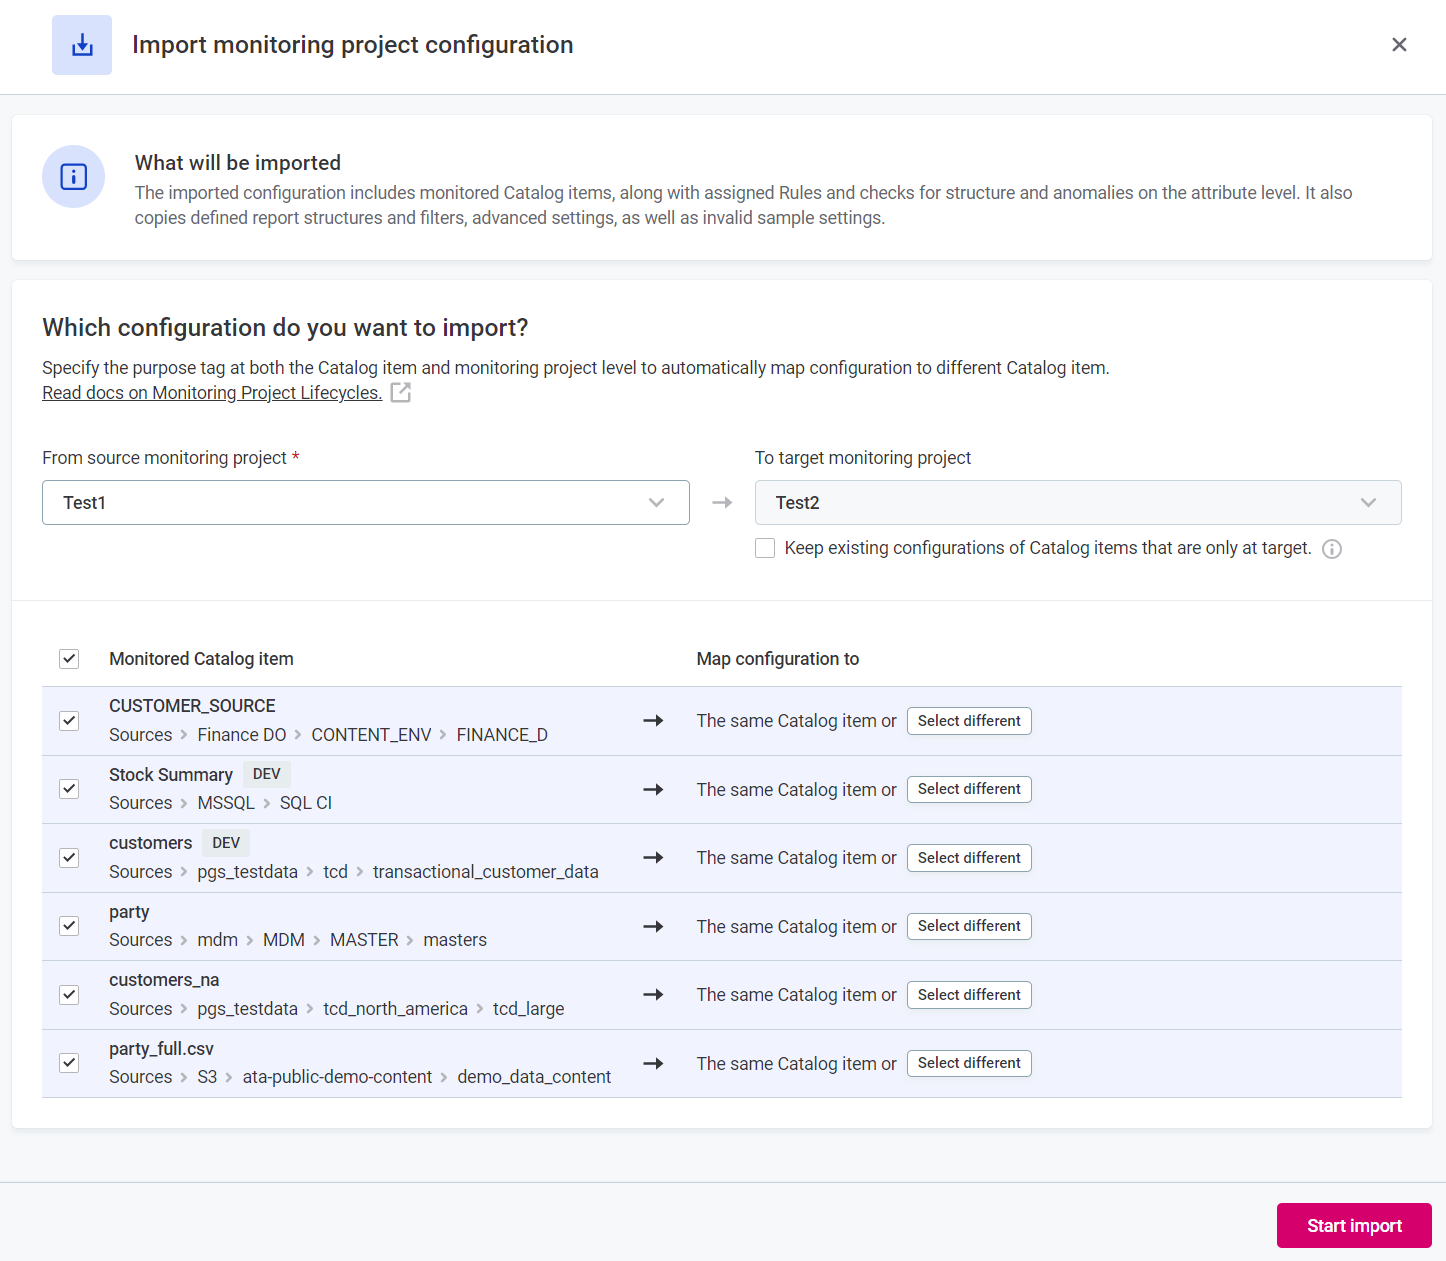
On the Import monitoring project configuration screen, from the list provided, select the monitoring project from which the configuration should be used.
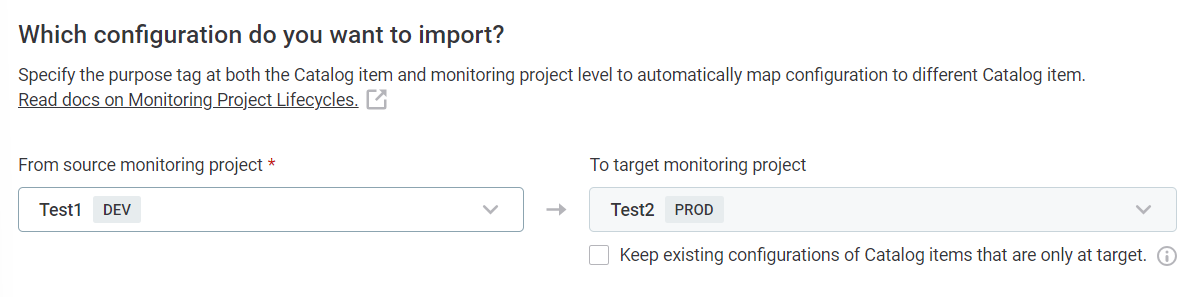
By default, items in the target project are overwritten during import. If a catalog item exists at target but not at the source, it is deleted.
Select Keep existing configurations of Catalog items that are only at target if you don’t want these items to be deleted.
-
-
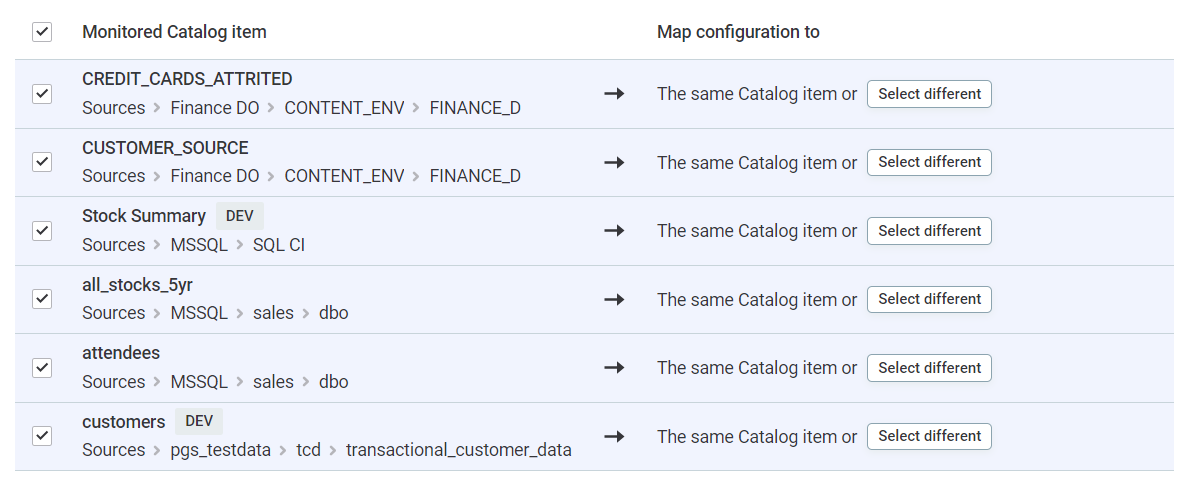
Map catalog items in the source and target monitoring projects. Without further action, items in the source project overwrite those in the target project.
If required, adjust the mappings of the catalog items in the next step.
-
Edit the mappings as necessary. You can:
-
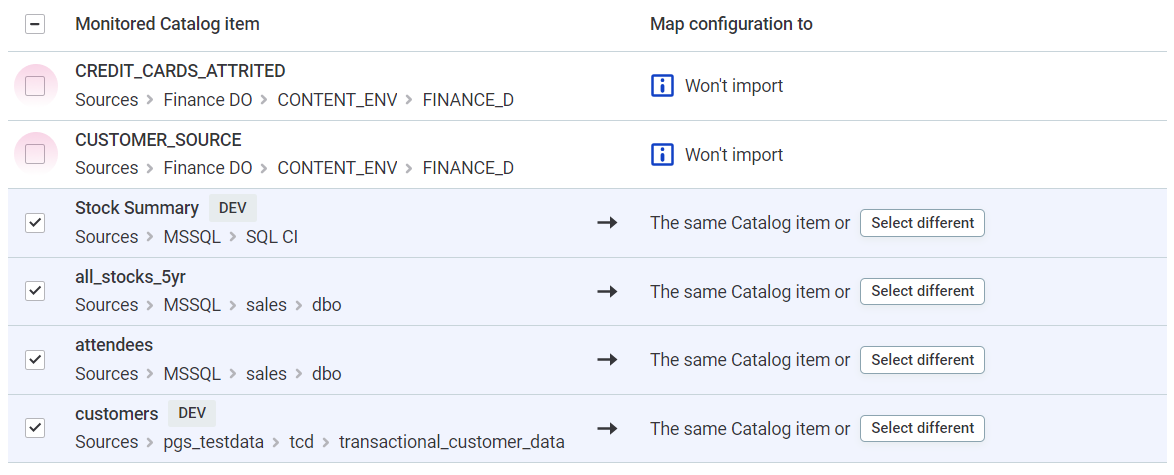
Manually map alternative catalog items. To do this, select Select different and choose from the list provided.
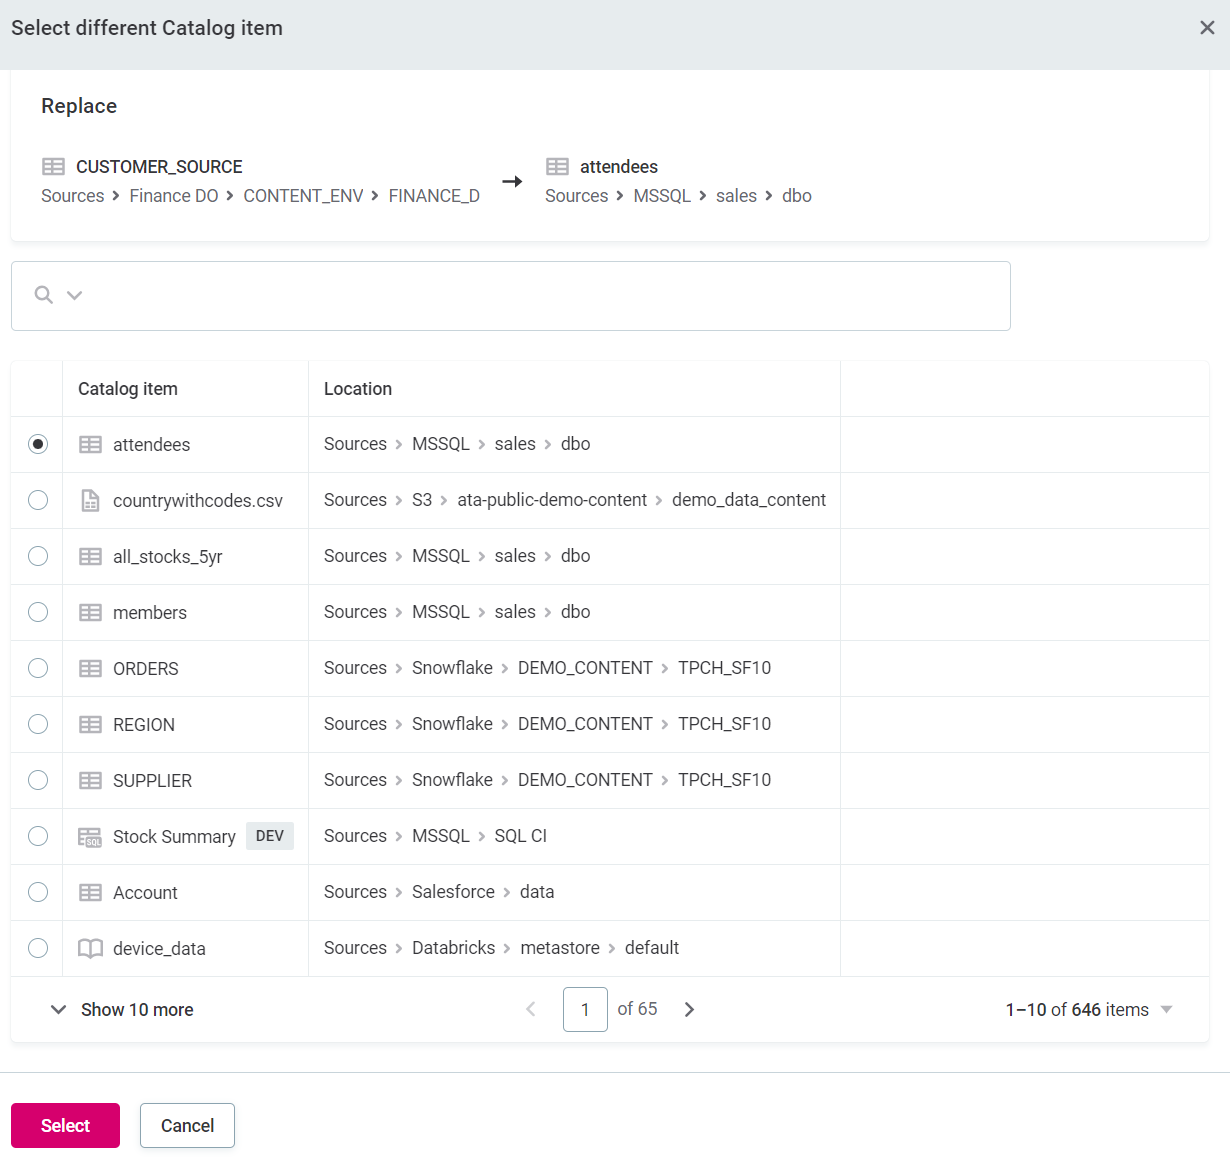
You are notified if the structure of the selected catalog item does not match that of the source catalog item. If this happens, you can either:
-
Exclude the catalog item (see b).
-
Manually map alternative attributes (see c).
-
-
Exclude individual catalog items. To do this, clear the selected items as needed.
-
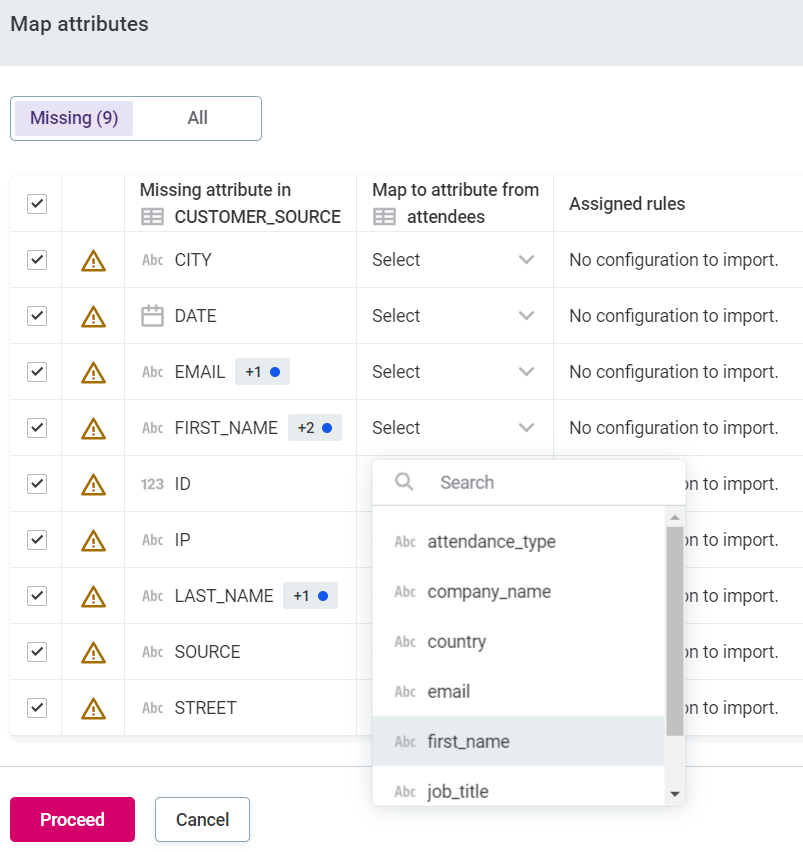
Manually map alternative attributes. To do this, select Map attributes and use the dropdown to select available attributes.
Alternatively, exclude selected attributes (see d).

-
Exclude individual attributes. To do this, clear the selected attributes as needed.
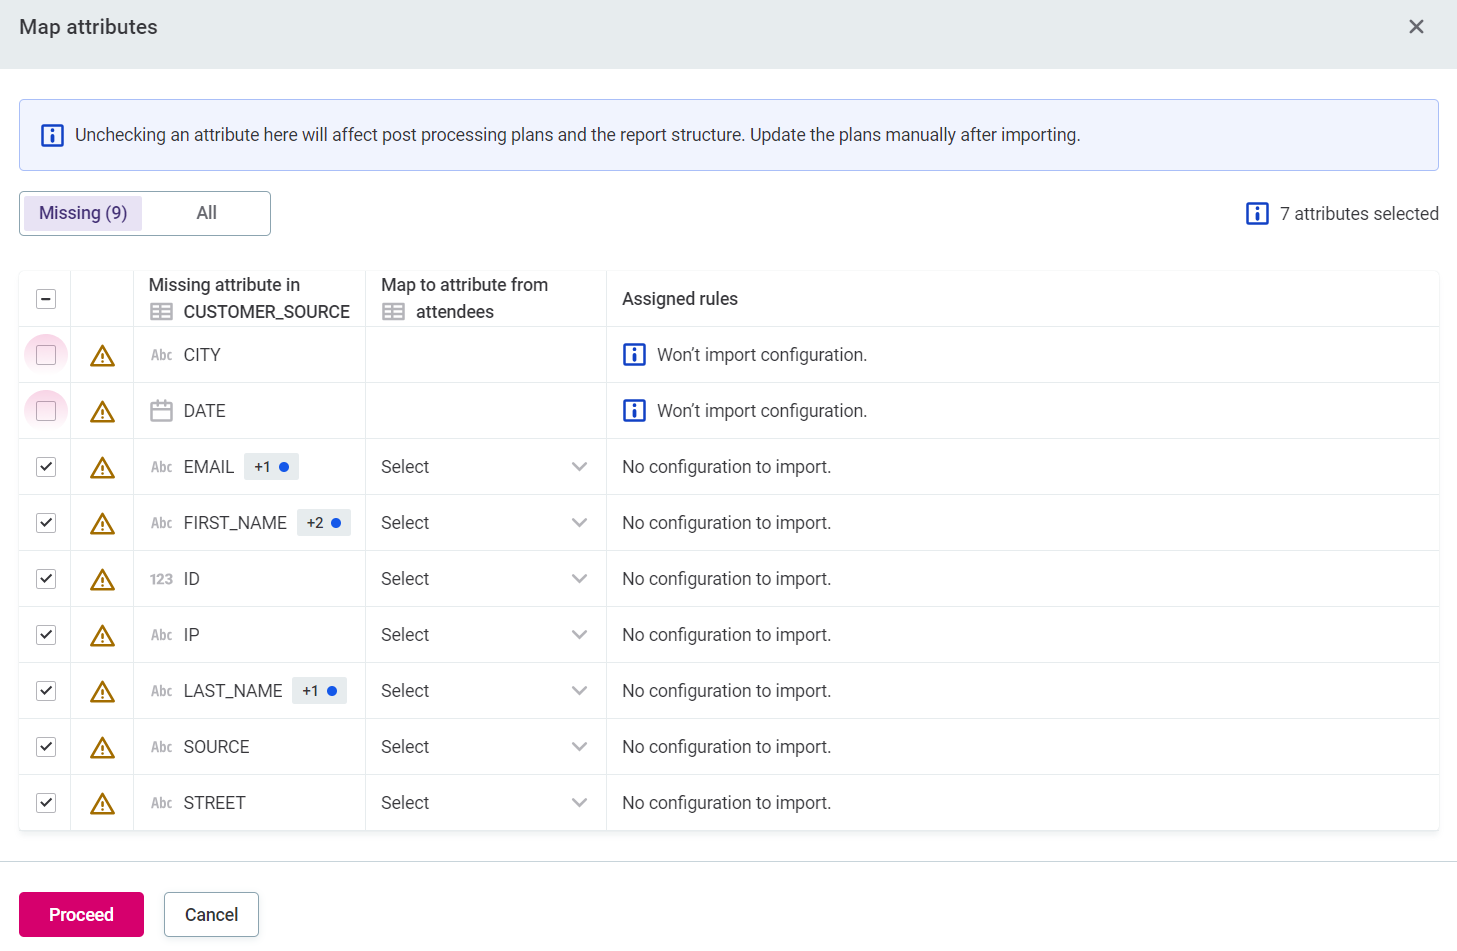
If the removed attribute is used as an input attribute in multi-input rules, the associated rule is removed from the project. Removing attributes here affects post-processing plans and the report structure. Update the plans manually after importing.
-
-
Select Start import at the bottom of the screen. The configuration and the report settings are imported to the target monitoring project:
Monitoring project lifecycles
You can use a combination of Purpose tags and the import monitoring project configuration feature to simulate a multi-environment process (Configure > Test > Send for approval > Make public, and repeat) within one physical environment.
How it works
The workflow is as follows:
-
Create a project using tables from a non-production data source, apply rules, and test.
-
Create a second project and use the Import configuration functionality to import the configuration from the first project.
-
Map tables to their production instances:
-
If catalog items are not yet assigned a purpose tag, and this is the first import of the configuration, map items manually.
-
If the configuration has been previously imported, mapping is automatic (this can be overridden).
-
If catalog items have been assigned a purpose corresponding to that of the project, these items are selected automatically.
-
This approach allows you to test rules and monitoring project configuration on non-production data without affecting the production dashboard. It also eliminates the need to configure the same project multiple times, which is valuable for organizations with large numbers of catalog items and rules.
|
When importing a monitoring project configuration that has post-processing plans attached, the same component is attached to the newly imported project. This means that the source and target projects will share the same post-processing plan component, and any changes made to it will affect both projects. If you need independent post-processing plans for the source and target projects (for example, when importing from DEV to PROD environments), delete and recreate the post-processing plan components after importing the configuration. This ensures each project has its own dedicated post-processing plan that can be modified independently. |
Physical environment considerations
Two physical environments can be created, but the non-production environment should only be used for:
-
Testing new sources.
-
Testing new integration plans (for example, workflows that read or write to APIs).
-
Testing model changes.
-
Testing service re-configurations (for example, changing settings in configuration files to check platform stability).
These instances are not intended for developing data quality monitoring projects and then migrating between them (that is, developing monitoring on DEV and then physically migrating to PROD). Physical migration would require either manually propagating changes to the PROD environment, or creating migration scripts using built-in APIs or custom APIs (usually implemented by plans and API steps).
Instead, we recommend using one production environment for all metadata, and one non-production environment for model changes, API work, and testing. This differs from other products, for example, ONE RDM and ONE MDM, for which one production and two non-production environments are recommended.
Tutorial
This tutorial demonstrates how to create DEV and PROD instances of the same project using purpose labels.
Step 1: Create purpose labels
-
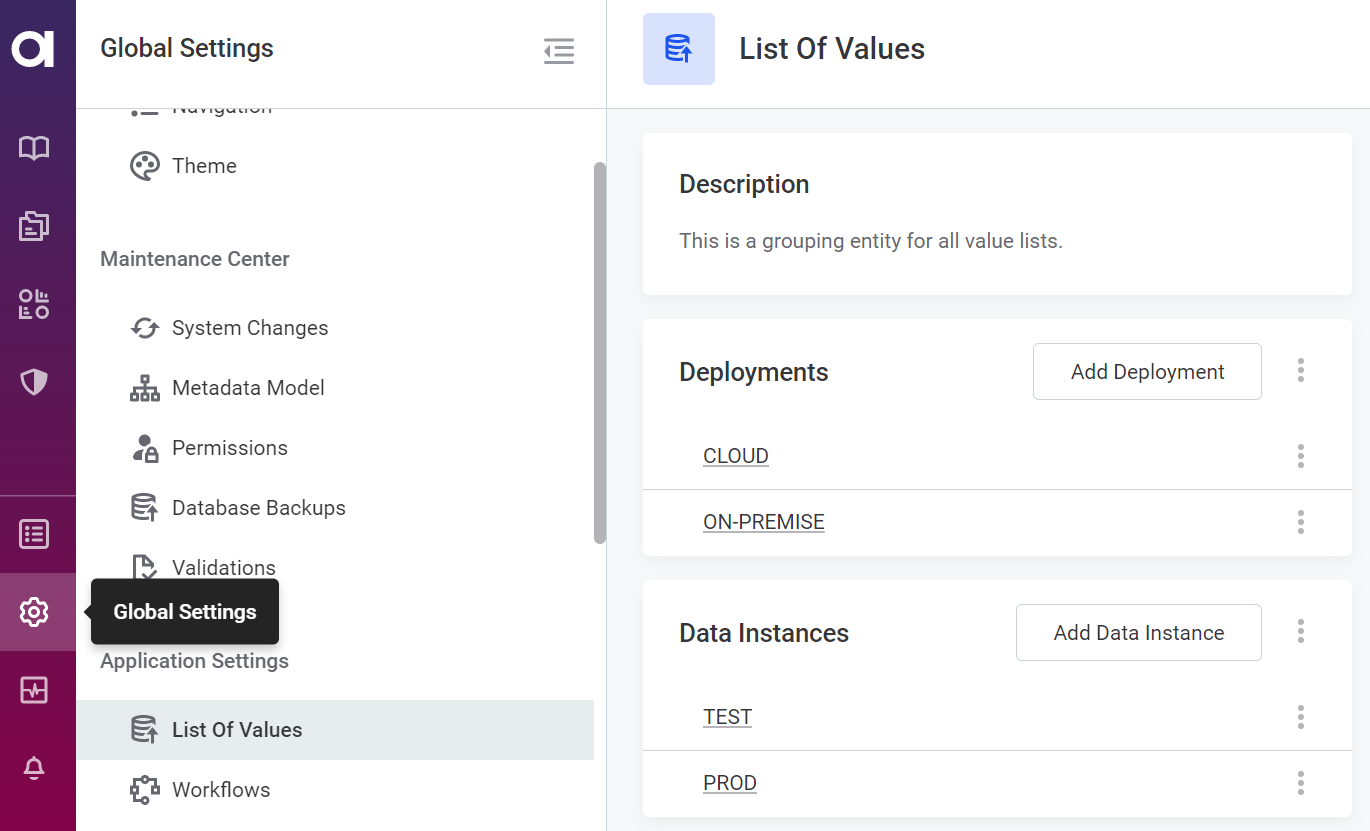
In Global Settings > List of Values, select Add Data instance.
-
Provide a name (DEV or PROD).
-
Select Save.
-
Repeat for the second purpose label.
Step 2: Configure the DEV project
-
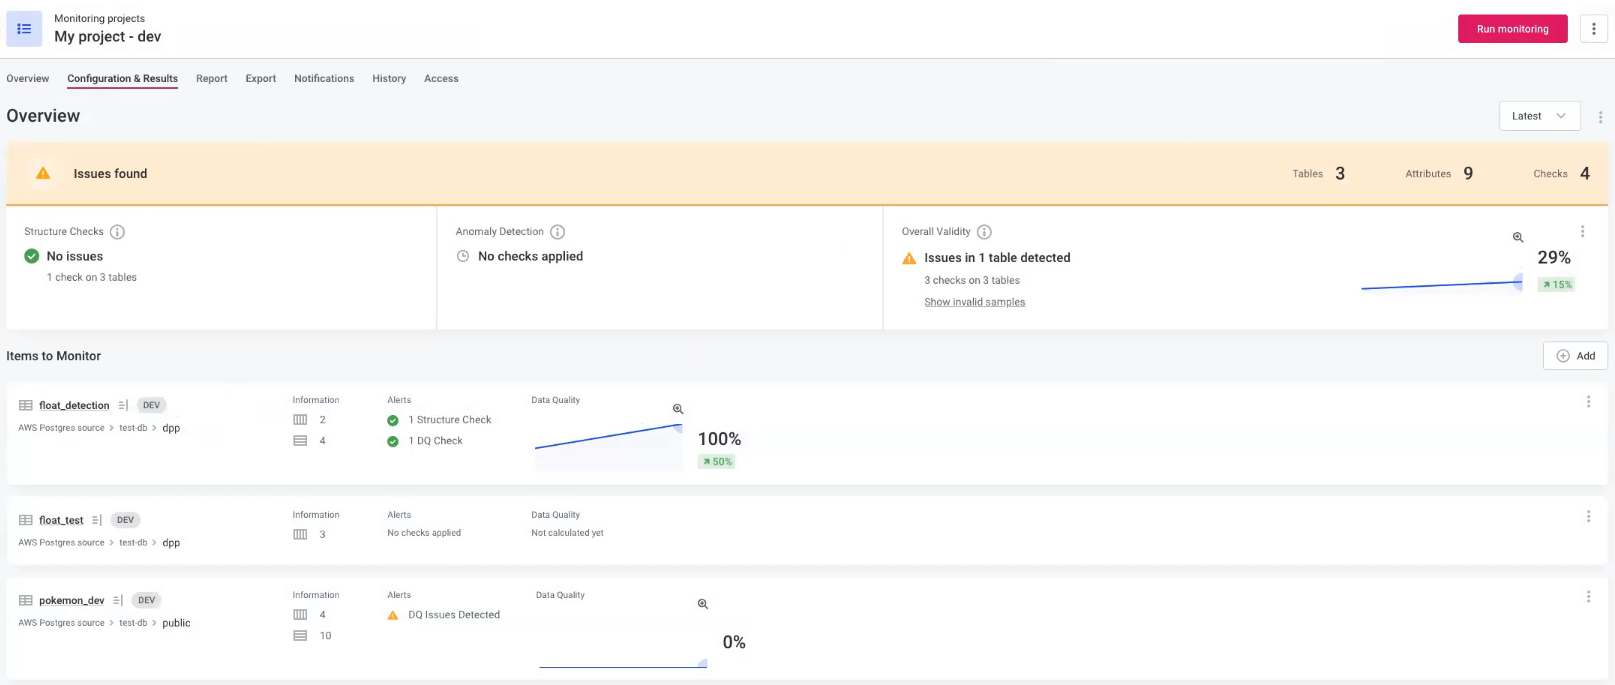
Select an existing project to be used as the DEV instance, or configure one, for example, My project - dev.
-
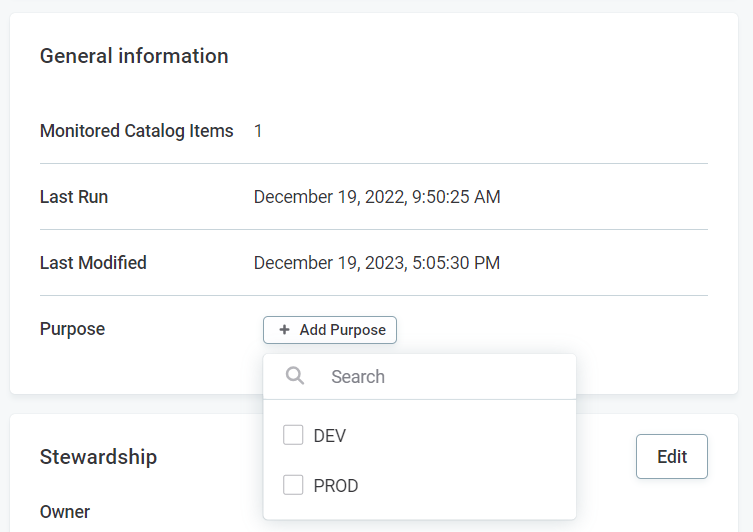
In General information, add a purpose for the monitoring project: DEV.
Was this page useful?