Secret Management Services
Create integrations between ONE and secret management services to provide access to your central storage locations and retrieve secrets from them when connecting to a data source, allowing for more secure storage and management of application secrets and keys.
| This page includes references to Azure AD, which you might also know as Microsoft Entra ID. |
Secret management service integrations can be created by users with editing or full access rights to the Vault entity.
For more information, see Governance Roles.
|
Create new Azure secret management integration
-
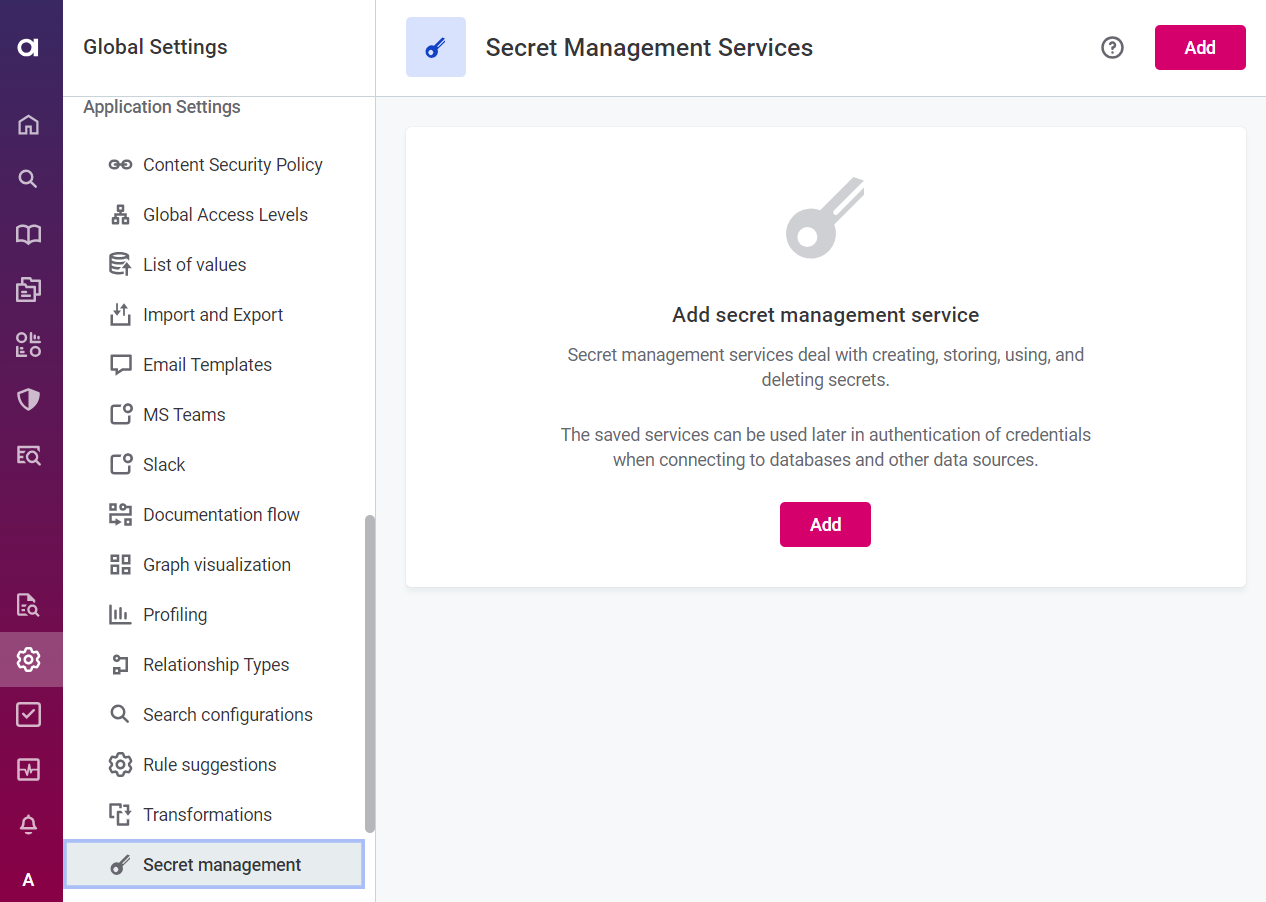
Select Global Settings and then under Application Settings, select Secret management.
-
Select Add.
-
Provide the following information:
-
General
-
Provider: The key vault or secret manager you are connecting to. Select Azure Key Vault.
-
Name: A unique name for this service.
-
URL: The complete URL of the Azure Key Vault.
-
Description (Optional): A description for this service.
-
-
Authentication
-
Method: Select from the options provided.
-
Azure AD Client Credential
-
Tenant ID: The unique identifier of the Azure AD instance within your Azure subscription (string). Also known as 'directory' ID. This takes the following form (GUID):
ab12c456-789d-01ef-gg22-3h44i5jkl67m. -
Client ID: The unique identifier of the application created in Azure AD (string). Also known as Application ID. This takes the following form (GUID):
cd12e456-789f-01gh-ii22-3j44k5lmn67o. -
Client secret: The client secret for Azure Key Vault (string).
-
-
Azure AD Managed Identity:
-
Client ID (Optional): The authentication key string associated with the selected managed identity.
If you want to use Azure AD Managed Identity, the Data Processing Engine (DPE) must be installed in your Azure cloud subscription on a virtual machine (VM) instance, and a Managed Role must be assigned in the Microsoft Azure Portal. To fulfill this requirement, if you are using Cloud Portal, the DPE must be installed in hybrid mode. See hybrid-deployment:self-managed-dpe-deployment-in-ataccama-cloud.adoc.
If you have multiple DPEs running, you might need to specify additional constraints. See Constraints Configuration.
-
-
-
-
-
Select Test to test the connection.
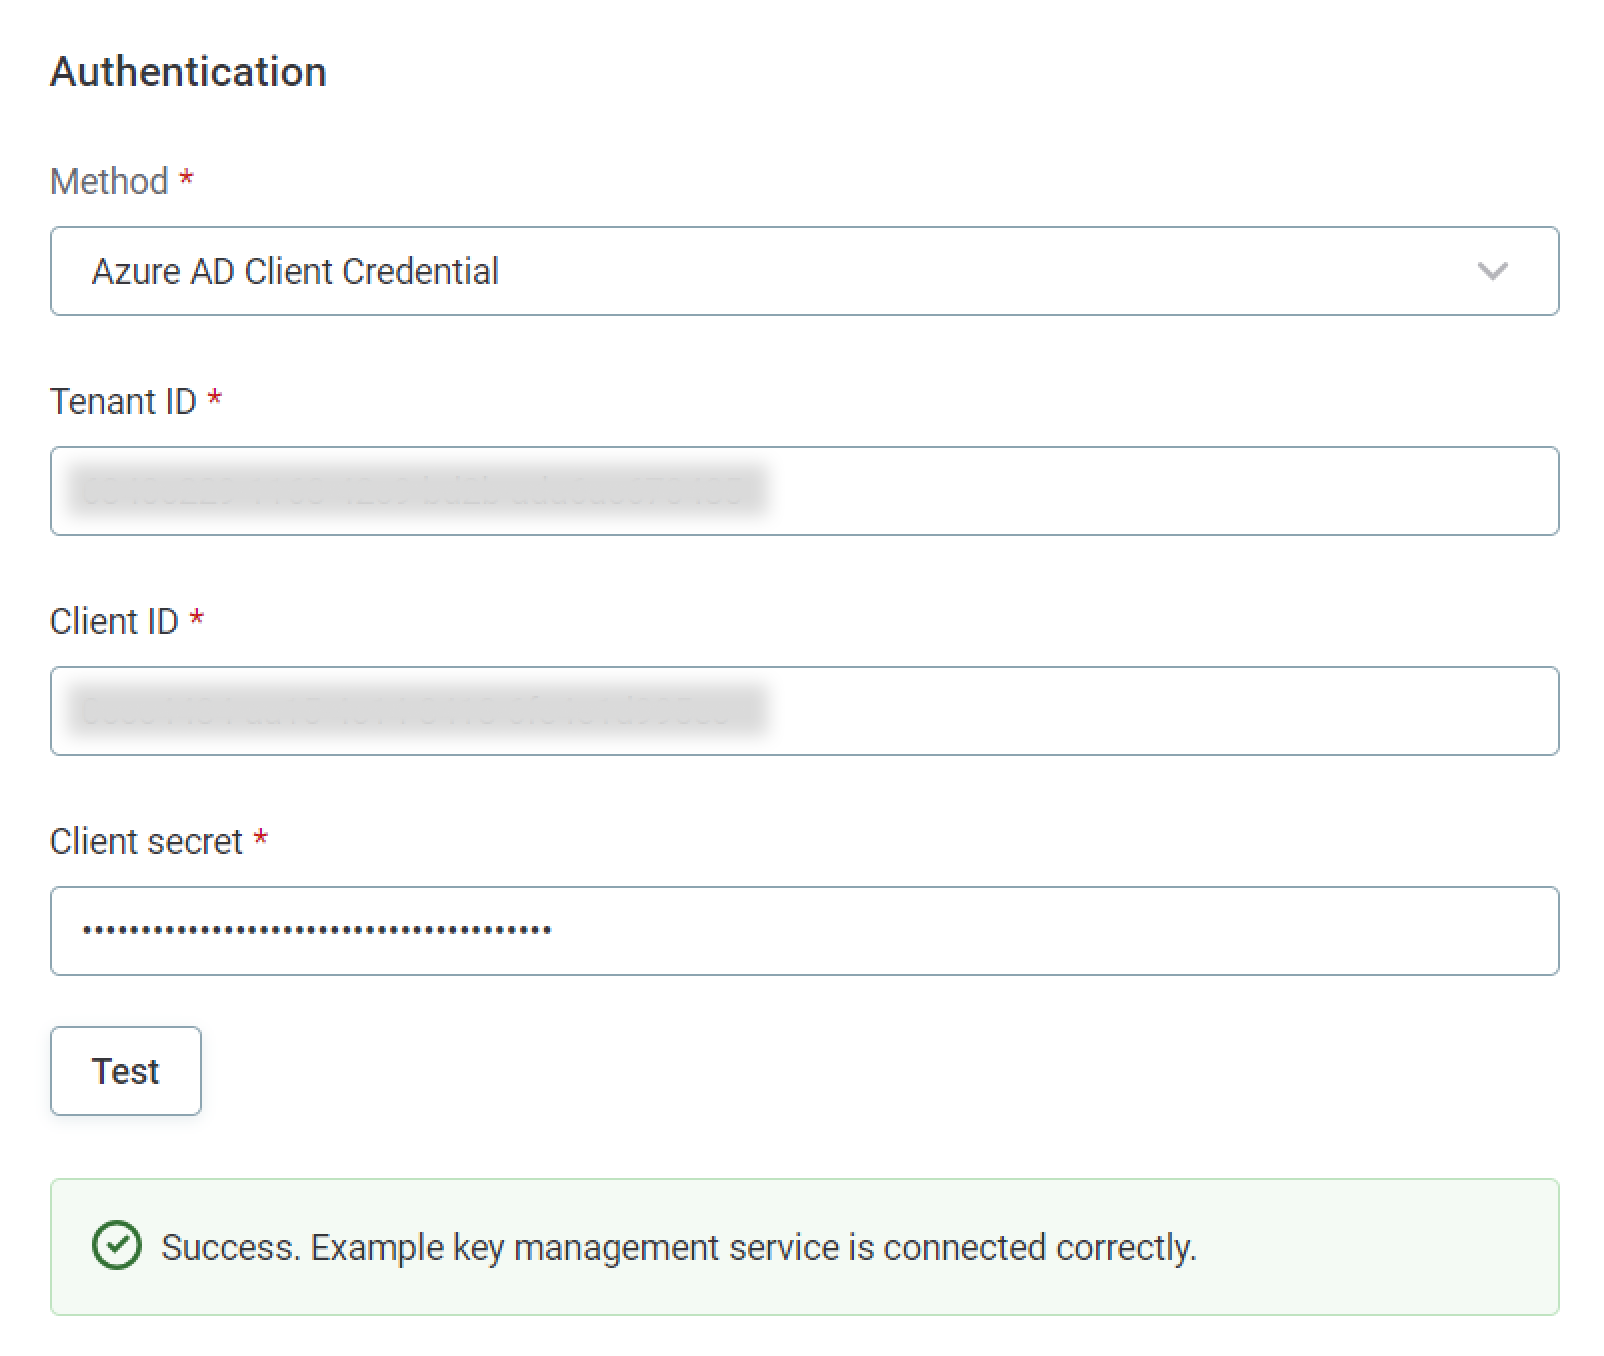
If the connection is successful, select Save. Otherwise, verify that your configuration is correct.
Create new HashiCorp secret management integration
-
Select Global Settings and then under Application Settings, select Secret management.

-
Select Add.
-
Provide the following information:
-
General
-
Provider: The key vault or secret manager you are connecting to. Select HashiCorp Vault.
-
Name: A unique name for this service.
-
Json enabled (Recommended): Select this option to allow ONE to work with values nested in JSON objects in HashiCorp.
-
URL: The complete URL of the HashiCorp Vault.
-
Namespace: The name of your namespace in HashiCorp. This can be seen in the HashiCorp URL after you select your vault from the list of vaults in Secrets Engine.
-
-
Authentication
-
Method: Select from the options provided.
-
Google Service Account Key credential
-
Role: The name of the role configured in the HashiCorp Vault. If you do not know this, obtain it using the API according to the official HashiCorp documentation.
-
Service key: Upload your service key. This is a JSON file obtained via Service Accounts in the Google Cloud Console.
-
-
Google Compute Engine credential
This option can only be used when Ataccama DPEs are deployed on Google servers. -
Role: The name of the role configured in the HashiCorp Vault. If you do not know this, obtain it using the API according to the official HashiCorp documentation.
-
-
-
-
-
Select Test to test the connection. If the connection is successful, select Save. Otherwise, verify that your configuration is correct.
Use credentials from secret management service in connections
When you create new connections for data sources, you can retrieve credentials from the integrated secret management services instead of adding them manually.
| For more information about creating connections to data sources, see Connect to a Source. |
Instead of providing the values themselves (for example, the password or client secret), you need to provide the name under which that value is saved (that is, the key part of a key-value pair). For example:
-
Name:
oracle-prod-pw -
Value:
0aaa12…3ab
Use the following guides to retrieve details from an integrated secret management service when adding credentials for a connection.
Example using username and password and Azure Key Vault
-
In Data Catalog > Sources > [Your source] > Add Connection, select Add Credentials.
-
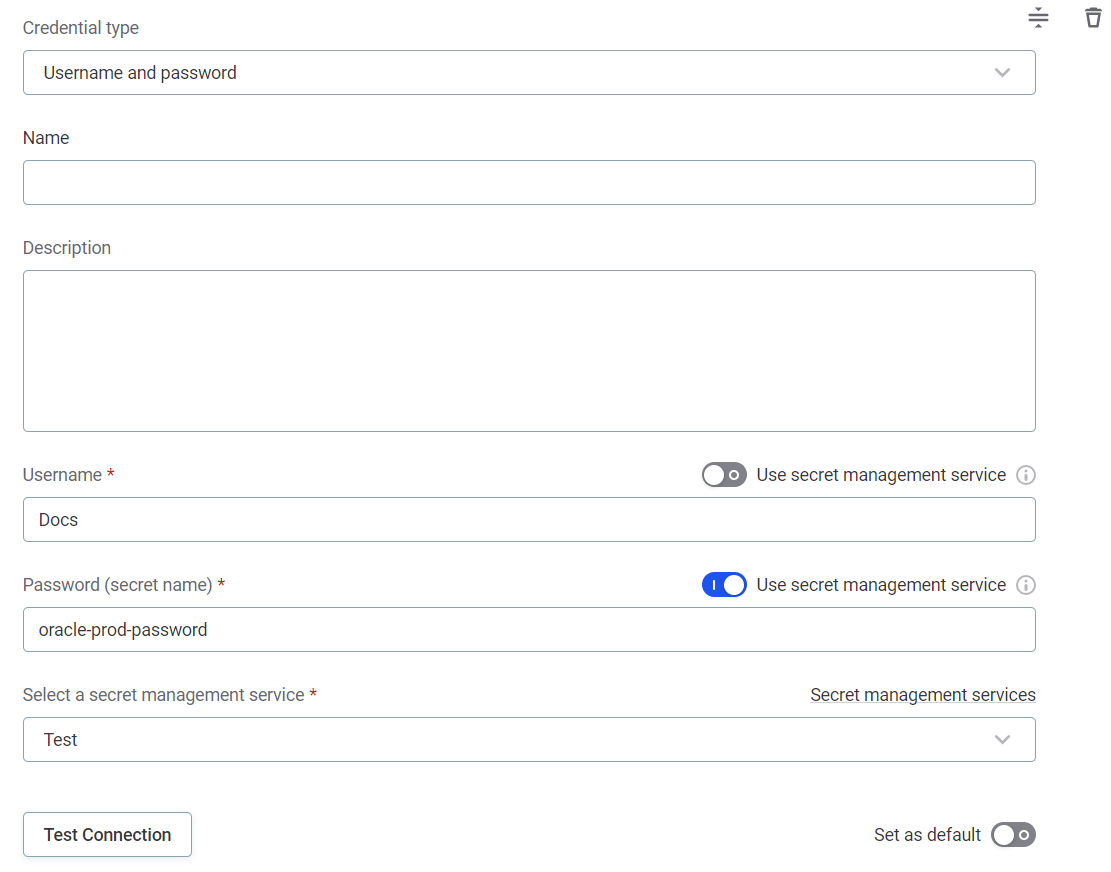
Select Credential type from the options provided:
-
Username and password
-
Name: A unique name for this set of credentials.
-
Description (Optional): A description for this service.
-
Select a secret management service: Using the dropdown options, select the secret management service in which the required secrets are contained.
-
Username
-
Select the Use secret management service option.
You can enable Use secret management service to retrieve the username, but it is not necessary as usernames can generally be shared and entered manually. -
Username (secret name): Enter the name under which the password is stored in your key vault.
-
-
Password
-
Select the Use secret management service option.
-
Password (secret name): Enter the name under which the password is stored in your key vault. For example,
oracle-prod-password.Essentially, the secret name is the name the password is stored under in your key vault or secret manager. 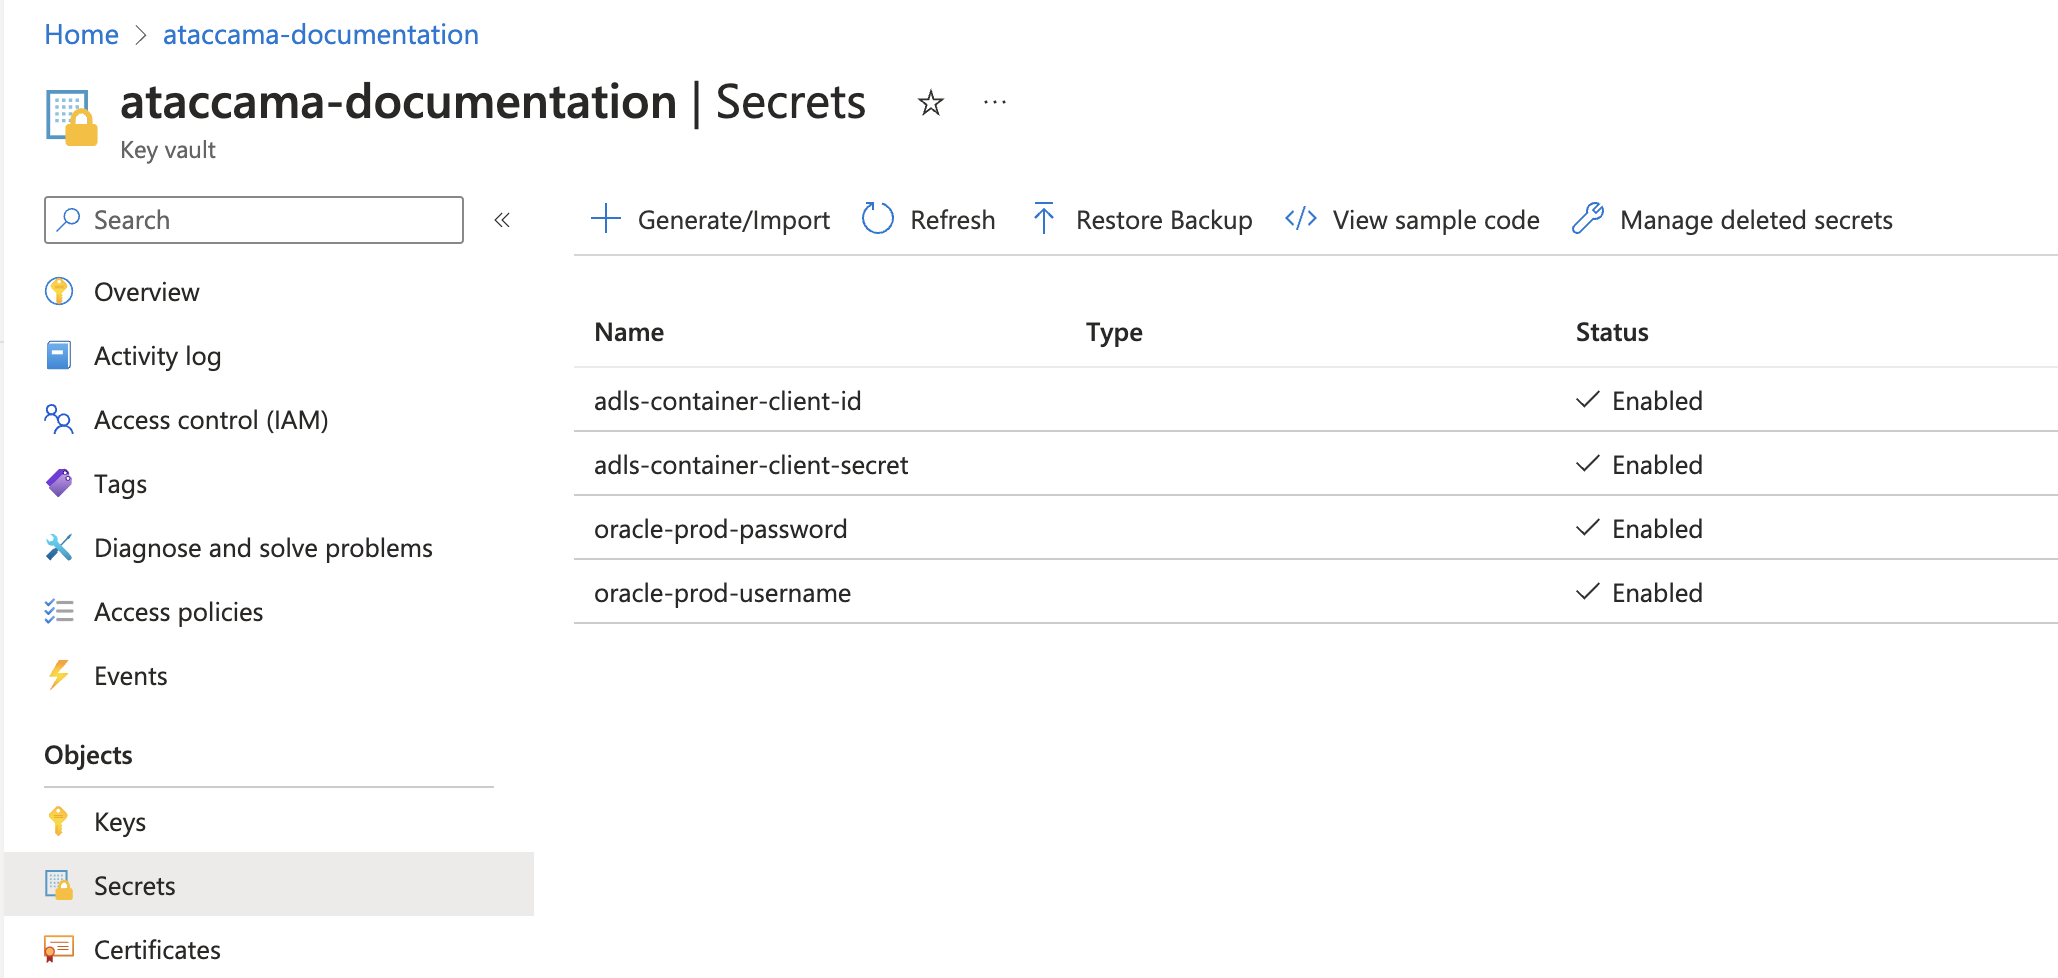
-
-
-
-
Select Test to test the connection. If the connection is successful, select Save. Otherwise, verify that your configuration is correct.
Example using username and password and HashiCorp Vault
-
In Data Catalog > Sources > [Your source] > Add Connection, select Add Credentials.
-
Select Credential type from the options provided:
-
Username and password

-
Name: A unique name for this set of credentials.
-
Description (Optional): A description for this service.
-
Select a secret management service: Using the dropdown options, select the secret management service in which the required secrets are contained.
-
Username
-
Select the Use secret management service option.
You can enable Use secret management service to retrieve the username, but it is not necessary as usernames can generally be shared and entered manually. -
Username (secret name): Enter the name under which the password is stored in your key vault.
-
Username Json path: The JSON path to the username in your Hashicorp Vault.
In the following example, Username (secret name) is example_path/secret_nameand Username Json path is$.snowflake-username.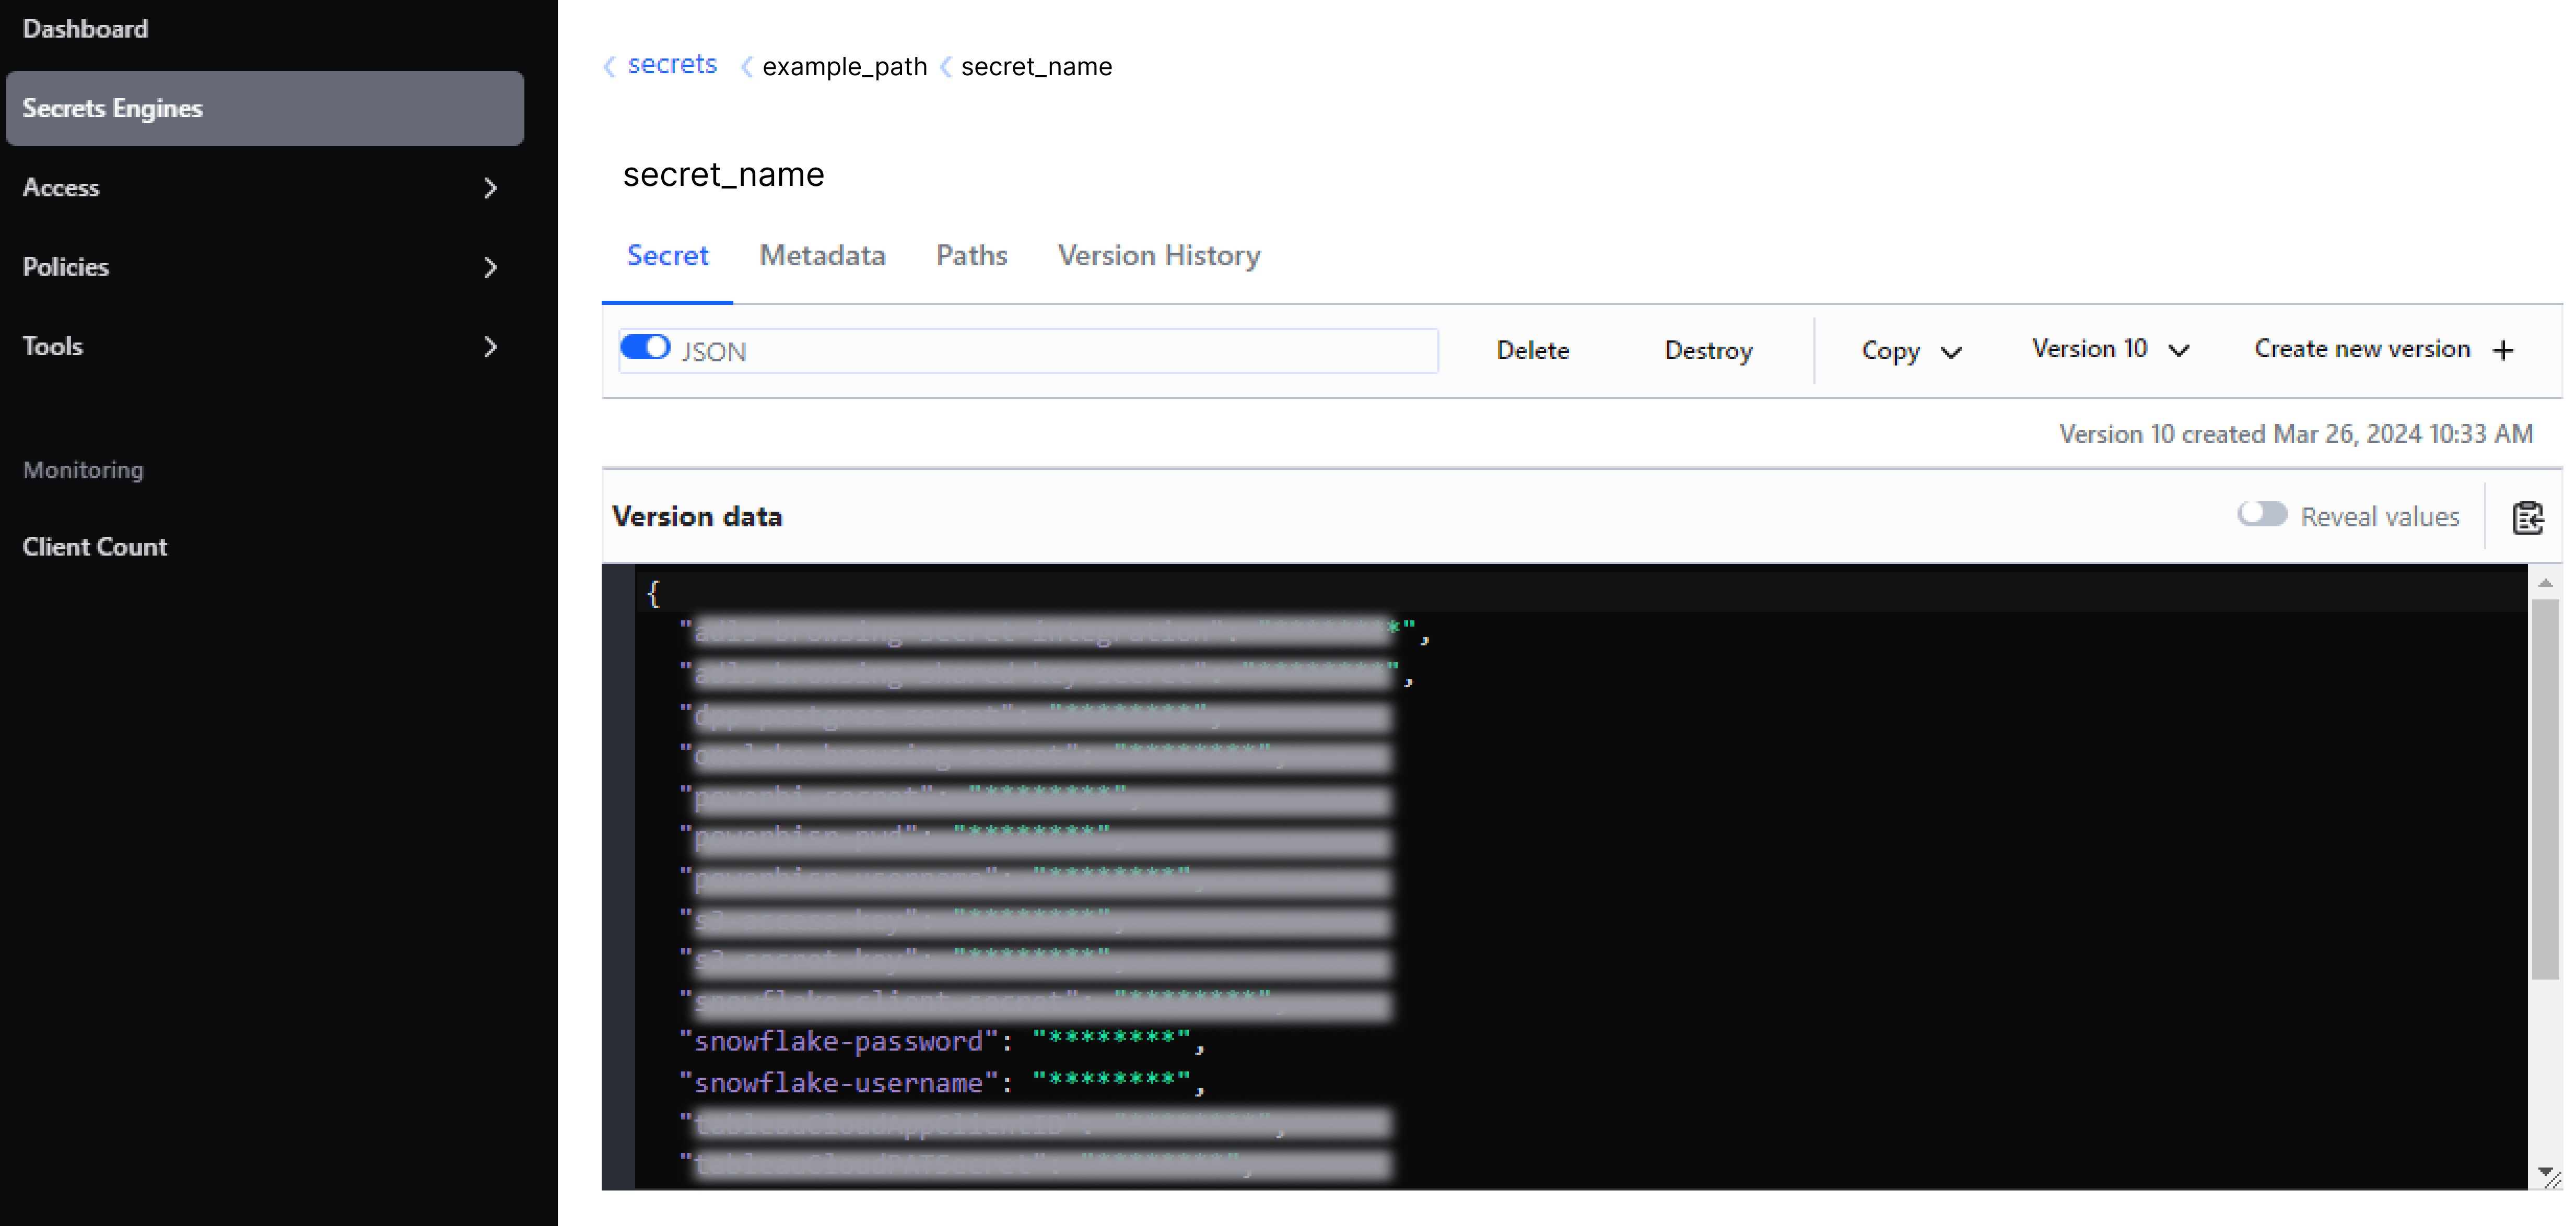
This field is only relevant if you selected Json enabled when configuring the HashiCorp Vault in Secret Management Services.
-
-
Password
-
Select the Use secret management service option.
-
Password (secret name): Enter the name under which the password is stored in your key vault.
-
Password Json path: The JSON path to the secret in your Hashicorp Vault, for example
$.snowflake-password.In the following example, Password (secret name) is example_path/secret_nameand Password Json path is$.snowflake-password.
This field is only relevant if you selected Json enabled when configuring the HashiCorp Vault in Secret Management Services.
-
-
-
-
Select Test to test the connection. If the connection is successful, select Save. Otherwise, verify that your configuration is correct.
Example using Azure AD Client Credential
-
In Data Catalog > Sources > [your source] > Add Connection, select Add Credentials.
-
Select Credential type from the options provided:
-
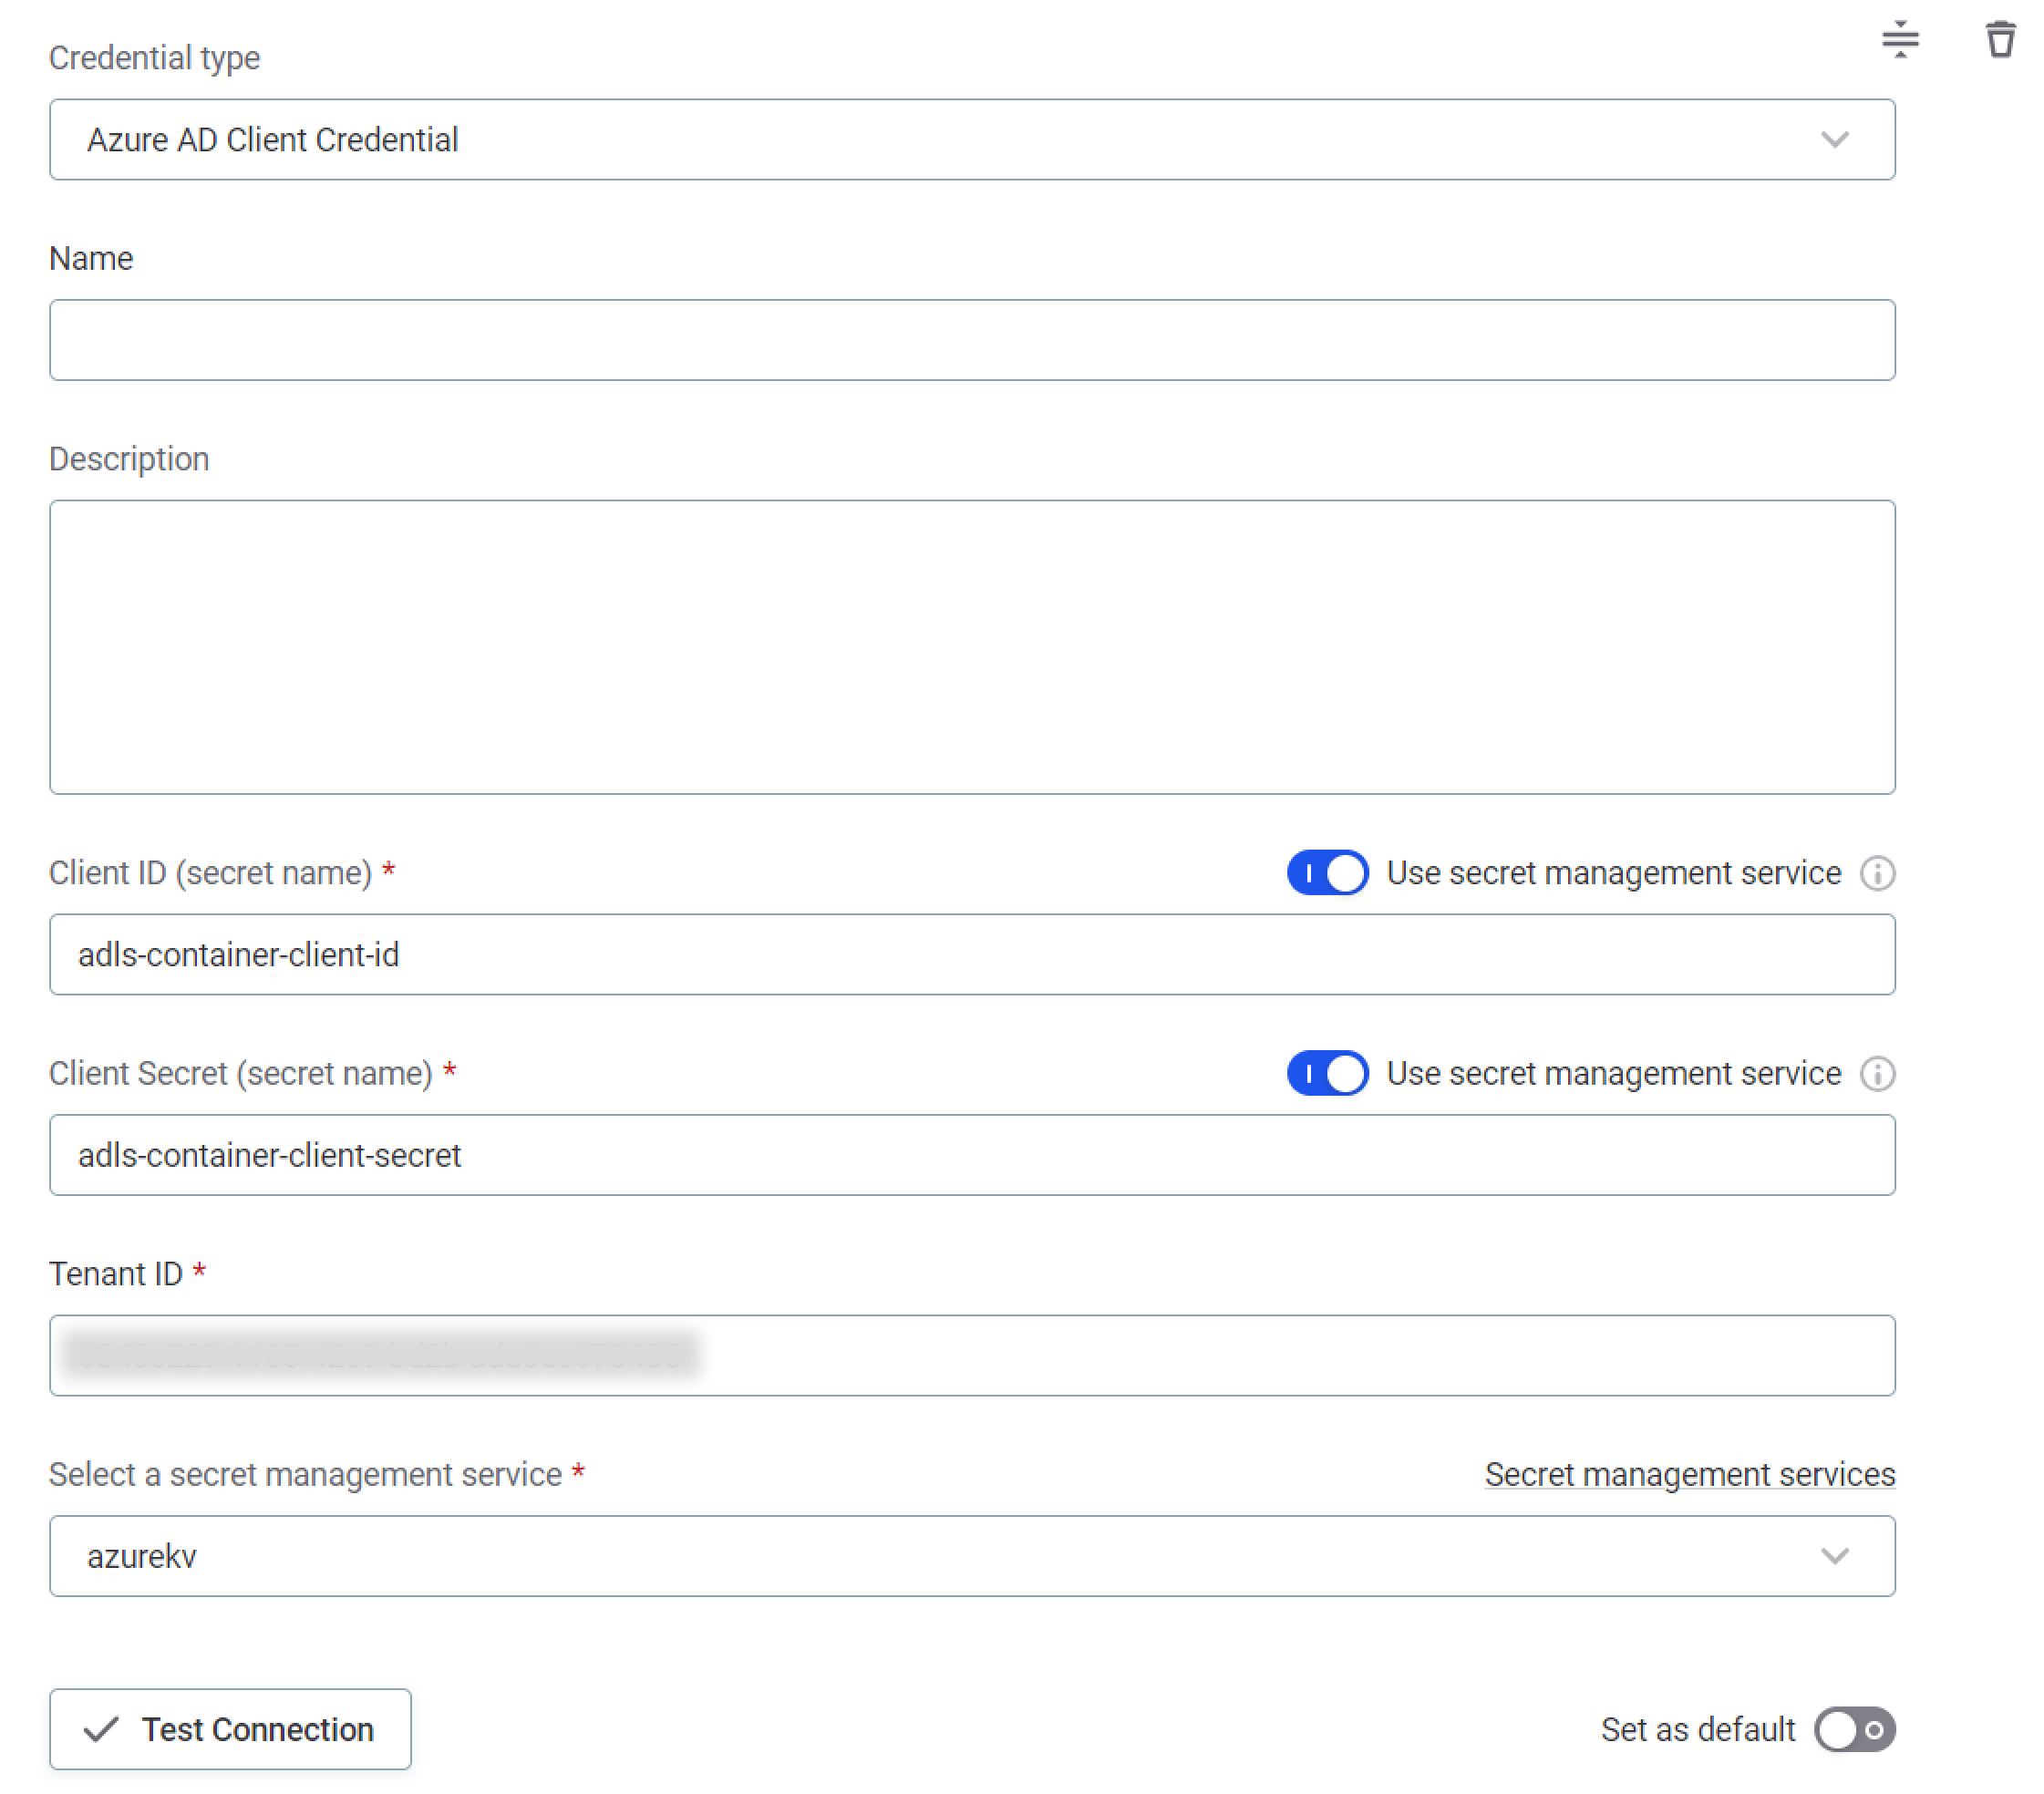
Azure AD Client Credential
-
Name: A unique name for this set of credentials.
-
Description (Optional): A description for this service.
-
Select a secret management service: Using the dropdown options, select the secret management service in which the required secrets are contained.
-
Client ID:
-
Select the Use secret management service option.
-
Client ID (secret name): Enter the name under which the Client ID is stored in your key vault. For example,
adls-container-client-id.Essentially, the secret name is the name the respective Client ID, Client Secret, and other parameters, are stored under in your key vault or secret manager. 
-
-
Client secret:
-
Select the Use secret management service option.
-
Client Secret (secret name): Enter the name under which the Client Secret is stored in your key vault. For example,
adls-container-client-secret.
-
-
Tenant ID: The unique identifier of the Azure AD instance within your Azure subscription (string). Also called its 'directory' ID.
-
-
-
Select Test to test the connection. If the connection is successful, select Save. Otherwise, verify that your configuration is correct.
Next steps
Once you have configured a secret management service, you can retrieve credentials from it when connecting to data sources. Head to Connect to a Source and select the instructions relevant for your connection, for example:
Was this page useful?
