
Keycloak Active Directory Integration
Use the following instructions to enable basic Single Sign-on via Keycloak with Azure Active Directory as the Identity Provider using SAML.
We will only cover Authentication. In this case, when a user logs into Ataccama for the first time, a user record is created in Keycloak with the user’s email address (as their username) and their first and last names for use within Ataccama ONE.
| These instructions assume that the client has a fully-qualified-domain-name (FQDN) associated with the Ataccama Platform, which typically points to the gateway server’s / load balancer’s IP Address. |
Prepare Keycloak realm for integration with AD
-
Login to the Keycloak Administration Console.
-
Open
Ataccamaonerealm in Keycloak. -
Go to the Identity Providers.
-
From the dropdown list select SAML v2.0.
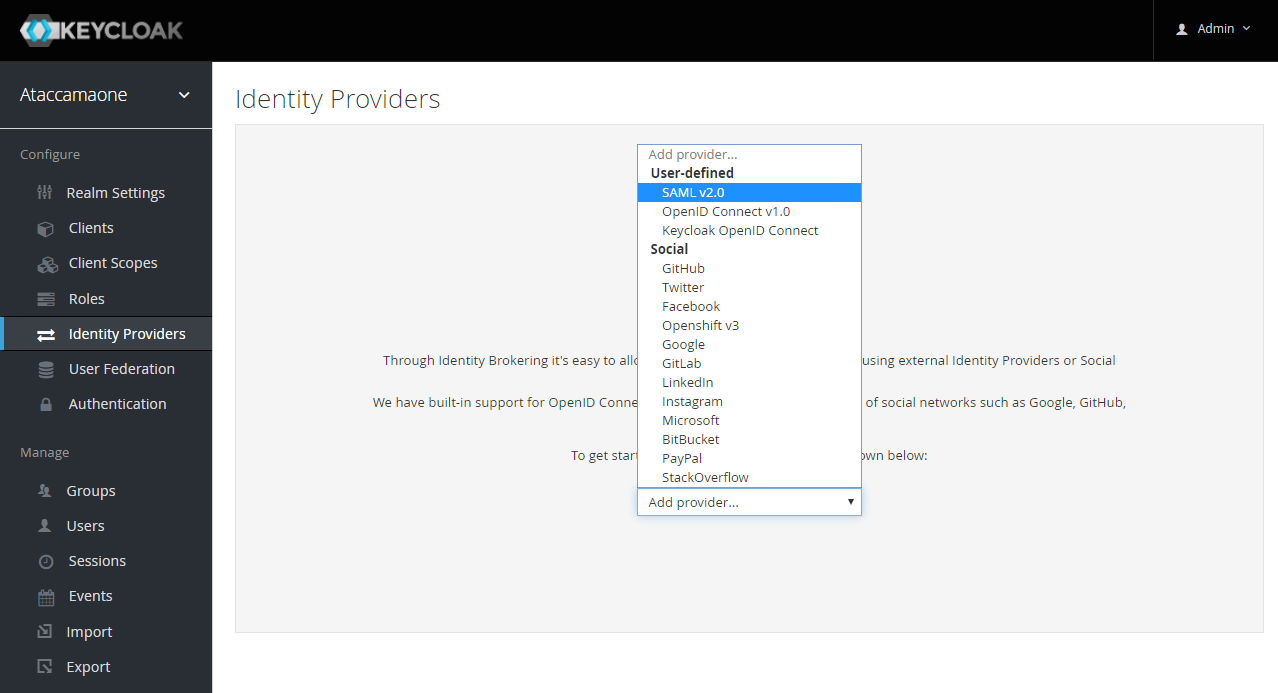
-
The Add identity provider screen will open, setup up the Alias 'saml': This alias will be used in the redirect URL. You can also add a Display Name which will be visible on the Ataccama Login page
-
Make a note of the Redirect URI as it will be required later. Redirect URI should look something like
<ataccama_platform_fqdn>/auth/realms/ataccamaone/broker/saml/endpoint: wheresamlmatches the value of the Alias field. -
Leave this window open, we will return to it later.
|
Information for Client’s IAM Team
Further information will be required by the Client’s IAM Team, as can be seen in the example below: 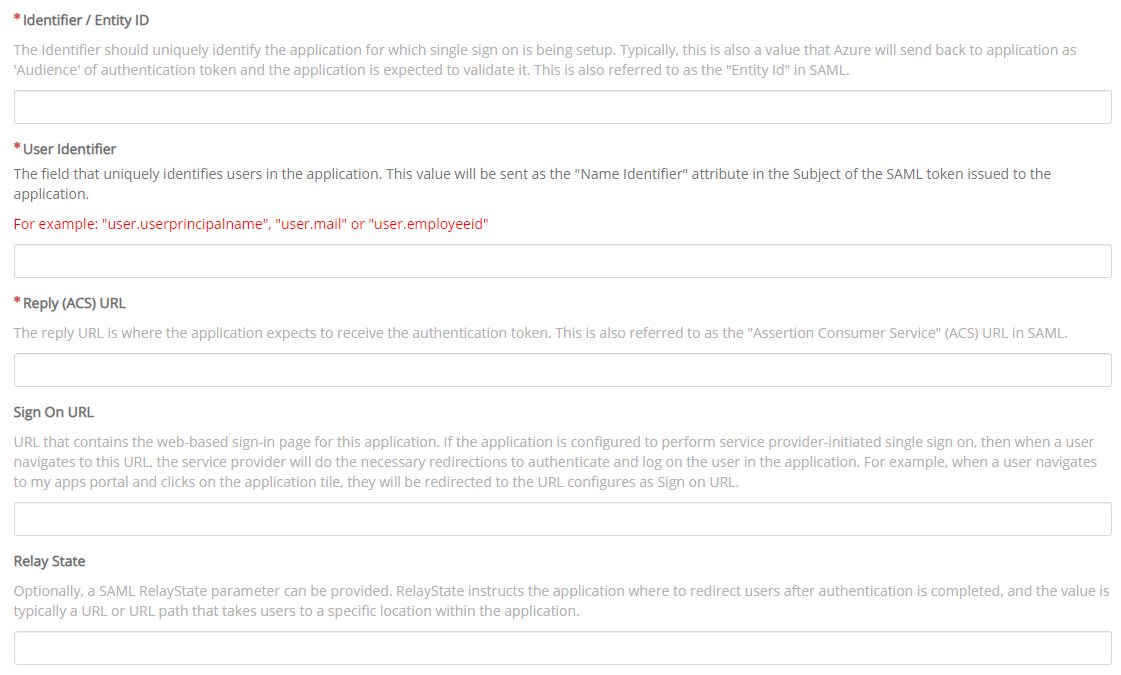
The following responses (or similar) can be provided:
After supplying the above information to the client’s IAM team, they should be able to an |
Keycloak realm integration (continued)
Return to the open Keycloak Add Identity Provider page, and follow the steps below:
-
Scroll to the bottom of the page until you find the Import External IDP Config section and paste the metadata link into the Import from URL field. Select Import.
-
If the format of the file is correct you should receive:

The Single Sign-On Service URL will now be populated. Other settings may have been changed too.
-
Select Save.
Set up the first login flow
The First Login Flow is the process that executes when a user logs into Ataccama for the first time. In the scenario described here, a user record will be created in Keycloak with the user’s email address as their username along with their first and last names, for use within Ataccama ONE.
-
Login to the Keycloak Administration Console.
-
Ensure the Ataccamaone Realm is selected.
-
In the left-hand-menu, select Authentication.
-
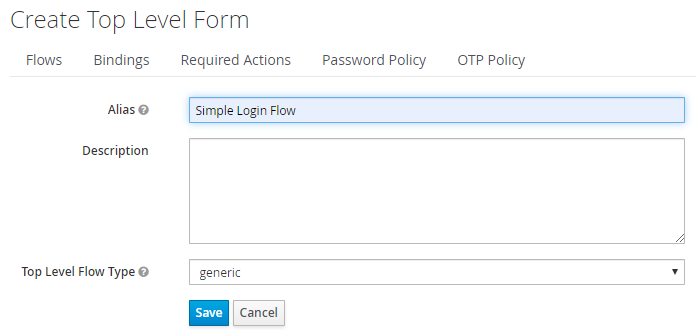
On the Flows tab, click New on the right-hand-side.

-
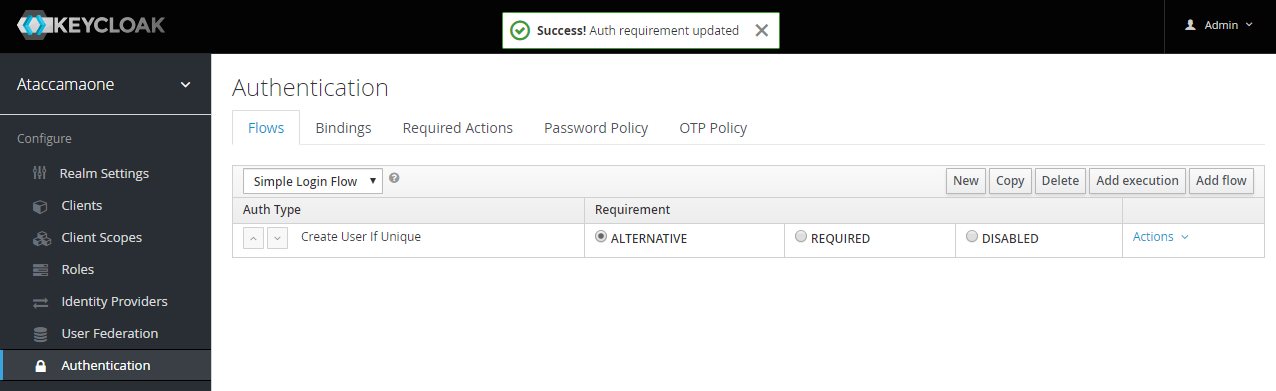
Enter an Alias eg. Simple Login Flow and click Save.
-
With the new flow selected, click Add execution.

-
Under Provider, scroll down the list and select Create User If Unique.
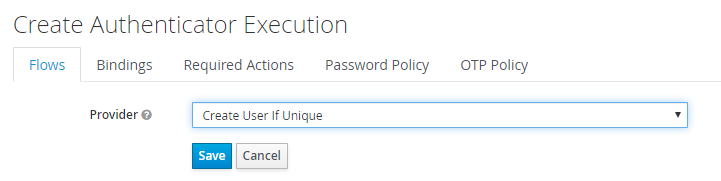
-
Select Save.
-
Under Requirement, select ALTERNATIVE.
-
The next time the user logs in, we want them to go directly to the platform. This involves the Browser authentication flow:
-
Login to the Keycloak Administration Console.
-
Ensure the Ataccamaone Realm is selected.
-
In the left-hand-menu, select Authentication.
-
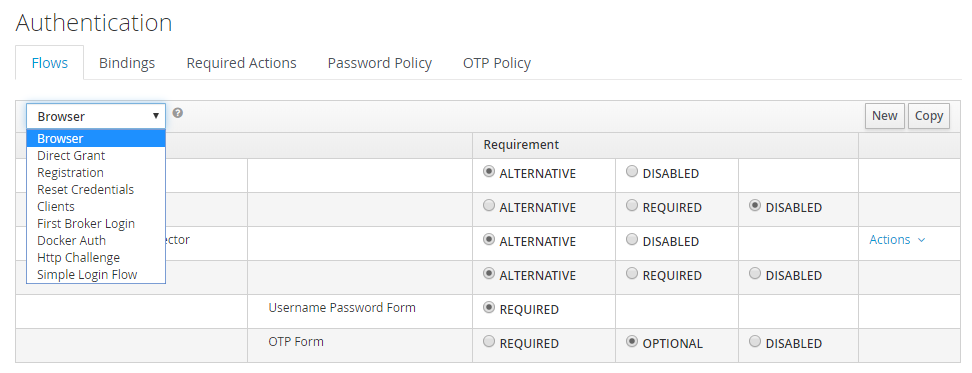
Under Flows select Browser.
-
-
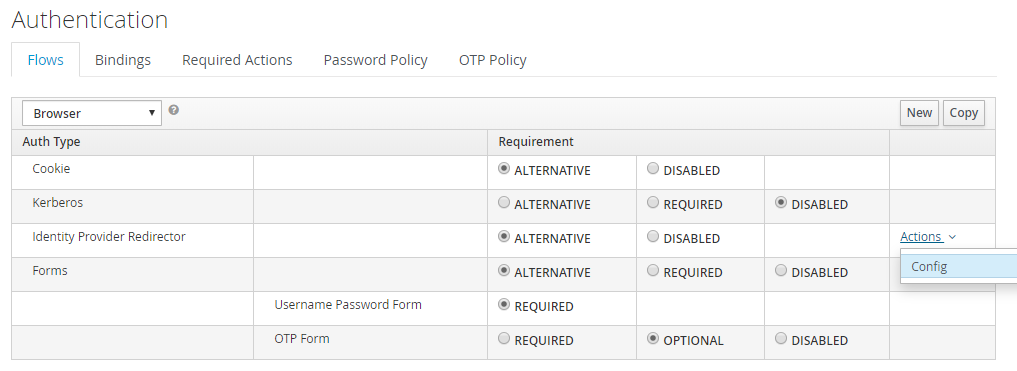
On the Identity Provider Redirector line, click on Actions, and then select Config.
-
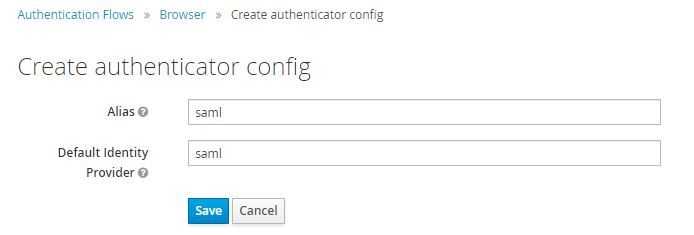
Enter the name of the Identity provider, e.g. saml, in both the Alias and Default Identity Provider boxes.
-
Select Save.
Single sign-on configuration
-
Login to the Keycloak Administration Console.
-
Ensure the Ataccamaone Realm is selected.
-
In the left-hand-menu, select Identity Providers.
-
Click on the name of the previously created IDP, e.g.
saml:
-
Under First Login Flow, select the flow that we created in the previous section, e.g., Simple Login Flow.

-
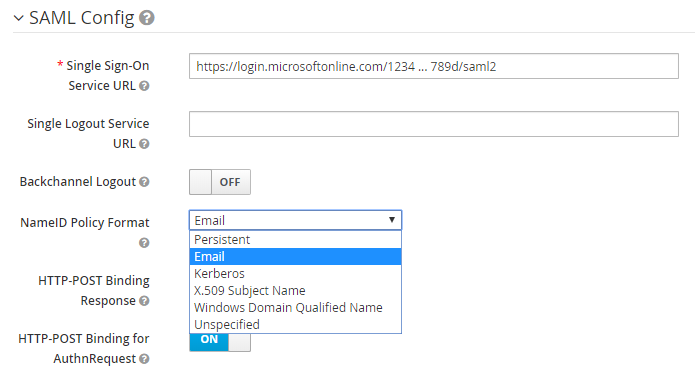
Under SAML Config, set NameID Policy Format to Email.
-
The SAML Config section should now look similar to:
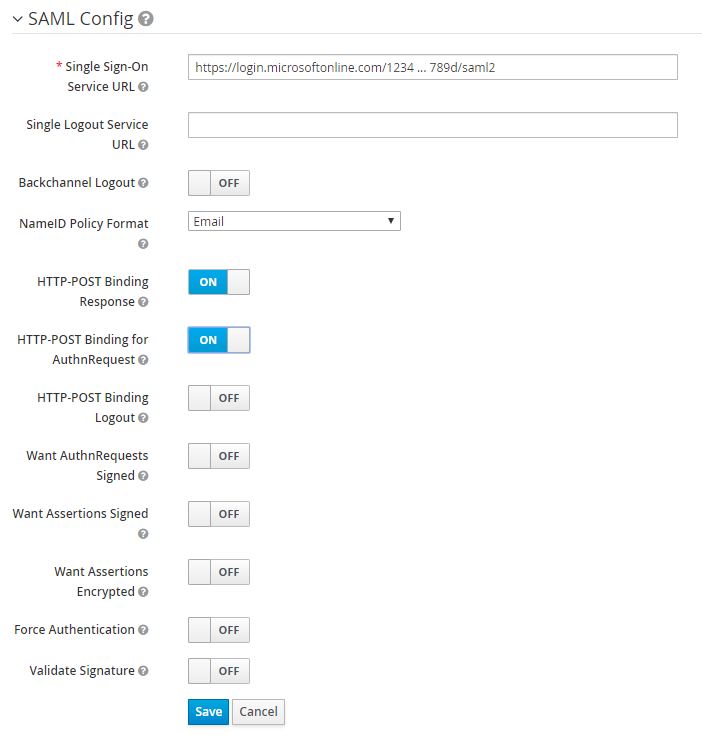
-
If so, select Save. If not go back and edit as necessary.
Set up mappers
-
Login to the Keycloak Administration Console.
-
Ensure the Ataccamaone Realm is selected.
-
In the left-hand-menu, select Identity Providers.
-
Click on the name of the previously created IDP, e.g.
saml. -
Select the Mappers tab.

-
Select Create.
-
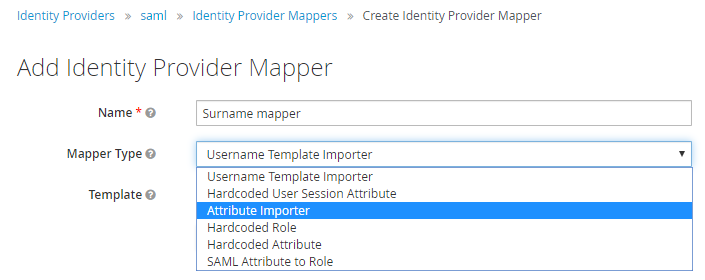
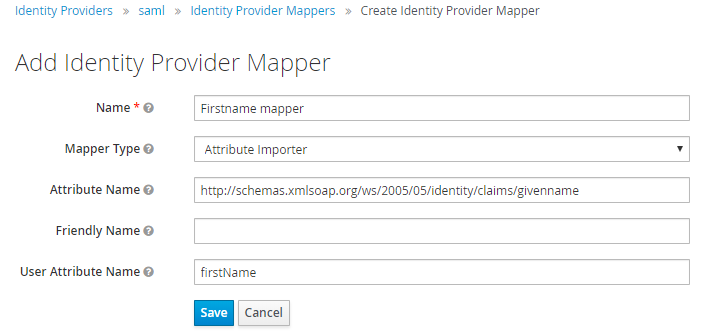
Enter a Name, e.g. Surname mapper, and then select Attribute Importer as the Mapper Type.
-
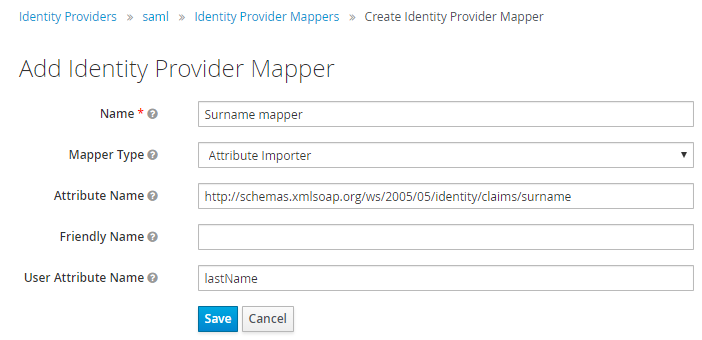
The following screen will appear. The important fields here are Attribute Name and User Attribute Name.
-
Attribute Name: e.g.:
schemas.xmlsoap.org/ws/2005/05/identity/claims/surname. -
User Attribute Name:
lastName.The value of Attribute Name must match the name of the attribute coming from the Azure AD Claims. There are a few ways to determine this. In the example
.xml, the Claims are listed as part of the <fed:ClaimTypesOffered> section. However, this doesn’t necessarily mean that these attributes will be returned as part of the security handshake. Refer to the Mapping the Claims section below to retrieve and decode the Claims as they are returned during the login process.Ensure to use camel case for User Attribute Name.
-
-
Now do the same for first name
-
Attribute Name: e.g.:
schemas.xmlsoap.org/ws/2005/05/identity/claims/surname. -
User Attribute Name:
firstName.
-
Map the claims
This section provides a method for capturing and decoding the claims that are returned by Azure Active Directory as part of the login process.
| For this method to work, a user needs to be set up in Azure AD with the correct permissions (e.g. AD Group) that provides the user with access to the Ataccama Platform. |
-
Login to the Keycloak Administration Console.
-
Ensure the test user does not already have a record in Keycloak (if it does, make a separate note of the associated Roles and simply delete the user record).
-
Open an Incognito Chrome window (Ctrl+Shift+N).
-
Open Developer Tools (Ctrl+Shift+I).
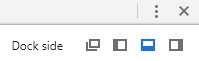
For ease, move the Console to the bottom of the window – click on the three vertical dots, and select the third Dock side option
-
Ensure the Preserve log option is checked.
-
Attempt to login to Ataccama, e.g. point the browser at
<ataccama_platform_fqdn>/. -
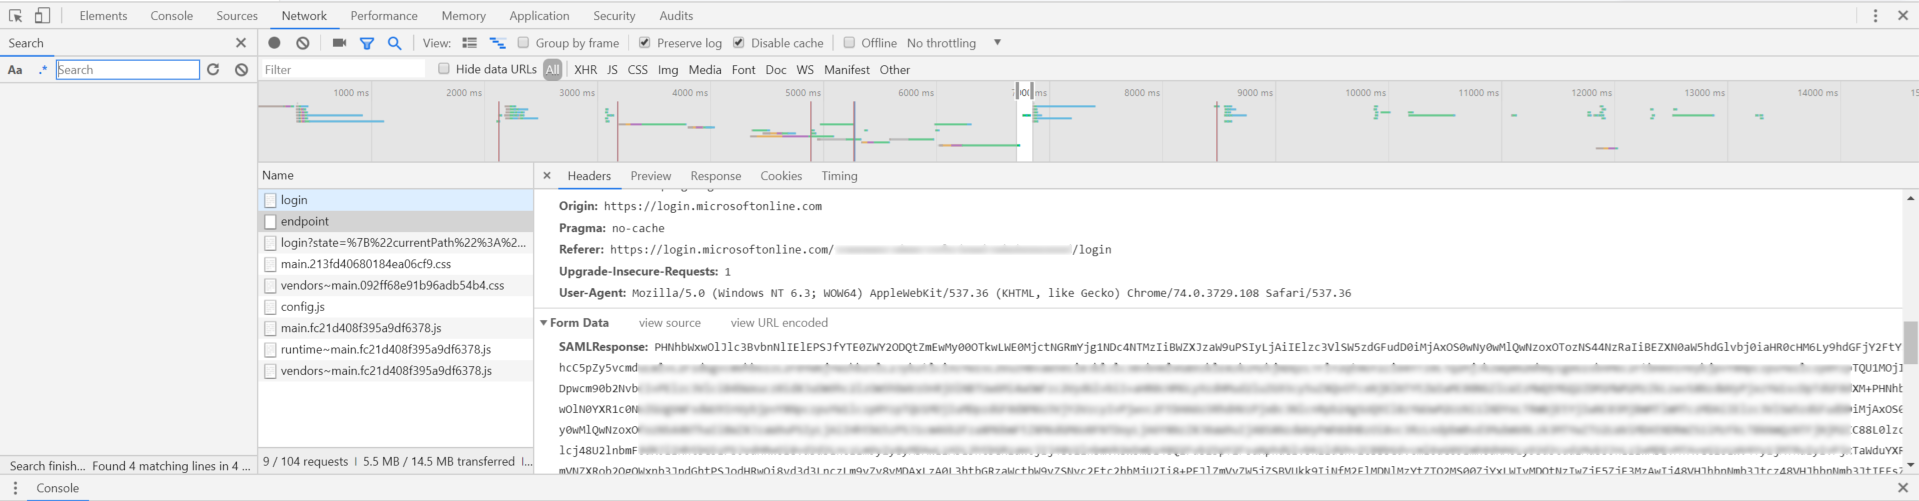
In the Console, find the Azure AD reply that contains the SAMLResponse.
-
Copy the entire SAMLResponse (
PHNhbWxwOlJlc3BvbnNlIElEPSJfYTE0ZWY2ODQtZmEwMy00OT…) and use a website such aswww.samltool.com/decode.php to decode it. After reformatting the.xml, the (anonymised) response should look something like this:Example SAML response
<?xml version="1.0" encoding="UTF-8"?>
<samlp:Response xmlns:samlp="urn:oasis:names:tc:SAML:2.0:protocol" ID="_a14ef684-fa03-4990-a427-4dfb85478533" Version="2.0" IssueInstant="2019-07-02T07:19:35.874Z" Destination="https://<ataccama_platform_fqdn>/auth/realms/ataccamaone/broker/saml/endpoint" InResponseTo="ID_9338c443-1ecd-4f6f-8a24-4622ded87ca7">
   <Issuer xmlns="urn:oasis:names:tc:SAML:2.0:assertion">https://sts.windows.net/97160e56-eb00-44fe-b31d-0d6d351c636d/</Issuer>
   <samlp:Status>
      <samlp:StatusCode Value="urn:oasis:names:tc:SAML:2.0:status:Success" />
   </samlp:Status>
   <Assertion xmlns="urn:oasis:names:tc:SAML:2.0:assertion" ID="_3ae03e36-e461-4f61-b204-720f19f17300" IssueInstant="2019-07-02T07:19:35.858Z" Version="2.0">
      <Issuer>https://sts.windows.net/97160e56-eb00-44fe-b31d-0d6d351c636d/</Issuer>
      <Signature xmlns="http://www.w3.org/2000/09/xmldsig#">
         <SignedInfo>
            <CanonicalizationMethod Algorithm="http://www.w3.org/2001/10/xml-exc-c14n#" />
            <SignatureMethod Algorithm="http://www.w3.org/2001/04/xmldsig-more#rsa-sha256" />
            <Reference URI="#_3ae03e36-e461-4f61-b204-720f19f17300">
               <Transforms>
                  <Transform Algorithm="http://www.w3.org/2000/09/xmldsig#enveloped-signature" />
                  <Transform Algorithm="http://www.w3.org/2001/10/xml-exc-c14n#" />
               </Transforms>
               <DigestMethod Algorithm="http://www.w3.org/2001/04/xmlenc#sha256" />
               <DigestValue>FnfGJo8O5APMB4PmFvtZTB576PLZIeb9UVpjblYU7Kk=</DigestValue>
            </Reference>
         </SignedInfo>
         <SignatureValue>J9jhAHU4OH5UygNPVA…VmpGpZusSoCrRxJH6ysswQ==</SignatureValue>
         <KeyInfo>
            <X509Data>
<X509Certificate>MIIC8DCCAdigAwIB…r645jGSdHxtK</X509Certificate>
            </X509Data>
         </KeyInfo>
      </Signature>
      <Subject>
         <NameID Format="urn:oasis:names:tc:SAML:1.1:nameid-format:emailAddress">adrian.anderson@somewhere.com</NameID>
         <SubjectConfirmation Method="urn:oasis:names:tc:SAML:2.0:cm:bearer">
            <SubjectConfirmationData InResponseTo="ID_1234…7ca7" NotOnOrAfter="2019-07-02T07:24:35.858Z" Recipient="https://<ataccama_platform_fqdn>/auth/realms/ataccamaone/broker/saml/endpoint" />
         </SubjectConfirmation>
      </Subject>
      <Conditions NotBefore="2019-07-02T07:14:35.858Z" NotOnOrAfter="2019-07-02T08:19:35.858Z">
         <AudienceRestriction>
            <Audience>https://<ataccama_platform_fqdn>/auth/realms/ataccamaone</Audience>
         </AudienceRestriction>
      </Conditions>
      <AttributeStatement>
         <Attribute Name="http://schemas.microsoft.com/identity/claims/tenantid">
            <AttributeValue>1234…636d</AttributeValue>
         </Attribute>
         <Attribute Name="http://schemas.microsoft.com/identity/claims/objectidentifier">
            <AttributeValue>ad00b932-…-69a90d9eadaf</AttributeValue>
         </Attribute>
         <Attribute Name="http://schemas.microsoft.com/identity/claims/displayname">
            <AttributeValue>Anderson, Adrian</AttributeValue>
         </Attribute>
         <Attribute Name="http://schemas.microsoft.com/identity/claims/identityprovider">
            <AttributeValue>https://sts.windows.net/1234...636d/</AttributeValue>
         </Attribute>
         <Attribute Name="http://schemas.microsoft.com/claims/authnmethodsreferences">
            <AttributeValue>http://schemas.microsoft.com/ws/2008/06/identity/authenticationmethod/password</AttributeValue>
            <AttributeValue>http://schemas.microsoft.com/ws/2008/06/identity/authenticationmethod/windows</AttributeValue>
         </Attribute>
         <Attribute Name="http://schemas.xmlsoap.org/ws/2005/05/identity/claims/givenname">
            <AttributeValue>Adrian</AttributeValue>
         </Attribute>
         <Attribute Name="http://schemas.xmlsoap.org/ws/2005/05/identity/claims/surname">
            <AttributeValue>Anderson</AttributeValue>
         </Attribute>
         <Attribute Name="http://schemas.xmlsoap.org/ws/2005/05/identity/claims/emailaddress">
            <AttributeValue>Adrian.Anderson@somewhere.com</AttributeValue>
         </Attribute>
         <Attribute Name="http://schemas.xmlsoap.org/ws/2005/05/identity/claims/name">
            <AttributeValue>Adrian.Anderson@somewhere.com.au</AttributeValue>
         </Attribute>
      </AttributeStatement>
      <AuthnStatement AuthnInstant="2019-07-02T07:19:35.101Z" SessionIndex="_3ae03e36-e461-4f61-b204-720f19f17300">
         <AuthnContext>
            <AuthnContextClassRef>urn:oasis:names:tc:SAML:2.0:ac:classes:Password</AuthnContextClassRef>
         </AuthnContext>
      </AuthnStatement>
   </Assertion>
</samlp:Response>
The attribute names can be clearly seen in the response. The full value from between the double-quotes is required.
-
Check the resulting User record in Keycloak. If the mappers were not set up correctly, simply update the mappers, delete the User record and login to the platform again.
Map the roles
| These steps rely on the completion of identity-related claims (see, Set up mappers). |
| To get mappers for identity providers see www.keycloak.org/docs-api/15.0/rest-api/index.html. |
-
Create a counterpart in Keycloak for each role in Active Directory, e.g.
AD_ROLE_ADMIN. -
Map those roles to Ataccama-specific roles as required.
-
Navigate to Identity Provider > Identity Provider Mappers.
-
Identify the claim as groups from AD, see example:
<Attribute Name="http://schemas.microsoft.com/ws/2008/06/identity/claims/groups"><AttributeValue>a8dfc3d4-c0c3-48f1-9d8e-157c645ef26e</AttributeValue></Attribute> -
Use SAML Attribute to Role, and fill in as required. Based on the example above this would be:
-
Attribute Name:
schemas.microsoft.com/ws/2008/06/identity/claims/groups. -
Attribute Value:
a8dfc3d4-c0c3-48f1-9d8e-157c645ef26e. -
Role:
AD_ROLE_ADMIN.
-
-
Save Mapper.
-
Repeat the steps above for as many groups as needed.
Was this page useful?