Configure Profiling
You can customize the profiling parameters as needed, including the preconfigured sample and full profiling options.
|
There are two known issues in this release:
If the default profiling configurations are deleted and new configurations do not have Profiling Type defined, it will not be possible to run profiling. If this situation occurs, the following GraphQL query and mutation can be used in order to delete the broken configuration, enabling you to create a new working configuration. Click here to expand the fix solutionquery {
metadata (gid: "00000000-0000-0000-0000-000000000001") {
draftVersion {
profilingConfigurations(filter: ["type IS null"]) {
edges {
node {
gid
draftVersion {
name
}
}
}
}
}
}
}
mutation {
profilingConfigurationDelete (gid: "YOUR_GID") {
success
}
}
|
View profiling settings
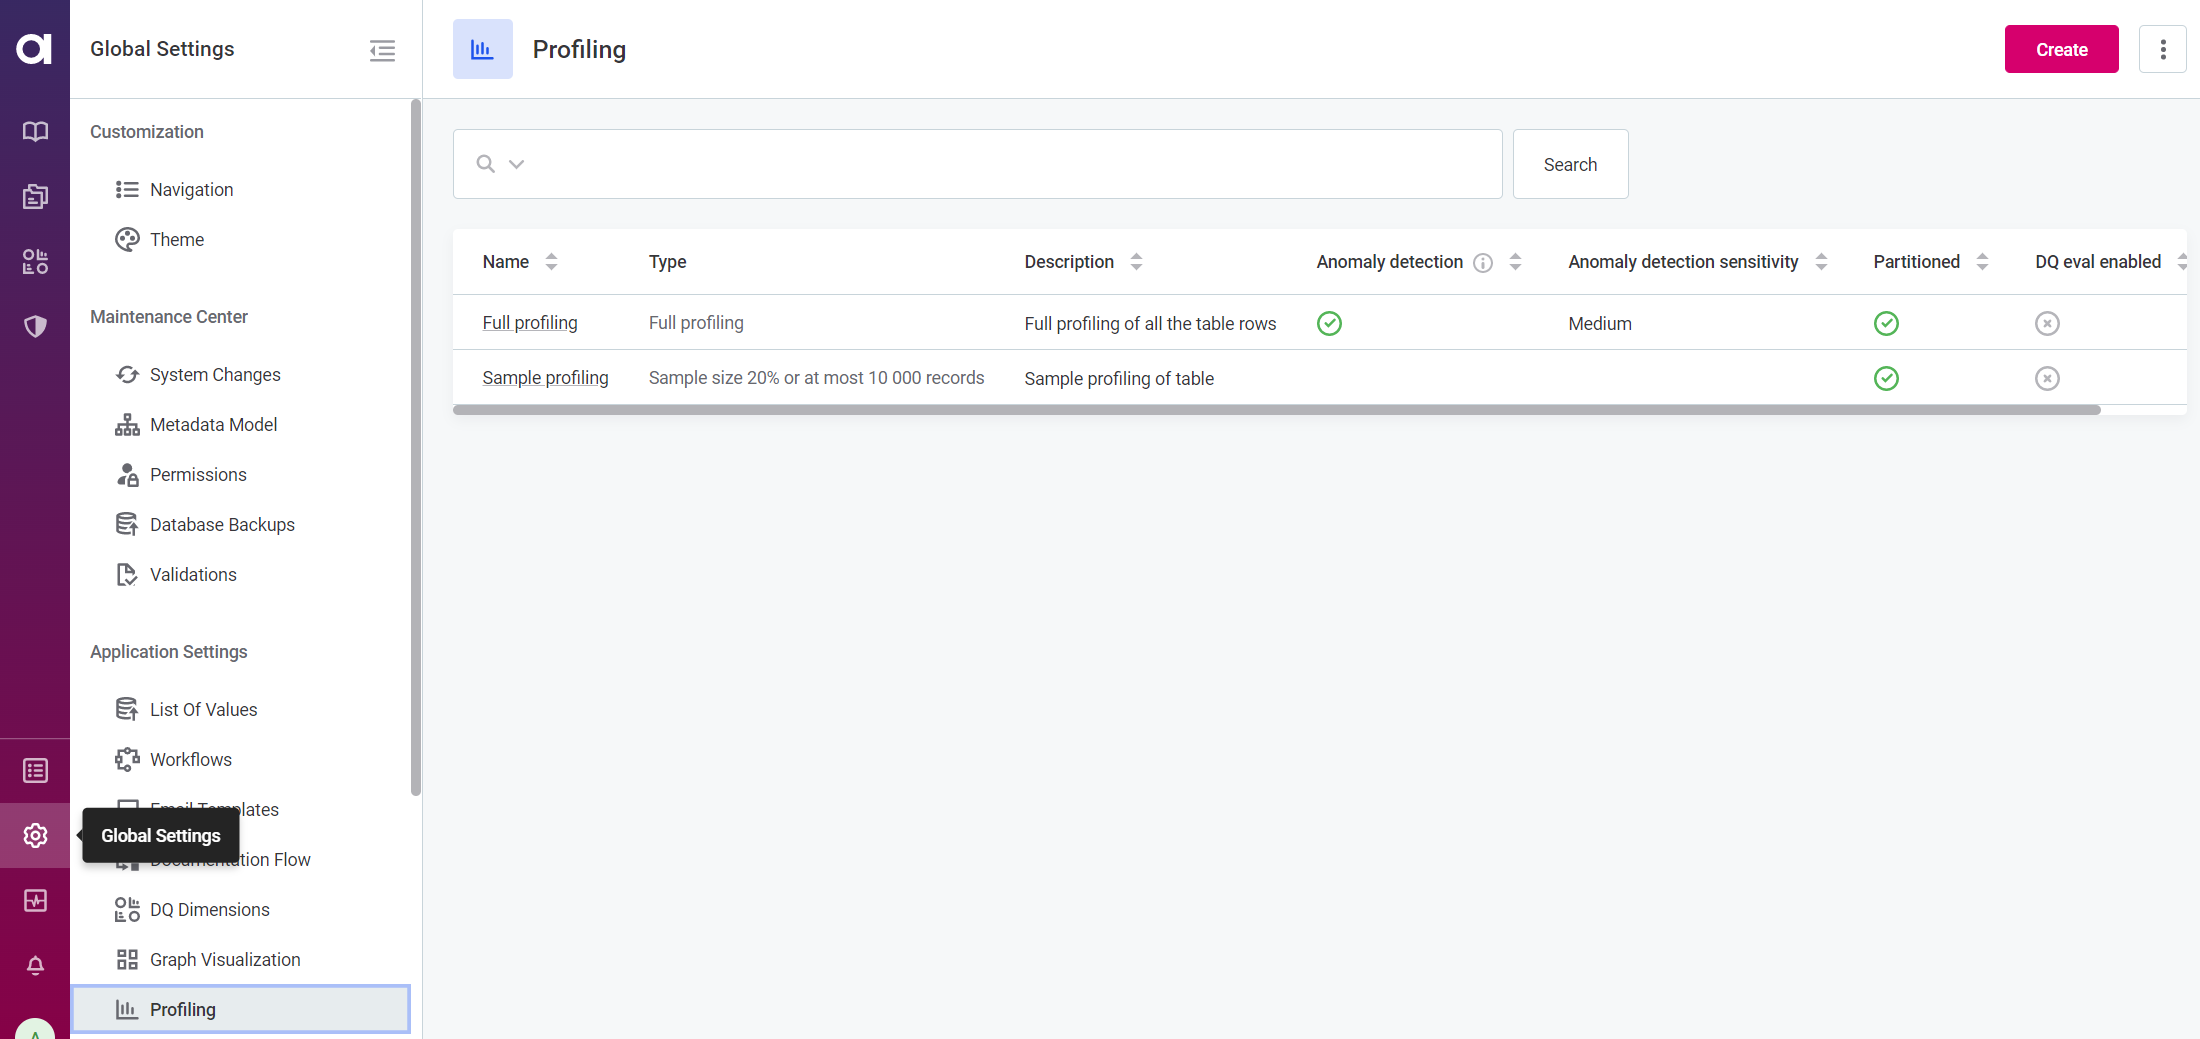
To view the profiling settings, go to Global Settings > Profiling.

For each profiling configuration, the following information is shown:
-
Name: The name of the profiling configuration.
-
Type: The type and scope of profiling.
-
Description (optional): A description of the profiling configuration.
-
Anomaly detection: Shows whether anomaly detection is run during profiling (only available on full profiling).
-
Anomaly detection sensitivity: Shows the sensitivity of anomaly detection configured.
-
Partitioned: Shows whether profiling partitions is supported.
-
DQ eval enabled: Shows whether automatic DQ evaluation is run after the profiling.
Create a new profiling configuration
To create a new profiling configuration:
-
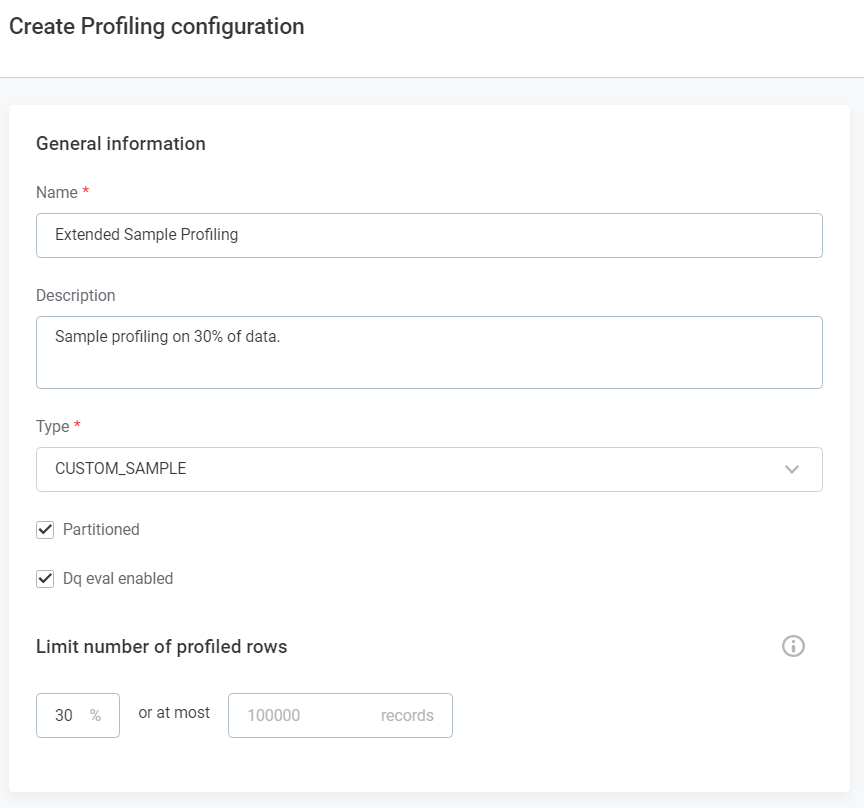
In Global Settings > Profiling, select Create.
-
Provide the following information:
-
Name: A unique name for the profiling configuration.
-
Description: A description of the profiling and when to use it.
-
Type:
-
CUSTOM_FULLorCUSTOM_SAMPLEto create a new full or sample profiling configuration. -
FULLorSAMPLEto replace the default full or sample profiling configurations.The profiling configuration page layout breaks when Profiling Type is not set on the newly created profiling configuration.
Click here to expand the fix solution
To fix profiling in the instance that a configuration has been created and is missing the Profiling Type, you can use the following GraphQL query and mutation:
query {
  metadata (gid: "00000000-0000-0000-0000-000000000001") {
    draftVersion {
      profilingConfigurations(filter: ["type IS null"]) {
        edges {
          node {
            gid
            draftVersion {
              name
            }
          }
        }
      }
    }
  }
}
mutation { profilingConfigurationDelete (gid: "YOUR_GID") { success } }
-
-
Partitioned: Enable partition profiling.
-
DQ eval enabled: Enables automatic DQ evaluation when the profiling is run.
-
-
If you selected
CUSTOM_SAMPLE, in Limit number or profiled rows, define the size of the profiled sample. This can be set as a percentage of all records or the maximum number of rows regardless of the total size of the dataset.
Records are selected randomly if the source supports this. -
If you selected
CUSTOM_FULL, set the anomaly detection preferences:-
Detect anomalies: Enables anomaly detection during profiling. To learn more, see Anomaly Detection in Catalog Items.
-
Anomaly detection sensitivity: Select from
Very high,High,Medium,Low, andVery low.For details, see Anomaly Detection in Catalog Items, section Anomaly detection sensitivity.
-
-
Select Save and publish your changes.
Edit profiling configuration
To edit an existing profiling configuration, in Global Settings > Profiling, open the required configuration and in the three dots menu select Edit.
Update the configuration as needed: see Create a new profiling configuration for details about the options available. Next, select Save and publish your changes.
Delete profiling configuration
| Only custom profiling configurations can be deleted. |
To delete a profiling configuration, in Global Settings > Profiling, open the required configuration and in the three dots menu select Delete. Confirm your choice when prompted and publish your changes.
Manage Access
To manage access to the profiling configurations:
-
In Global Settings > Profiling, open the required configuration and select Manage Access from the three dots menu, or navigate to the Access tab directly.
-
Set the access permissions. For more information on access management, see user-access-management:sharing-assets.adoc.
Was this page useful?
