Working with Reference Data
Reference data (also called dictionaries) is divided into two main types:
-
Translation - Used for mapping source values from connected systems to common (mastered) dictionary values.
Assume you have different dictionary values in one attribute (for example, gender) of a connected system, and the values in the data are female, Female, male, Male, Non-binary, Unknown. Values from several systems can be even more varied. Using the Translation type of dictionary, you can map these different values to a single representation in the connected system, like F, M, N, U.
-
Master - Used mainly for data providing operations. From the previous example, the single (translated) representations of different values (for gender attribute: "F", "M", "N", "U") are foreign keys to the gender master dictionary.
By default, a master dictionary has two attributes: master_code (Primary Key) and master_name. You can add additional columns to the dictionary if needed.
Adding reference data
To add a new dictionary:
-
Open Logical Model > Reference Data.
-
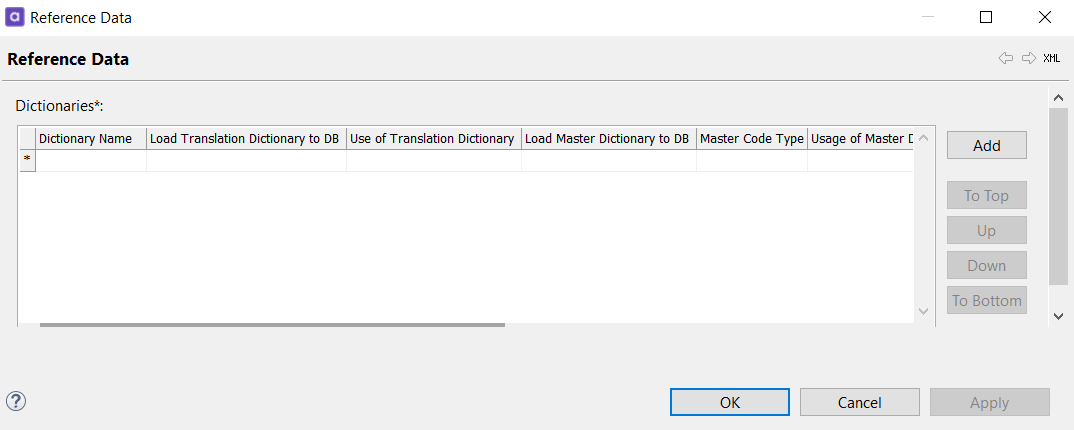
Select Add to add a row. Double-click the line number of the newly added line to continue editing.
-
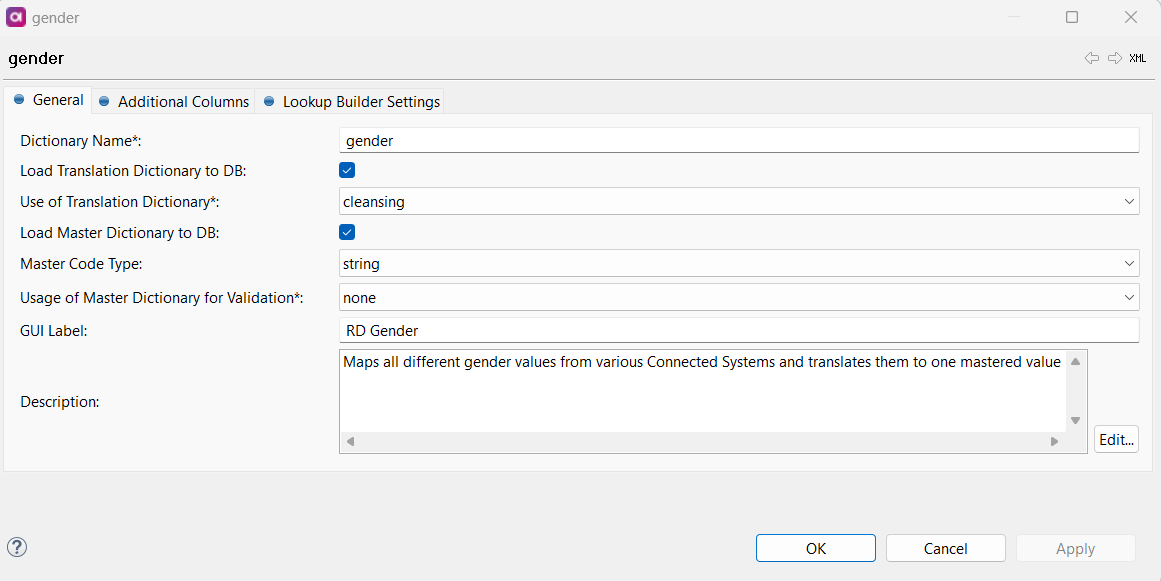
In the window that opens, specify the following:
-
Dictionary name: Name of the dictionary.
-
Load Translation Dictionary to DB: If selected, the translation dictionary is loaded into the MDM storage (that is, it will be available for exports and online web services).
-
Use of Translation Dictionary: Usage of the translation dictionary. Possible values:
cleansing,load,none. -
Load Master Dictionary to DB: If selected, the master dictionary is loaded into the MDM storage.
-
Master Code Type: Type of master code. Possible values:
float,integer,long,string. -
Use of Translation Dictionary: Usage of the translation dictionary. Possible values:
cleansing,load,none. -
GUI Label: Label that is displayed in MDM Web Application.
-
Description: Description of the dictionary.
-
-
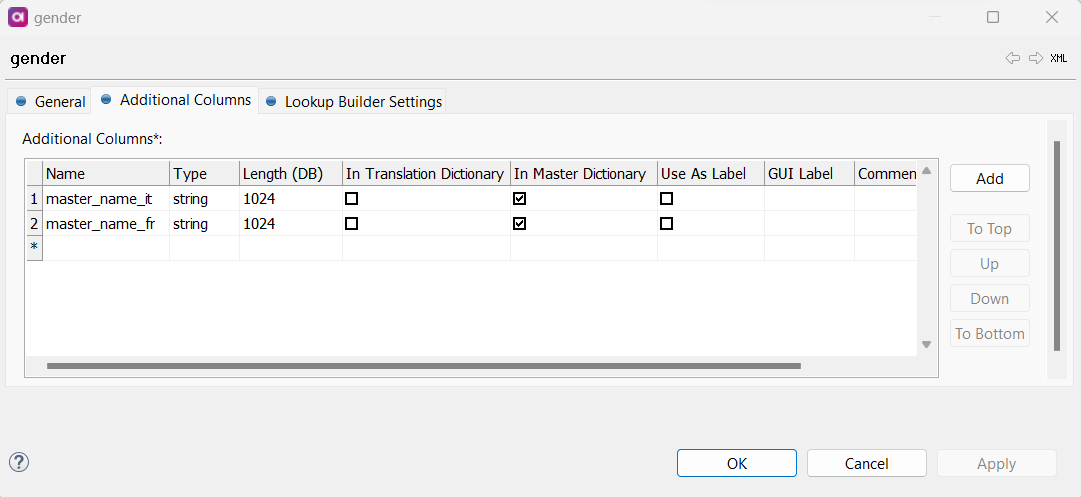
Go to the Additional Columns tab if more attributes are required.
Specify the column name, data type, length, whether you wish to create this column in Translation or Master Dictionary, the GUI label, and add a comment if needed. Select OK.
-
In the Model Explorer, right-click Reference Data > Generate. Keep the Default location and click Generate.
The system will prepare a dictionary build plan and a dictionary load plan.
-
Right-click Reference Data > Open Build Plan (the build plan has a fixed, predefined name and path: Files > data > ext > build > hub_reference_data_build.plan).
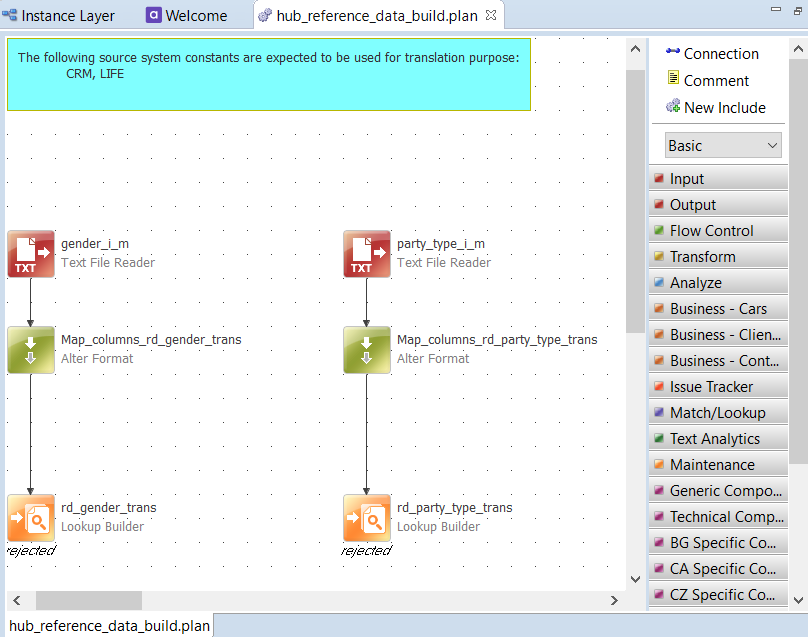
The default path variable for lookup steps,
pathvar://HUB_RD_LKP/, is hardcoded and cannot be changed. Any changes made are discarded when the plan is re-generated.To view Lookup Builder properties, open the Reference Data Build Plan and select the desired Lookup Builder step.
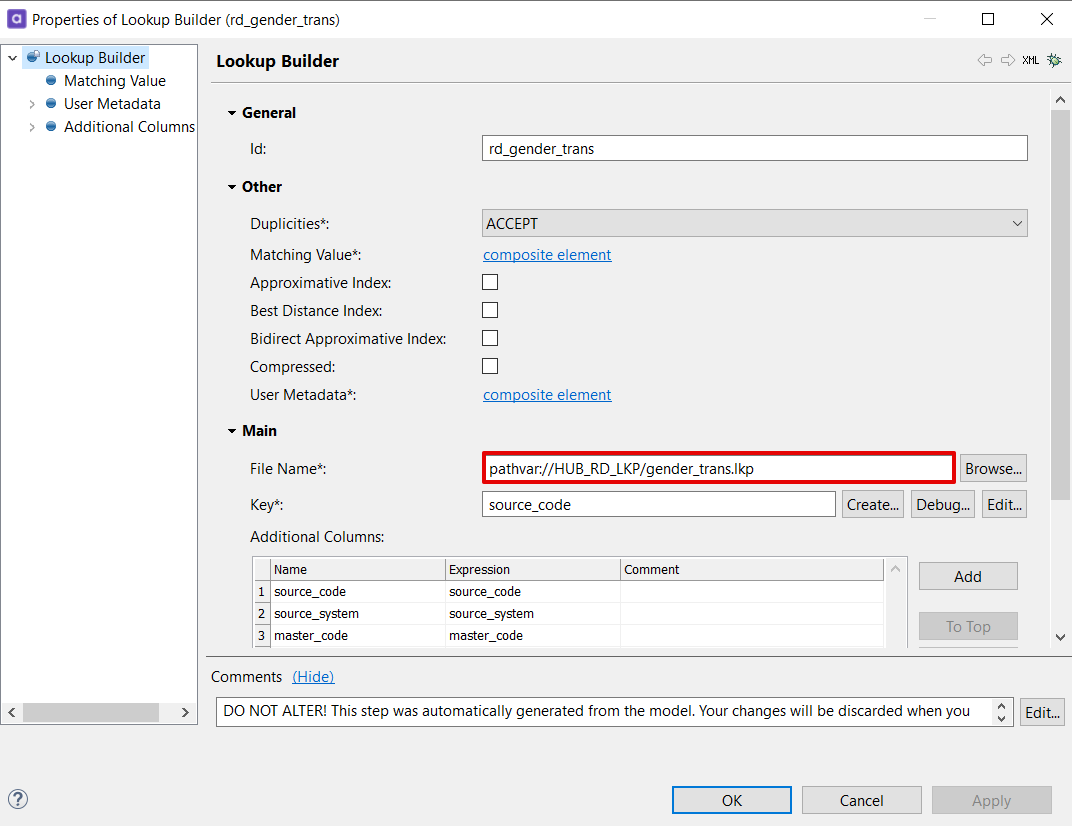
-
Add steps for reading the input with reference data (typically Text File Readers or JDBC Readers) and connect them tothe pre-generated steps.
-
Finally in the Alter Format step (Added Columns tab), map the input attributes (Expressions field) to the lookup attributes (Name field).
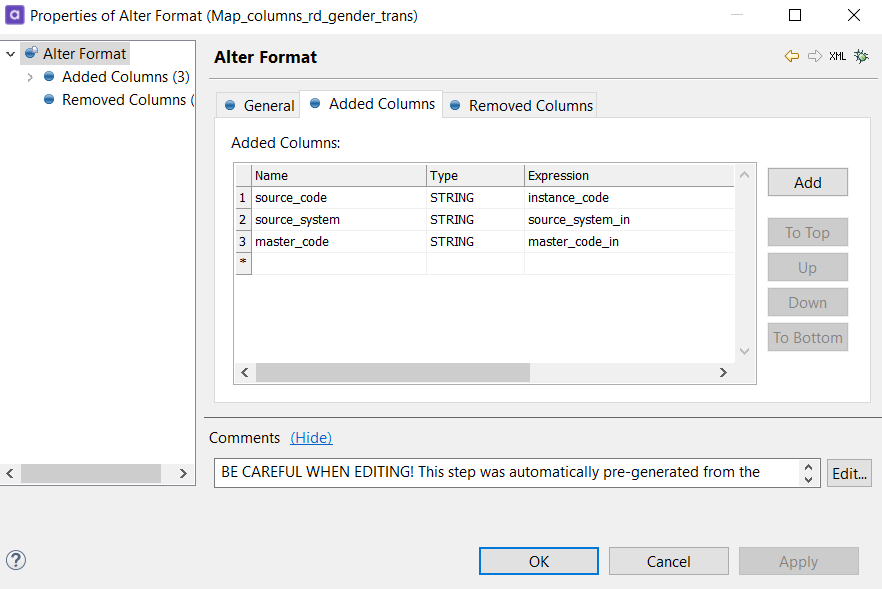
-
In the Model Explorer, right-click Reference Data > Open Load Plan (the load plan has a fixed, predefined name and path: Files > engine > load > referenceData > hub_reference_data.comp).
Like in the build plan in the previous step, add the same steps to read the input with reference data and connect them to the pre-generated steps, then add attribute mapping.
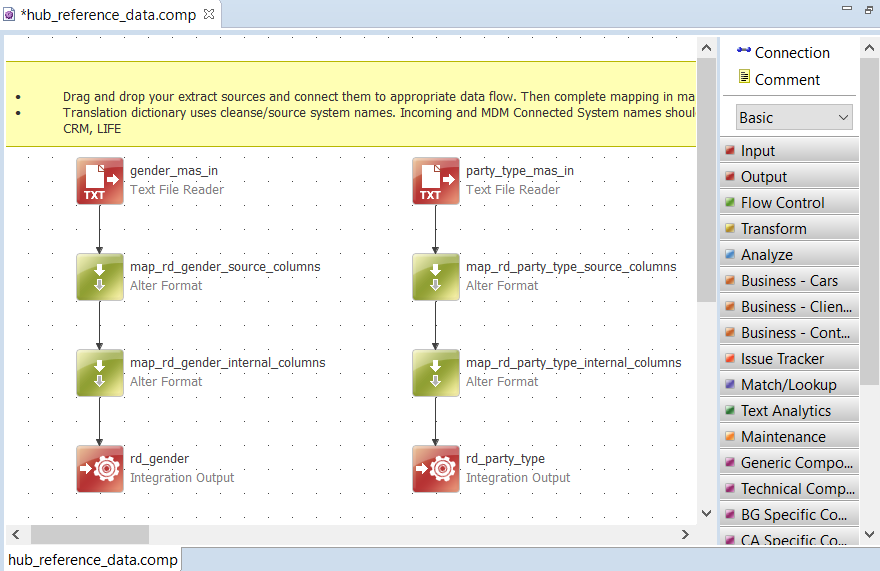
-
Now generate all related configuration files to the newly added reference data. Right-click the project root element and select Generate. Keep the Default location and select Generate.
ONE Desktop prepares all necessary configuration files for the entire solution (load, build, and export plans, as well as Reference Data configuration).
| When changing (especially removing) reference data, always remember to review both the generated plans mentioned above and all relevant cleansing plans (under the Transformations node). Manually delete steps for entities which are obsolete (typically Alter Formats, Integration Outputs, and Lookups). |
Assigning reference data
| Reference data can only be assigned to one column per entity. |
To assign reference data, go to Logical Model and open the Instance Layer. Double-click the entity and add the Reference Data dictionary name to the Reference Data column.
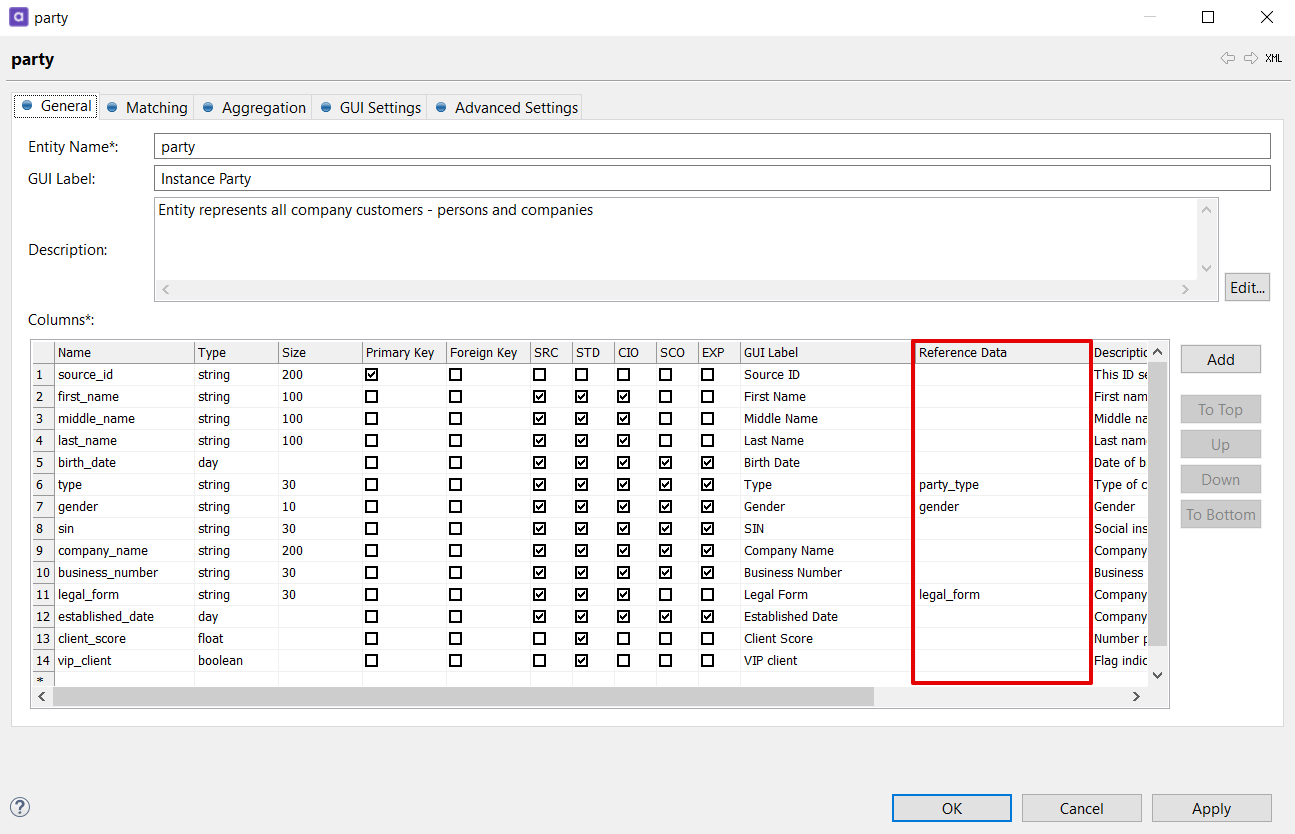
Refreshing reference data
When the reference data changes (for example, a new item is published in Reference Data Manager), the MDM Hub has to refresh the lookups (dictionaries stored in a binary file) as well. This can be done in one of two ways.
Offline approach
The lookup files are locked for write operations once the MDM Server is running (for details, see ONE Runtime Server).
Using this approach, the MDM server is switched off and the lookups are then rebuilt invoking the Hub Reference Data build plan (for example, using command line interface). Once the lookups are rebuilt, the MDM server can be restarted.
This approach is not suitable for production or HA environments but is sufficient for development and debug purposes.
Online approach (production standard)
The online approach uses a Versioned File System Component, also known as Virtual FS component or VFS, and path variables (see Folder Shortcuts). The VFS component enables the online reloading of lookup files.
To set up the online approach, do the following:
-
Use a path variable in the Hub Reference Data build plan in the lookup builder steps (for example, HUB_RD_LKP - see the
mdm.runtimeConfigin the MDM CDI example model project under Files > etc. For more information about the example project, see MDM Example Project). -
Enable the Versioned File System component in the MDM Server Configuration. See Server Configuration.
-
Create a workflow that runs the Hub Reference Data build plan using a path variable as parameter (for example, pointing to a temporary WF folder), then move the new lookup files to the versioned folder and reload the VFS (see the
rebuild_dictionaries.ewfworkflow in the MDM CDI example model project under Files > workflows).
| The workflow should take into account any possible failures and handle any errors. Also, consider any disaster recovery (DR) points. |
Was this page useful?
