
Viewing Data in RDM
This section describes the various RDM features related to viewing data. The article assumes the table is opened in the EDIT mode.
Columns Setup
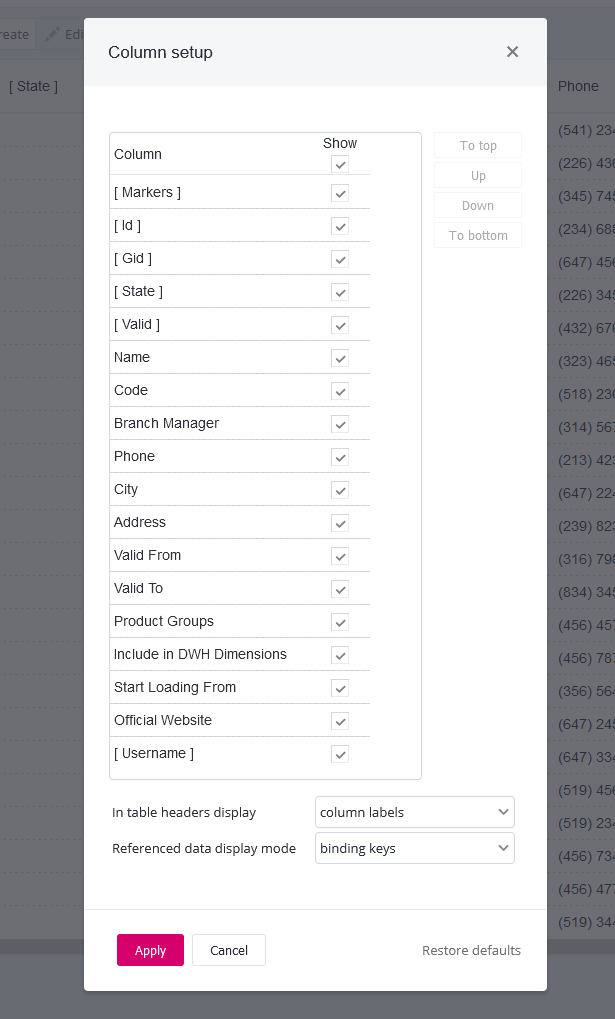
For any table opened in any mode, you can choose the displayed columns by selecting Columns Setup in the toolbar:

In the Columns setup dialog, you can choose which columns to display, move column relative position, choose header labels and referenced data display mode. The latter two options add the corresponding icons next to the column name, as described in the following sections.
In table headers display
In table headers display determines which column names are shown for the given table:
-
column labels - Labels defined in the backend.
-
column IDs - Column names as available in the database.
Referenced data display mode
Referenced data display mode determines how parent attributes are shown in the current (child) table. This field and combo-box are displayed only if the current table has any parent tables.
The display options are as follows:
-
labels - The defined label column values are displayed.
-
generated keys - RDM-generated GID values are displayed.
-
binding keys - The actual value of the binding key between the tables is displayed.
Column sorting and adjustment
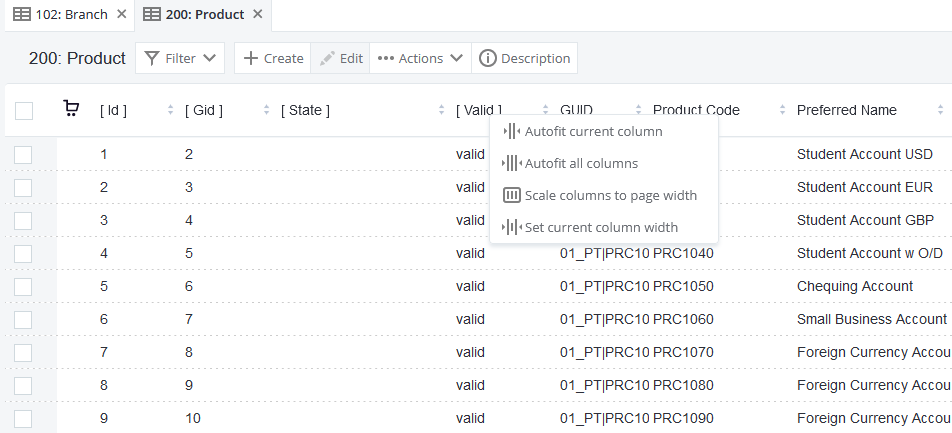
RDM enables column width adjustment and sorting by column. In addition, right-click any column to access other convenient column width options:
-
Autofit current column - Set current column width according to its longest value.
-
Autofit all columns - Set all columns width according to their longest value.
-
Scale columns to page width - All columns are resized to fit the browser window.
-
Set current column width - Set the size of the column in pixels.
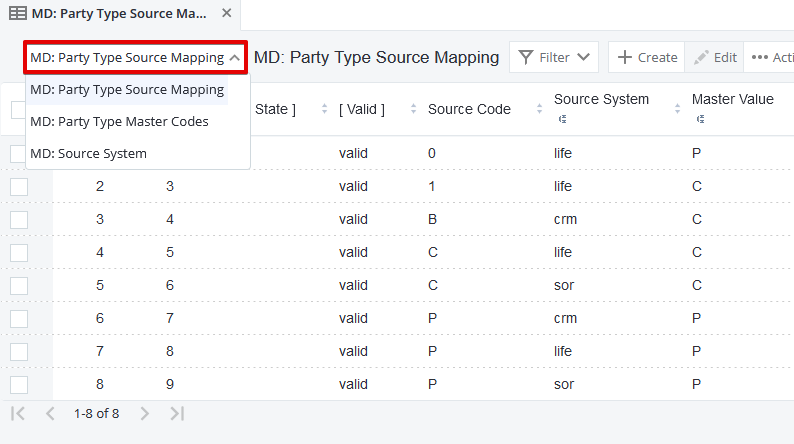
Filters
When you open an entity from the navigation panel, a list of records is pre-loaded. You can narrow down the record listing by applying a filter.
-
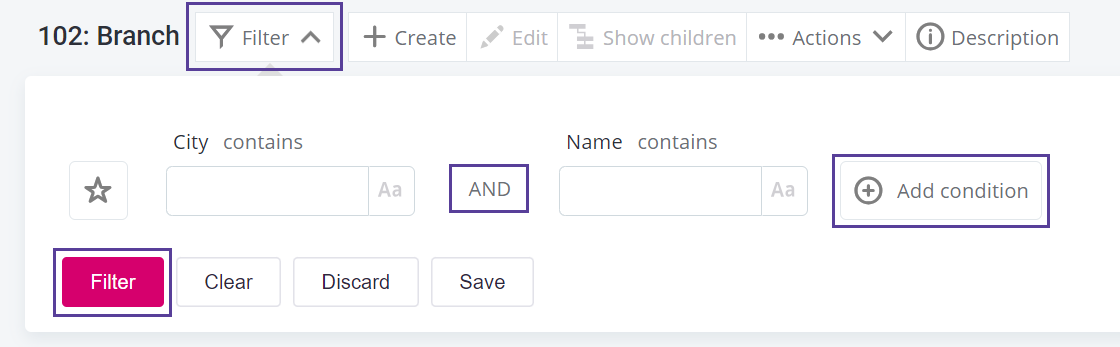
Select Filter to open the filtering pane.
-
Select Add condition to add the first attribute into your search definition. Alternatively, right-click the attribute and select Add value to filter to automatically add it to the filter.
-
Select the search operator, such as equals to (
=), contains, and so on. -
Change case sensitivity if necessary.
-
Add Add condition again to search by one more attribute.
-
Change the AND/OR operator between conditions.
-
Select Filter. The record listing changes to reflect the filter conditions.
| Filter options depend on the operator data type. For example, if you are searching for City, the option to filter using `contains`is available. However, this won’t be the case if you are searching for Valid To. |
| The filter icon is highlighted when the filter is turned on. |
Advanced filter
Use the advanced filter or combine it with the basic filter when the basic filter alone is not enough. It functions similarly to the WHERE SQL clause and uses SQL-like syntax.
To get started:
-
Select Filter to open the filtering pane.
-
Switch to the Advanced filter tab.
-
Type your query.
-
Select Apply.
- Step 1
-
Press Ctrl+Space to get a list of all columns. Column names are case sensitive and must be in double quotes if they contain more than one word.
- Step 2
-
Next, set the filtering rules using operators and/or functions. Operators are not case sensitive, but functions are. Operators appear in purple in the advanced condition box.
The following are supported:
-
Operators:
LIKE,ESCAPE,FALSE,TRUE,NULL,CASE,IS,IN,=,<>,>,>=,<,⇐,IS NOT NULL,ISNULL,NOTLIKE,LIKEESCAPE,NOTLIKEESCAPE,LIST,FUNC. -
Logical operators:
AND,OR,NOT. -
Functions:
upper,lower,length,concat,now,to_date,substring.
-
- Step 3
-
To define the criteria, state which value you are filtering by. Values must be in single quotes and are case sensitive. They appear in red in the advanced condition box.
Examples
These examples show possible advanced filter use cases.
-
Combining AND/OR operators: You want to find a woman (Diana) who recently got married and changed her surname from her maiden name (Jones) to her married name (Smith), but are unsure which name is in her record detail.
Advanced filter condition: "First Name"
='Diana'AND("Last Name"='Jones'OR"Last Name"='Smith'). -
IN operator: You want to find all clients located in Toronto and Vancouver. The
INoperator is used instead of multipleORoperators.Advanced filter condition: City
IN('Toronto','Vancouver'). -
to_date function: You want to find all the records of people born before January 1st, 1980. You must define both the date and its format.
Advanced filter condition: "Birth Date" < to_date (
'1.1.1980','d.M.yyyy'). -
Now function: You want to find all products past their expiration date.
Advanced filter condition: "Expiration Date" < now().
-
Substring function: You want to find records of people whose names contain the letters 'mi' as the second and third letter. You must define the value ('mi'), the operator (=) and the substring function.
The substring function is defined as
substring("Column Name", start index, length of value). It is possible to use a substring within a substring.Advanced filter condition:
'mi'=substring ("First Name", 1, 2). -
Like operator: You want to find a record of a person, but are not sure how to spell their name.
To substitute one symbol, use the underscore (
'Jo_'could return Jon). To substitute more than one symbol, use the percentage sign ('Jo%'could return Jon, Joan, Jonathan).Advanced filter condition: "First Name"
LIKE'Jo%'. -
Additional examples:
-
"First Name" IN ('John','Smith') AND "Last Name" IN ('John','Smith') -
"First Name" LIKE 'Jo__' -
"Postal Code" NOT LIKE 'M _' AND City = 'Toronto' -
"Postal Code" >= 'M4%' AND "Postal Code" ⇐'M6%'
-
Advanced filter syntax
-
Column names that contain spaces should be in double quotes, for example,
"First Name"butCity. Press Ctrl+Space to get a list of columns. -
Wildcard expressions:
Wildcard symbol Meaning Example _
Matches exactly one symbol.
Jo_matchesJoebut notJohn.%
Matches one or more symbols.
Jo%matchesJon,Joan, andJonathan.
Saving filters
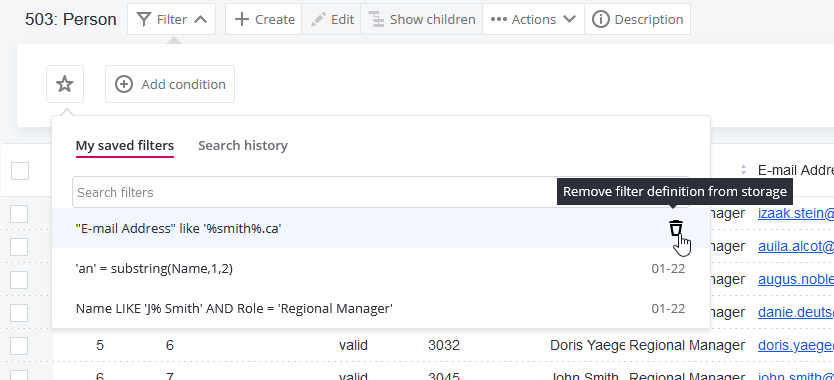
It is possible to save filters as well as view the 100 most recently applied filters by selecting the star icon and using the My Saved Filters and Search History options. Saved filters are displayed alphabetically while search history is displayed chronologically.
To save a filter:
-
Enter the filter parameters.
-
Select Save.
-
Optionally, enter a filter name. Once a filter is saved, it can no longer be renamed.
-
Select OK.
To delete your saved filter:
-
Hover over the saved entry.
-
Select the bin icon.
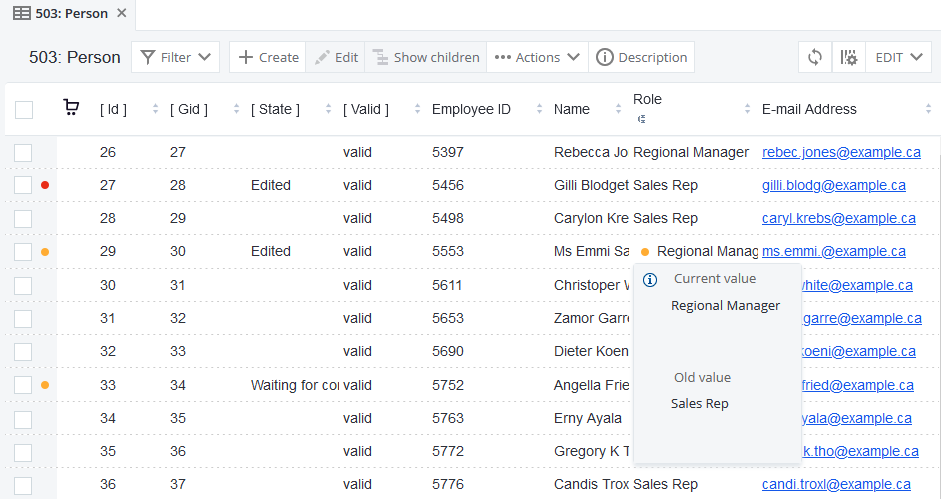
Viewing changes in data
To see the changes in an edited record, hover over the changed attributes to see the old (currently published) and the current (edited) value of the attribute.
Viewing record details
For fuller information about changes and other information about any given record, double-click the record.
The Record detail dialog opens in a separate tab and shows the following:
-
[ Id ] - Record ID.
-
[ State ] - Record edit state: new, edited, or deleted.
-
[ Workflow state ] - Record workflow state (depends on the configuration).
-
[ User ] - The user who made the latest change.
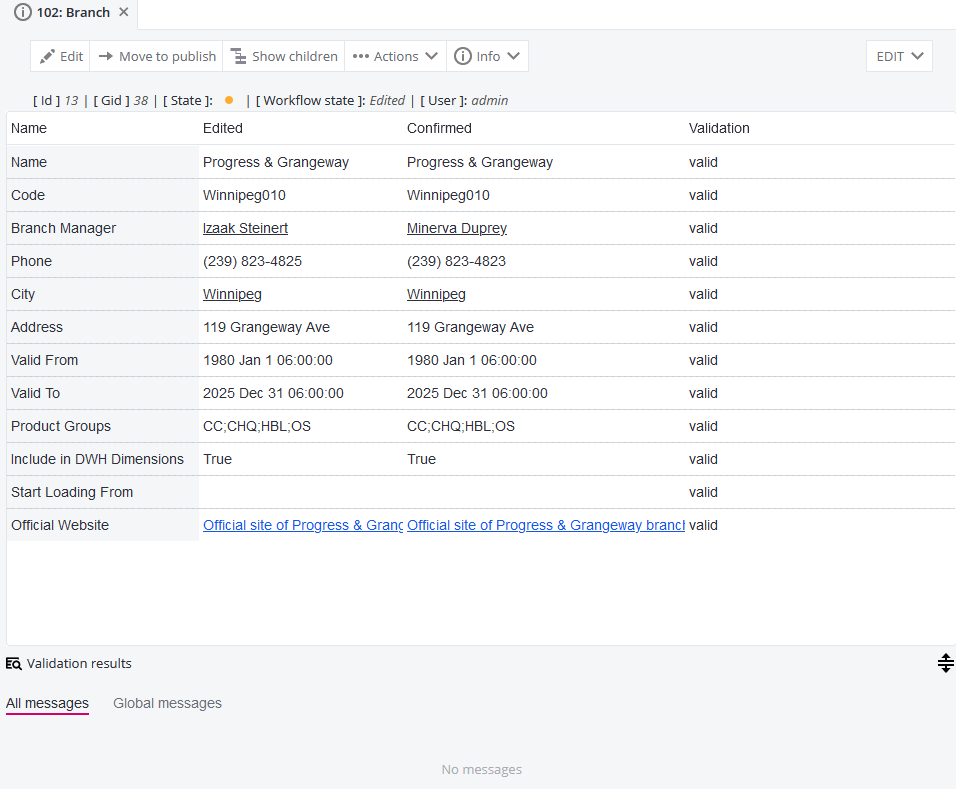
Table attributes are displayed in a table showing their Edited and Confirmed (currently published) values. The Validation column displays any problems with validation that might exist for a given attribute. The details are displayed in the panel under the table.
After you clicking the link-like attribute values, like Izaak Steinert and Winnipeg in the previous example, you can see the corresponding parent record details, which open in a new tab. Other records detail features are described in the following sections.
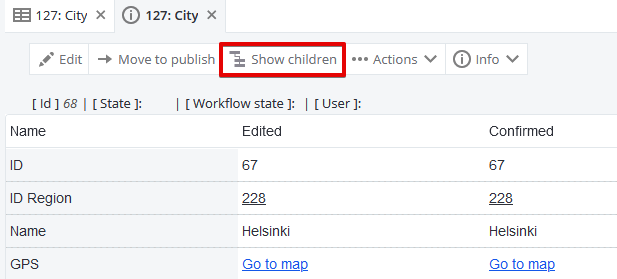
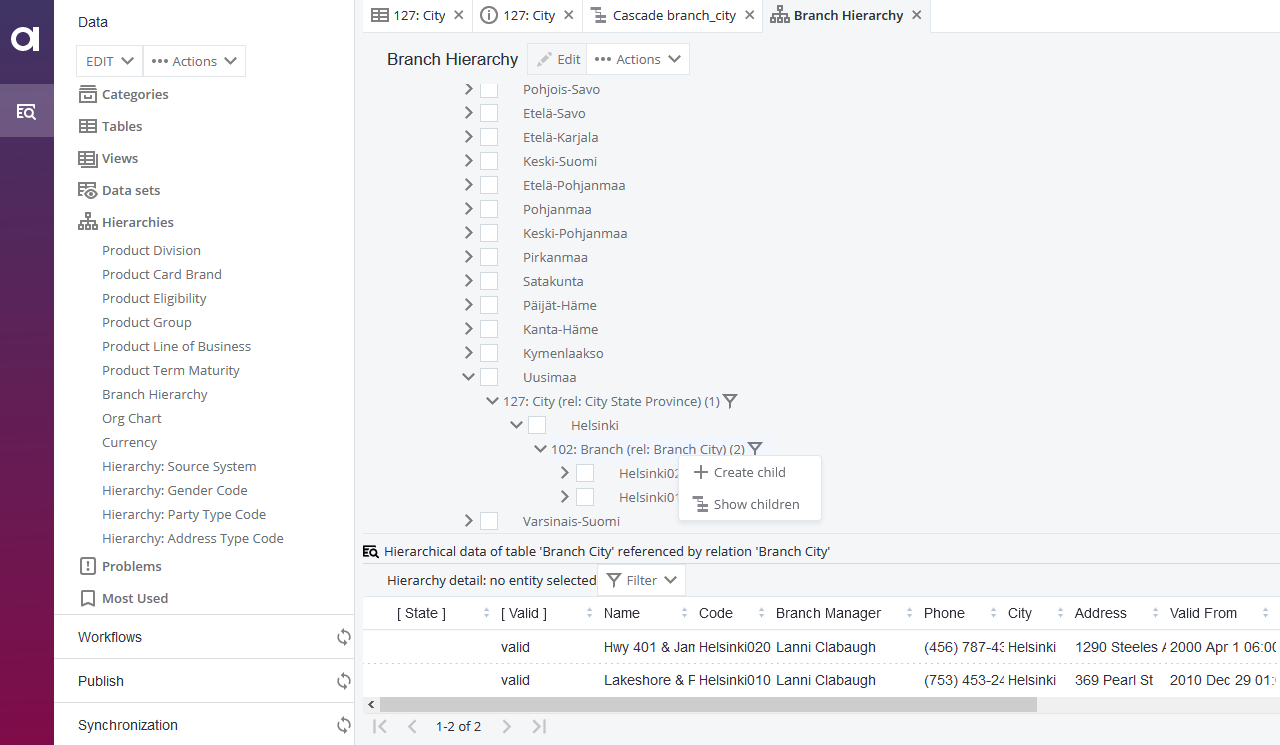
Show children
To view child records of a given record, select Show children from the toolbar of the record detail. Alternatively, navigate to Hierarchies in the left-hand toolbar and chose a hierarchy, expand the entities, and right-click to display Create child and Show children options.
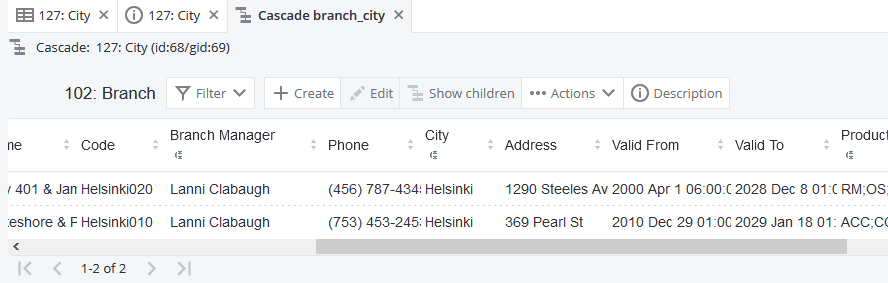
A cascade dialog opens. In the following example, the child table 102: Branch takes the value of the city (Helsinki) from the parent table 127: City.
Hierarchies
To view parent-child relationships in the data, navigate to Hierarchies in the left-hand toolbar. Here you can expand each entity to display the child records. Alternatively, right-click and select Show children. You can also create new child records for the chosen entity, to do this, right-click and select Create child.
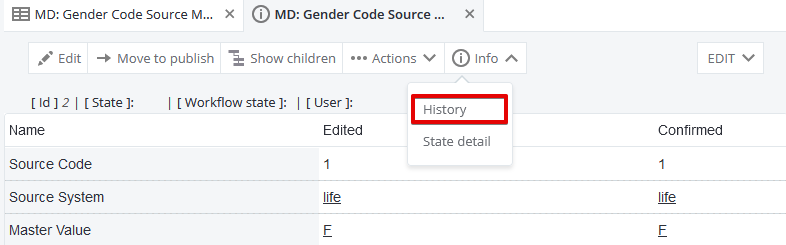
History
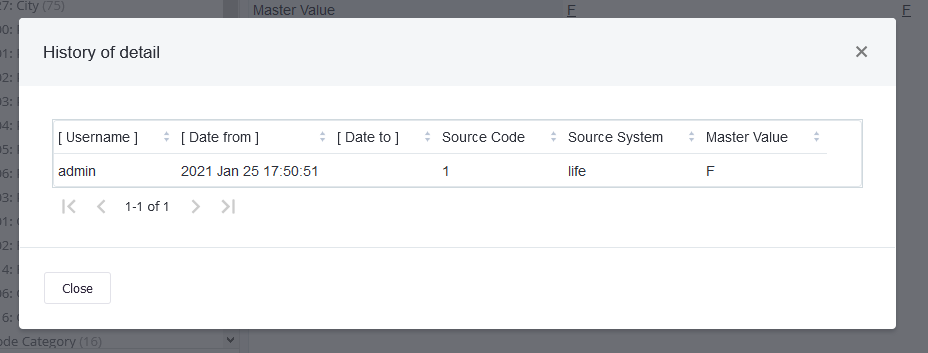
To view record history, select Info > History from the record detail toolbar.
The table that opens shows a different version of the record per line, specifying the validity period for each version (Date from and Date to default columns) as well as values of each attribute.
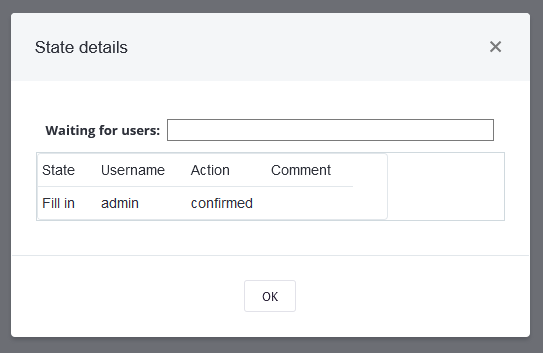
State detail
To view the history of the record workflow state, select Info > State detail from the record detail toolbar.
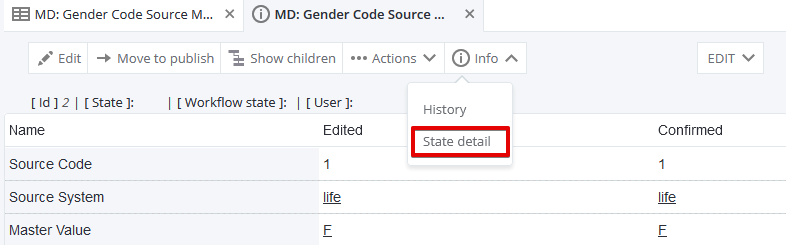
If a workflow for the given table and action (Create, Edit, Delete) is configured (see Moving Records Through RDM Workflows) and the record is edited, State details dialog show the history of workflow actions performed and the current pending action.
In the following example, the user admin moved the record in the workflow, and no additional action is required from other users before the record can be sent to publishing.
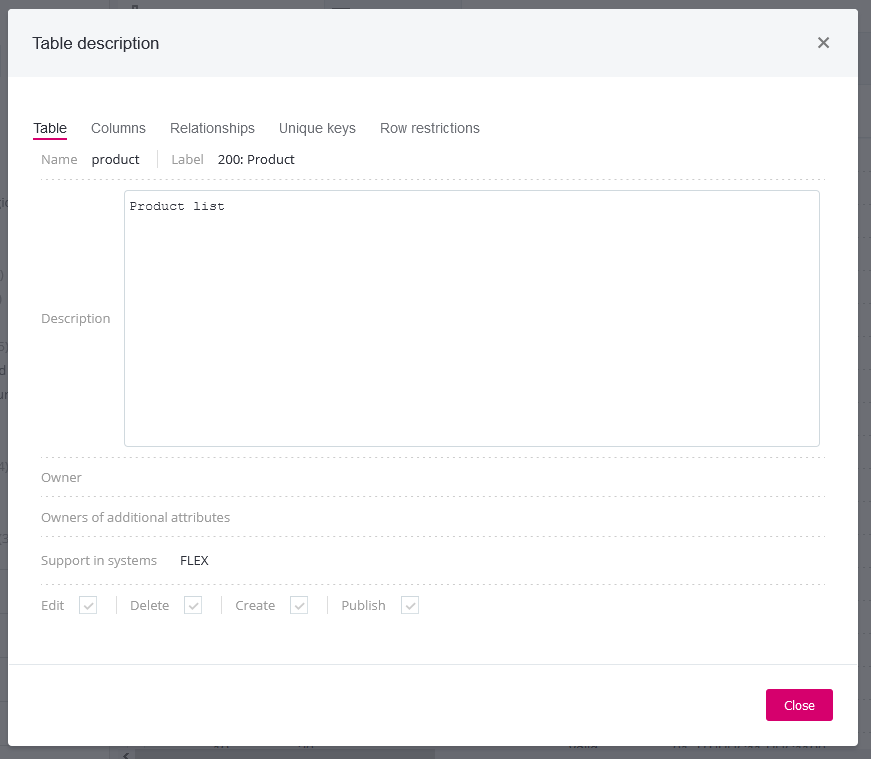
Viewing table details
To see detailed information about a table, select Description from the toolbar.

The Table description dialog opens, containing the following tabs:
- Table
-
Contains the Name and Label of the table, its Description, Owner, and Owner of additional attributes, Support in systems (connected systems), and your permissions for the given table (Edit, Delete, Create, Publish).
- Columns
-
Lists column metadata, such as Label, Name, and data type (default columns, like State, Valid, or Username are not displayed), Required and Read Only flags, as well as Validator parameters and Description.
- Relationships
-
Lists the relationships between tables in the data model, specifying the relationship Name, Parent table, Child table, the child Columns, and Parent Columns.
- Unique keys
-
Lists table unique keys and their constituent columns.
- Row restrictions
-
Displays any applied, user-defined SQL restrictions.
Configuring row-based restrictions is described in Setting Permissions in RDM.
- Business Dates
-
Displays the information about the business dates columns and infinity (minimum and maximum values) settings. See Versioning Records in RDM.
Was this page useful?