
Mapping Roles and Users
Mapping of users and roles is done in Keycloak.
To do this, go to the Keycloak Admin Console (http://localhost:8080/auth/) and follow these steps.
Creating roles
-
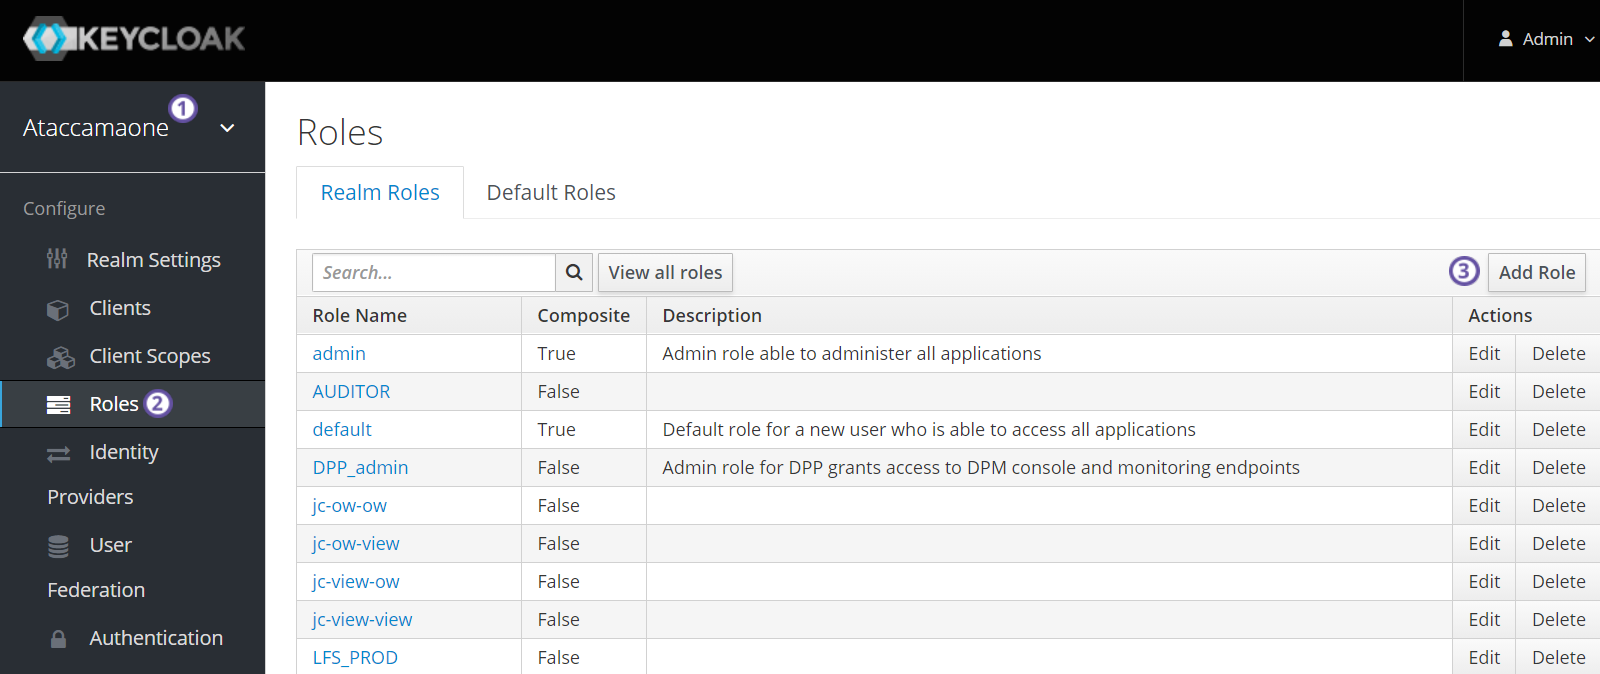
Make sure Ataccamaone realm is selected (the upper-left corner).
-
From the left navigation bar, select Roles.
-
On the Realm Roles tab, select Add Role:
-
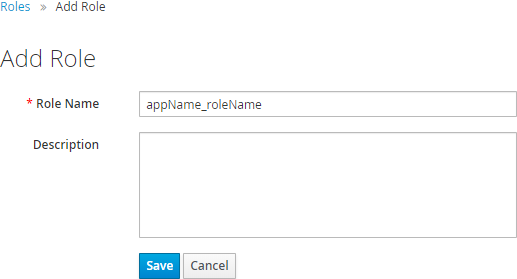
Fill in Role Name and Description.
Once a role is created in Keycloak, it is not possible to rename it. -
Select Save. The role appears in the roles list.
Editing roles
-
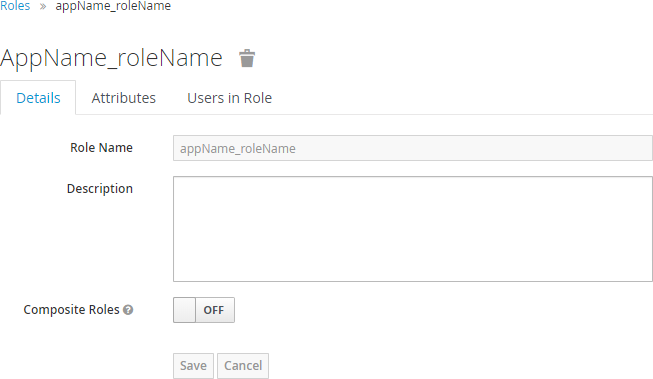
Navigate to the Roles >Realm Roles tab.
-
From the list of roles, select a role name to open the configuration. Here you can view and edit role Details and Attributes and view the list of Users in Role.
Removing roles
-
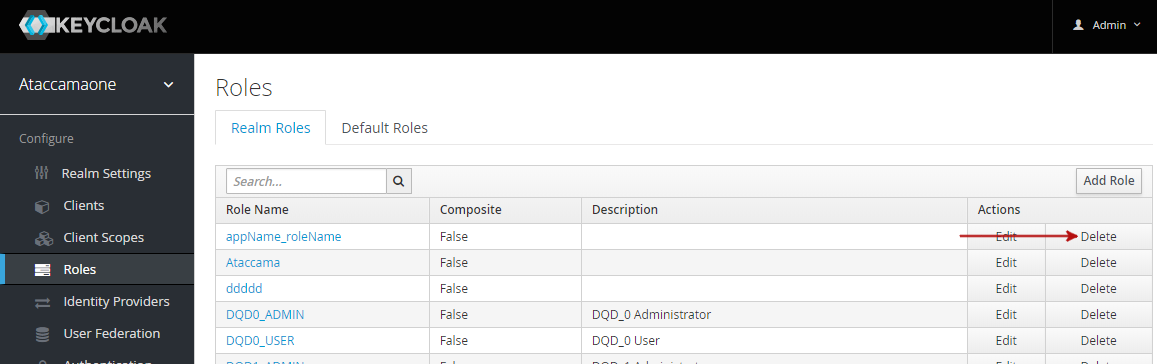
Navigate to the Roles > Realm Roles tab.
-
Find the role and select Delete, then confirm.
Role names prefixes
As Keycloak can simultaneously manage roles and users for web applications of multiple Ataccama products, roles in Keycloak are automatically mapped to a specific Ataccama web application using the role prefix defined for the application.
By default, the permission settings in RDM Web Application only look for roles with the prefix RDM_.
Roles without prefix are intended to be composite roles which comprise of prefixed roles.
For example, admin is a composition of MMM_admin, RDM_admin, and others.
For more information about composite roles, see Keycloak official documentation.
Creating role names with prefixes
The role name in Keycloak is created as <rolePrefix>_<roleName>, where:
-
rolePrefix: A role name prefix defined in theappNameelement in the web application configuration file.Make sure to start the role name with the <appName>_prefix. Otherwise, the application does not recognize the role. -
roleName: A role name defined in the web application.Use kebab-case (all lowercase with dashes as word separators), without diacritics.
Managing users in Keycloak
For more information and general use guidelines, see Keycloak official documentation.
| After each role change (whether manual or gained from group roles), all sessions of the particular user should be logged out. To do this, log in as administrator to Keycloak Admin Console, and on the Sessions tab for that user, select Log out all sessions. |
Creating users
To create users in Keycloak:
-
Log in to Keycloak Admin Console.
-
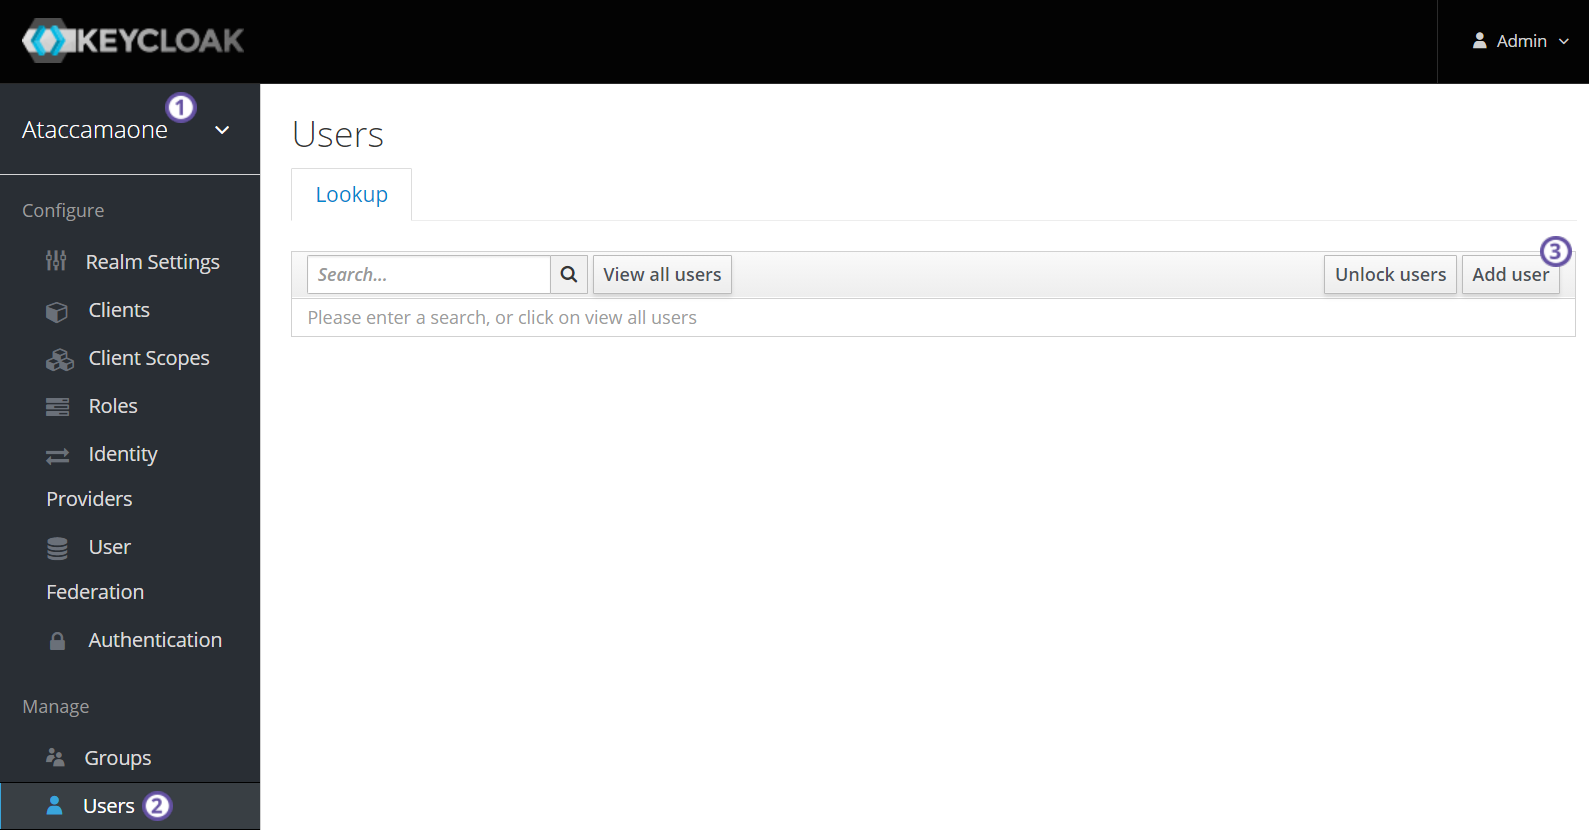
Make sure Ataccamaone realm is selected (the upper-left corner).
-
Navigate to the Users screen.
-
Select Add User.
-
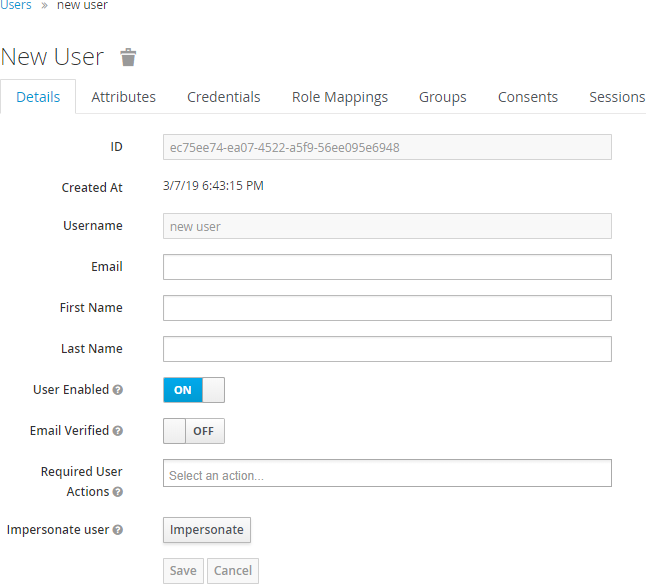
Fill in user details.
-
Select Save. The user now appears in the Users list.
Editing users
-
Log in to Keycloak Admin Console.
-
Make sure Ataccamaone realm is selected (the upper-left corner).
-
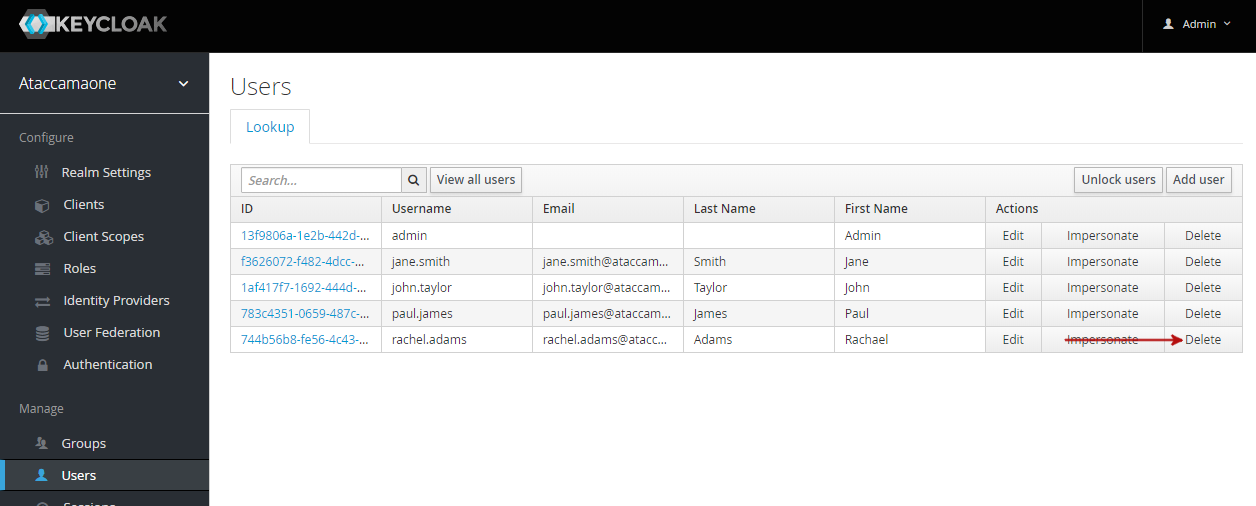
Navigate to the Users screen.
-
From the list of users, select the user ID to open the configuration page. Here you can view and edit user Details, Attributes, Credentials, and view user Groups and Role Mappings.
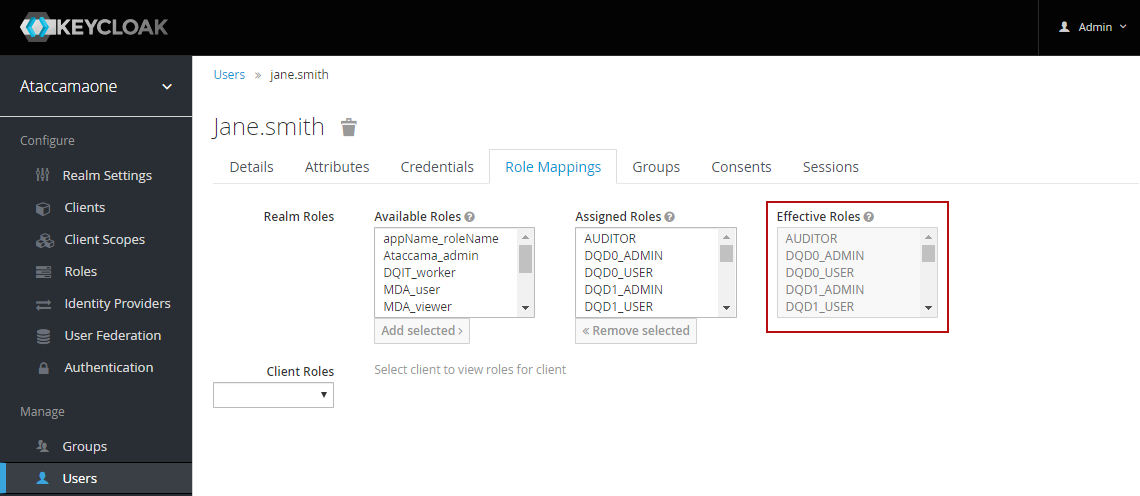
Mapping roles to users
To map roles to users in Keycloak:
-
Log in to Keycloak Admin Console.
-
Make sure Ataccamaone realm is selected (the upper-left corner).
-
Navigate to the Users screen.
-
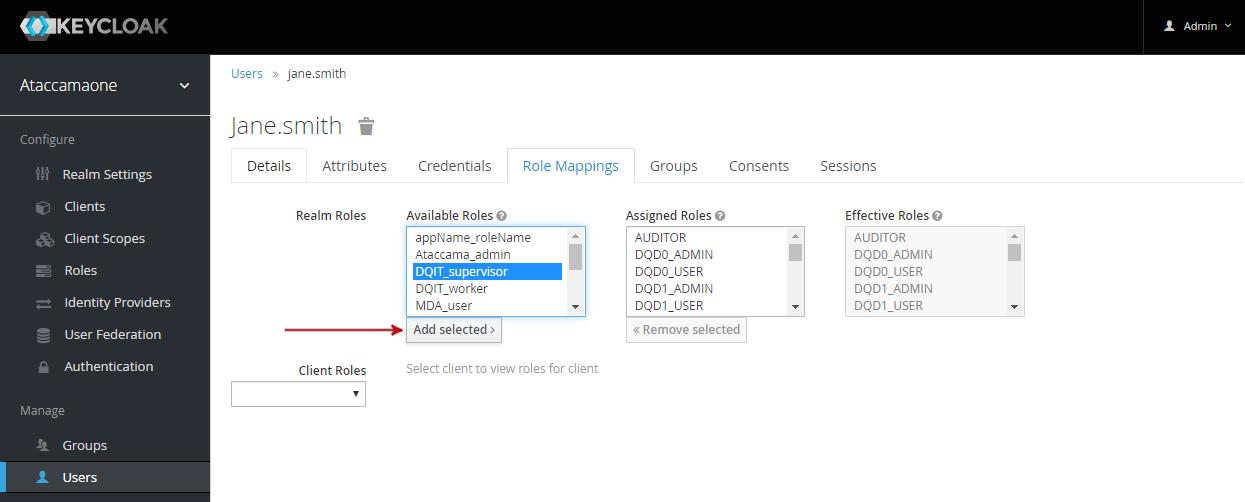
From the list of users, select the user ID to open the configuration.
-
On the Role Mappings tab, select from Available Roles and then Add selected.
To view all users with a particular role, open the role configuration and switch to the Users in Role tab.

To view all roles assigned to a user, open the user configuration page and switch to the Role Mappings tab.
See also web-application:setting-permissions.adoc for detailed information about RDM permissions.
Due to configuration changes in the Admin Console, it no longer allows access to the role RDM_admin but to the role defined in ataccama.one.rdm.system-group-name, which is where the access to the RDM web application Permissions tab is defined.
This means the role defined in this property has access to both the Permissions tab and Admin Console.
For access to the Permissions tab only, use the property ataccama.one.rdm.permissions-group-name.
|
Was this page useful?