
Configuring RDM Online Services
RDM can use web services to perform record validation.
Web services are situated in the Online Services node and can be easily created from ONE plans and components.
The resulting .online file and the underlying component, together with its constituent files (for example, lookups), are placed to the server with ONE.

Step 1 Configure the service
The first step to configuring RDM online services is creating a validation or enrichment service.
-
In ONE Desktop, expand the Online Services node.
-
Double-click the Validations or Enrichments node to open the configuration.
-
Double-click a new row to add a new validations or enrichment service. The Name of the validation or enrichment given in this section defines the name of the
.onlinefile. -
Double-click and select Edit element in the Services column to configure web services for online validation or enrichment.
-
Enter the Name in the appropriate column. The name given here is the name of the service and the component. The component has the name of the online file and the entered service name in the
.compfile. -
The columns labeled Server, Namespace, and Soap Version are generated automatically but can be altered.
-
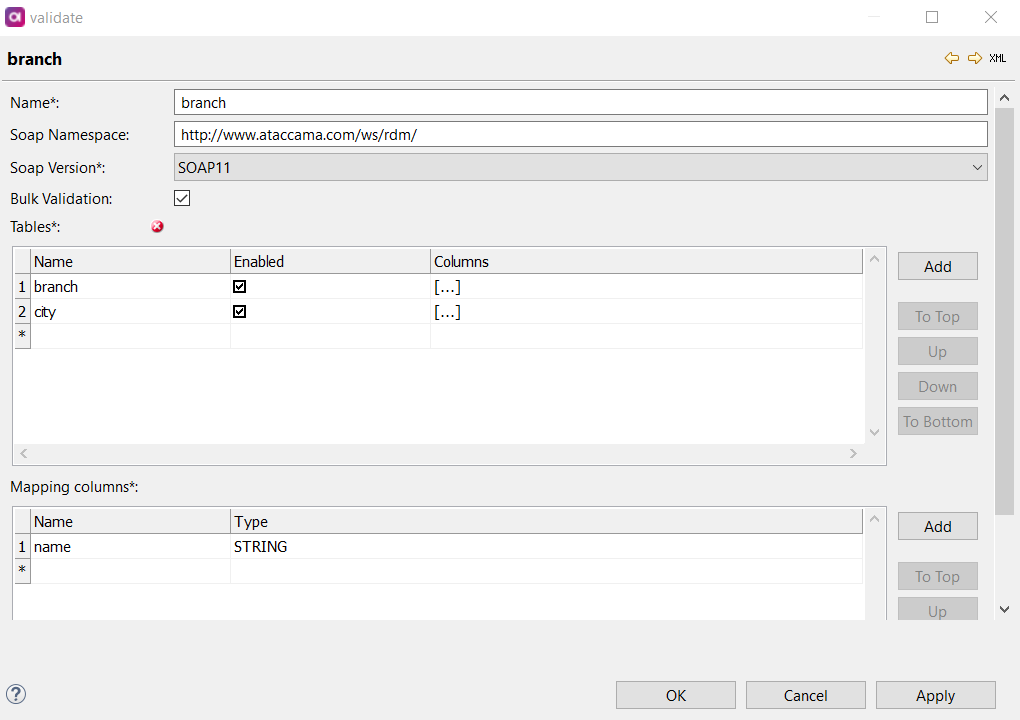
Double-click the row number to open the service configuration dialog.
For Validations, you can specify bulk validation by selecting the Bulk Validation option. Enabling this sends records in batches for validation; if it is not selected, records are sent one by one. -
In the Tables field, add the tables for validation. Press Ctrl+Space to see a list of available tables.
-
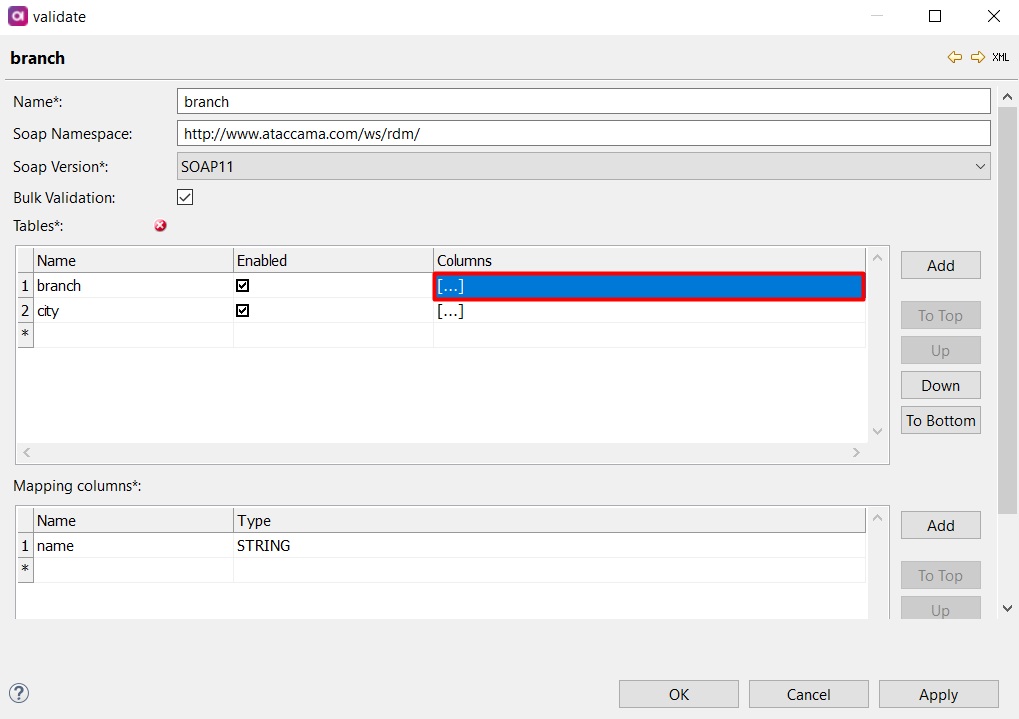
Double-click and select Edit element to open the column definition dialog.
Press Ctrl+Space to see a list of available columns.
For Validations, select Message if the column should show a validation message.
For Enrichments, check which columns are Input Columns (enrichment inputs) and which are Output Columns (the columns to be enriched). It is also possible to have one column as both the input and output column, although this is a less likely use case.
-
Repeat steps 8-0 for as many tables and columns as necessary.
-
Select Apply and Ok.
Mapping definition
If you are creating a service for only one table, you do not need to fill in the Mapping Columns or Mapped column attribute.
Mapping definition is only necessary if you are creating a service for more than one table. Mapping columns are columns that are used in the component for the validation logic definition.
| If two or more defined tables have columns with the same name, then mapping and all the options selected must be defined in the same way for all of them. |
-
In ONE Desktop, navigate to the service configuration dialog.
-
In the Mapping Columns field, double-click a new row to create a new mapping column.
-
Give your column a Name and define the column Type.
-
Repeat steps 2 and 3 for as many columns as you require.
-
Open the column definition dialog in the Tables field.
-
In the Mapped Column field, press Ctrl+Space to see a list of available mapping columns.
-
Select a mapping column and select Apply.
-
Repeat steps 5-7 for the defined tables and columns.
Step 2 Configure the component
Once you have completed step 1, it is necessary to define the logic for the component.
-
In ONE Desktop, right-click the Online Services node and select Generate All Plans and Components.
-
Navigate to Files > Plans > Components > Validators or Enrichers to find all automatically generated components.
-
Double-click a component file to open the logic definition.
-
The component should have four automatically generated steps: Integration Input in, Integration Output out, Alter Format in_mapping, and Alter Format out_mapping. For details, see Generated component steps.
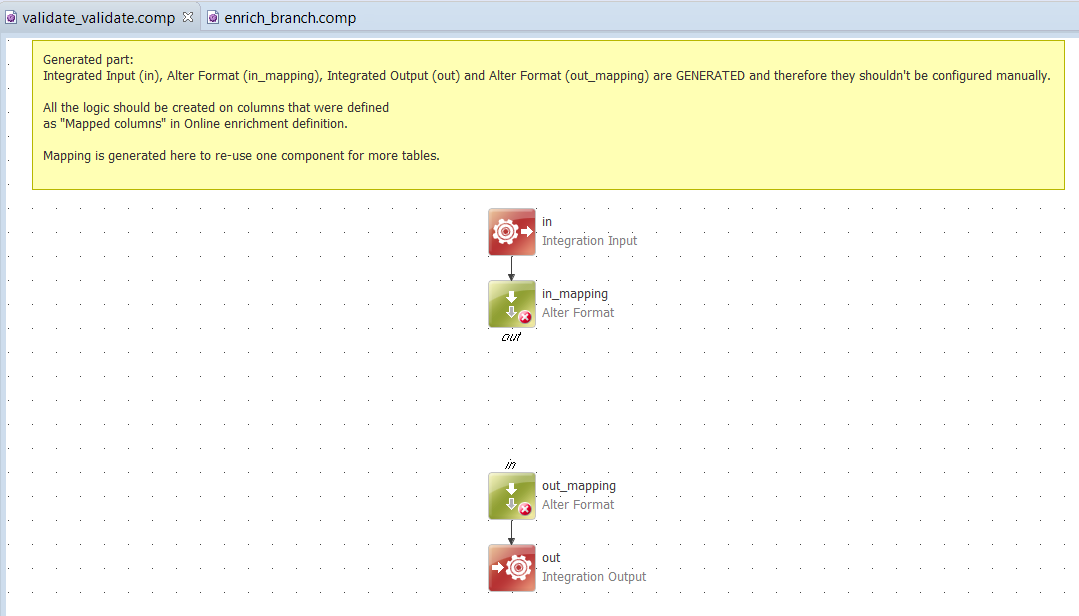
-
Place the custom, non-generated logic in between these steps.
-
On the main project file, right-click and select Generate to re-generate the entire project.
Generated component steps
This section describes the generated component steps in more detail.
-
Integration Input in:
-
Validations: Input for all table columns.
-
Enrichments: Input for all table columns that have the Input Column option selected.
-
-
Alter Format in_mapping:
-
Validations: For one table validations, all table columns (with the prefix validation) that have Message selected are added.
For multiple table validations, all table columns are removed as they are mapped to mapping columns but mapping columns (with the prefix validation) that have the Message option selected are added.
-
Enrichments: For single table enrichments, all table columns that have Output Column selected and that do not have Input Column selected are added.
For multiple table enrichments, all table columns that have Input Column selected are removed, but mapping columns that have Output Column selected but not Input Column are included.
-
-
Alter Format out_mapping:
-
Validations: For one table validations, all table columns are removed.
For multiple table validations, all mapping columns and mapping columns (with the prefix validation) that have Message selected are removed because they are mapped to each relevant table column (with the prefix validation).
-
Enrichments: For single table enrichments, all table columns that have Input Column selected and that do not have Output Column selected are removed.
For multiple table enrichments, all mapping columns are removed and those that have Output Column selected are mapped to each relevant table column.
-
-
Integration Input out:
-
This step contains every column that was not deleted.
-
| For further information about deploying online services, see Online Services Component. |
Was this page useful?