
Change Reference Data Table Structure
This document explains how to modify the structure of reference data tables. You can add, remove, or rename columns to adapt tables to your changing business requirements.
Define table structure
You can define and change the structure of your tables in the following ways:
Remember to Apply schema change whenever you make changes to the structure of a table.
Add columns
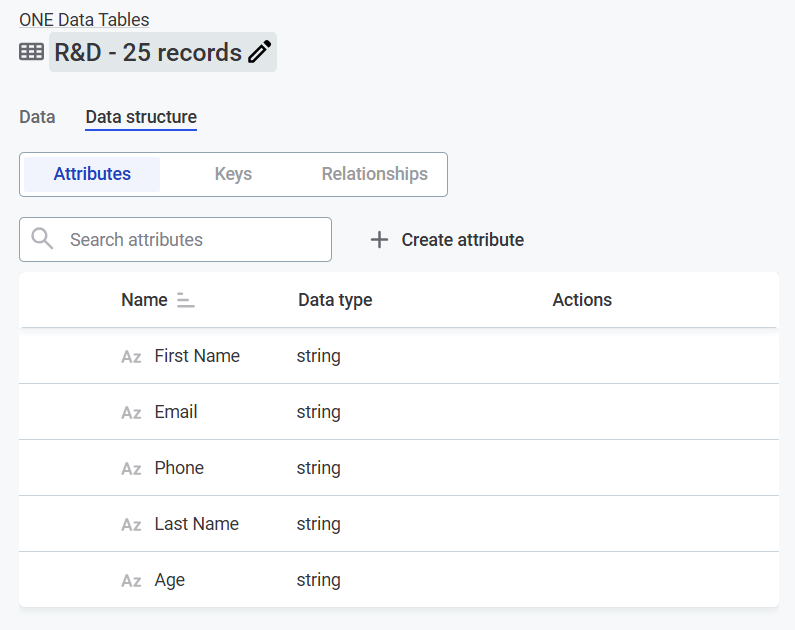
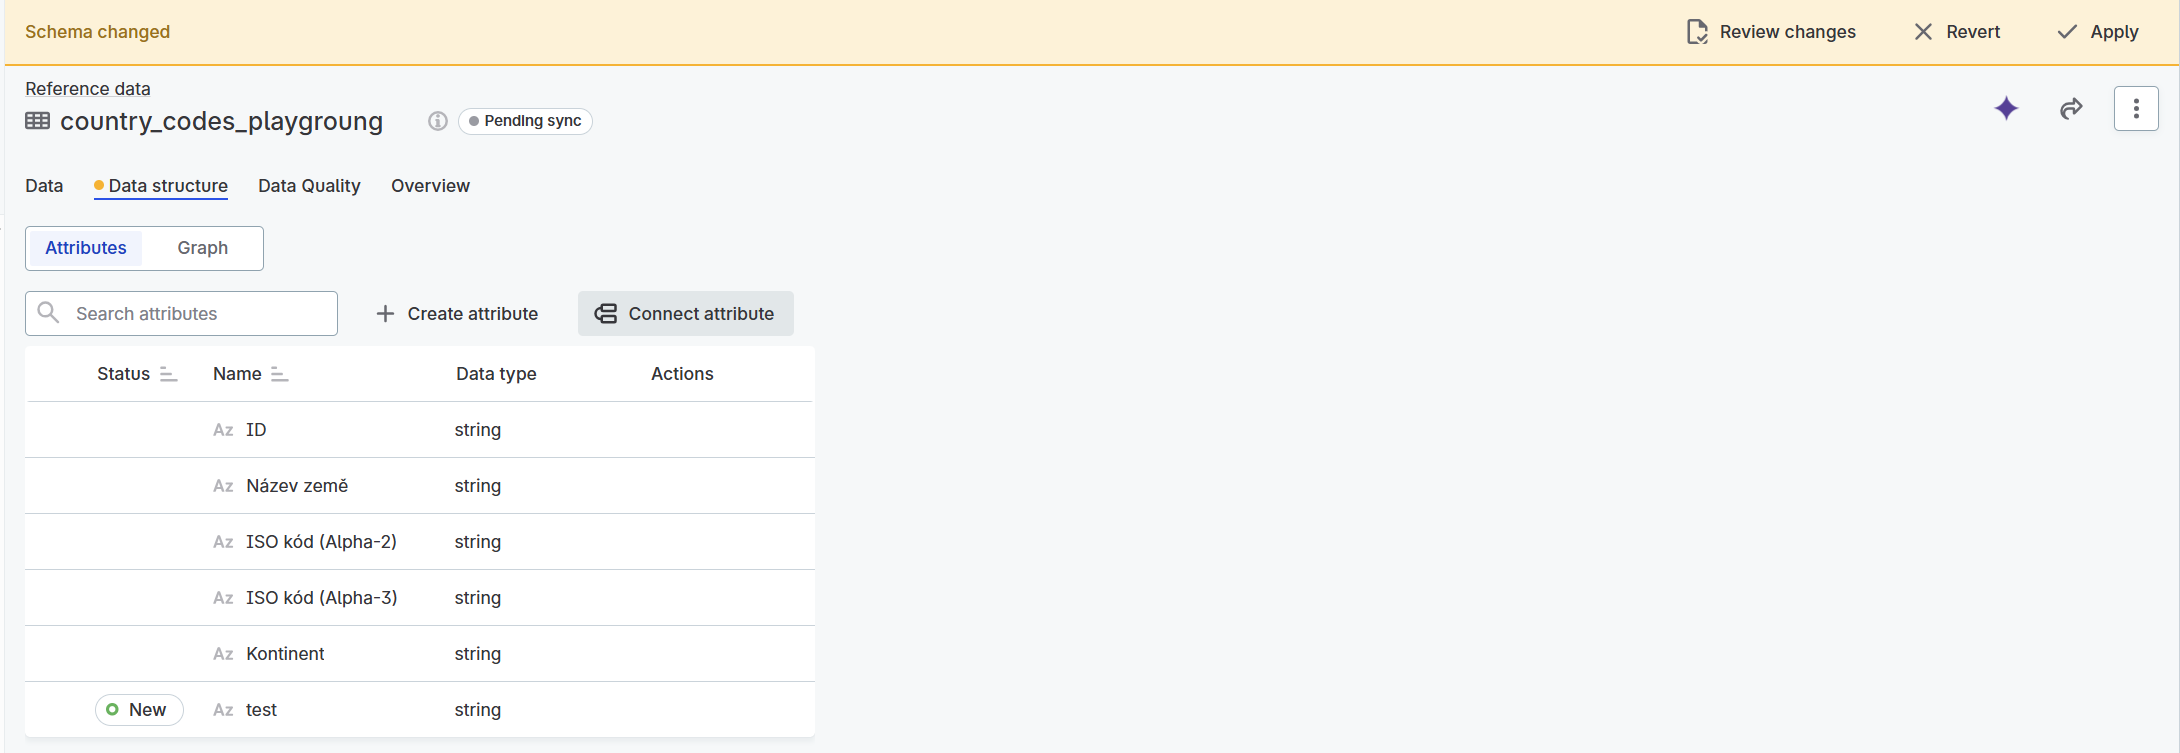
To add a column to a table, create an attribute on the Data structure tab.
-
Go to Manage reference data > Tables.
-
Select a table.
-
Go to the Data structure tab.
-
Select Create attribute.
-
Enter an Attribute name.
-
Choose a Data type from the list. The available data types are as follows:
-
String
-
Float
-
Integer
-
Long
-
Date
-
Date time
-
Boolean
-
-
Select Confirm.
-
The new attribute is added as a column to the table. It also appears in the list of attributes in Data structure.
Remove columns
To remove a column from a table, remove it from the attributes list on the Data structure tab.
| This action can’t be undone. |
-
Go to Manage reference data > Tables.
-
Select a table.
-
Go to the Data structure tab.
-
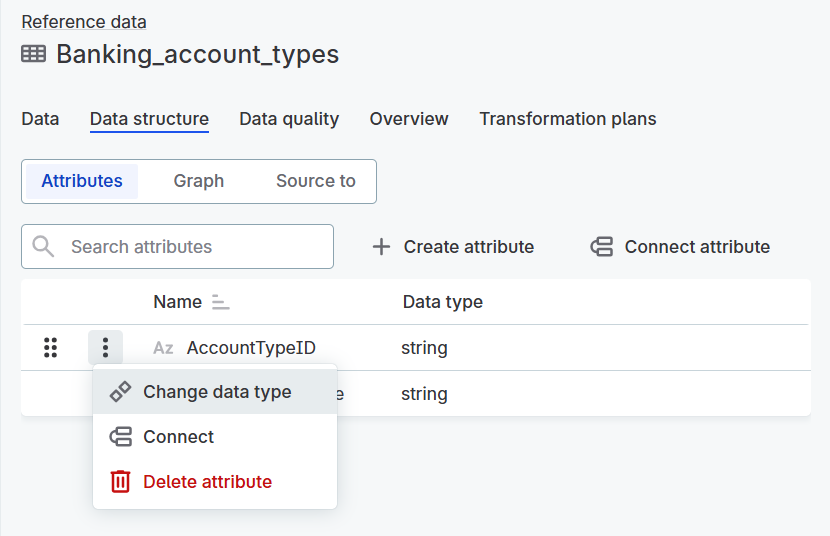
Point to the attribute you want to remove, and select the Delete option in the Actions column.
-
Select Delete to confirm the action.
-
This removes the column from the table.
Rename columns
To rename a column in a table, change its name in attributes list on the Data structure tab.
-
Go to Manage reference data > Tables.
-
Select a table.
-
Go to the Data structure tab.
-
Point to the attribute you want to rename, and select its name in the Name column.
-
Enter a new name and press Enter.
-
This renames the column.
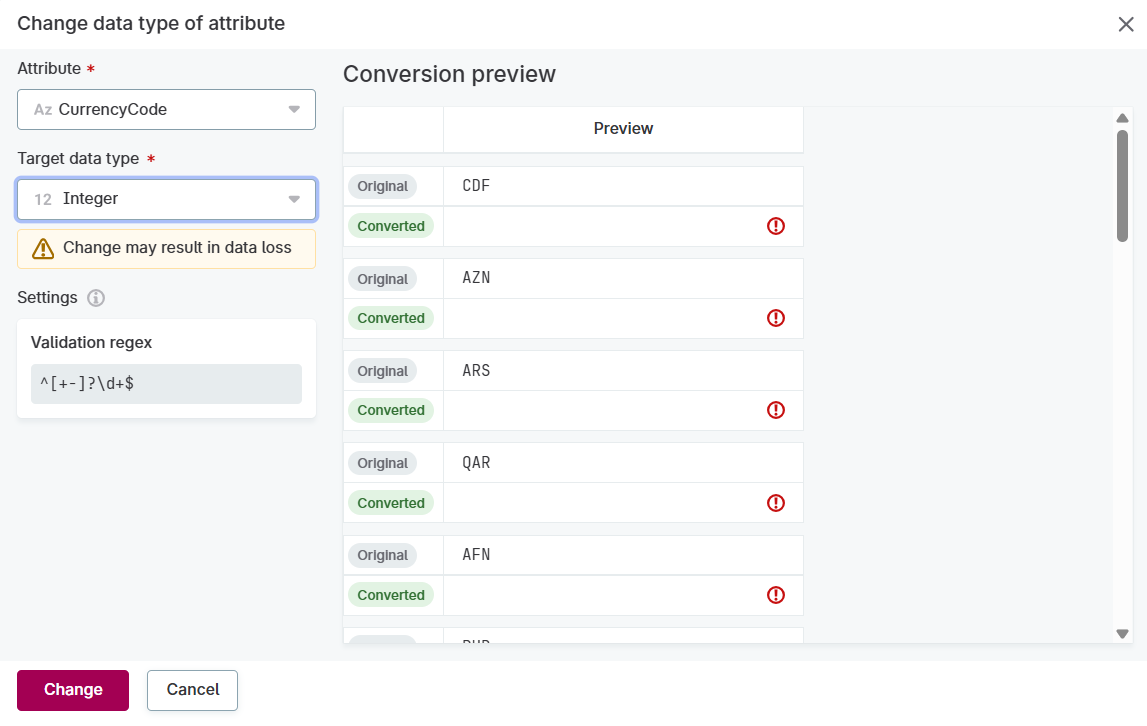
Change data types
You can change the data type of existing attributes. The conversion preview shows how existing data will be converted before you apply the change.
|
Use AI to suggest the most appropriate target data type by analyzing a sample of up to 50 records. Suggestions are informational only and you must explicitly confirm any conversion. |
Perform data type conversions manually via the Data Structure tab. They cannot be applied automatically during data import.
| Data that cannot be converted to the new data type is permanently deleted. Review the conversion preview carefully before confirming the change. |
-
Go to Manage reference data > Tables.
-
Select a table.
-
Go to the Data structure tab.
-
From the three dots menu of an attribute, select Change Data type.
-
In the Change attribute Data type dialog, select a Target Data type from the list.
To help you make a decision more quickly, look out for AI-suggested data types based on the analysis of your data.
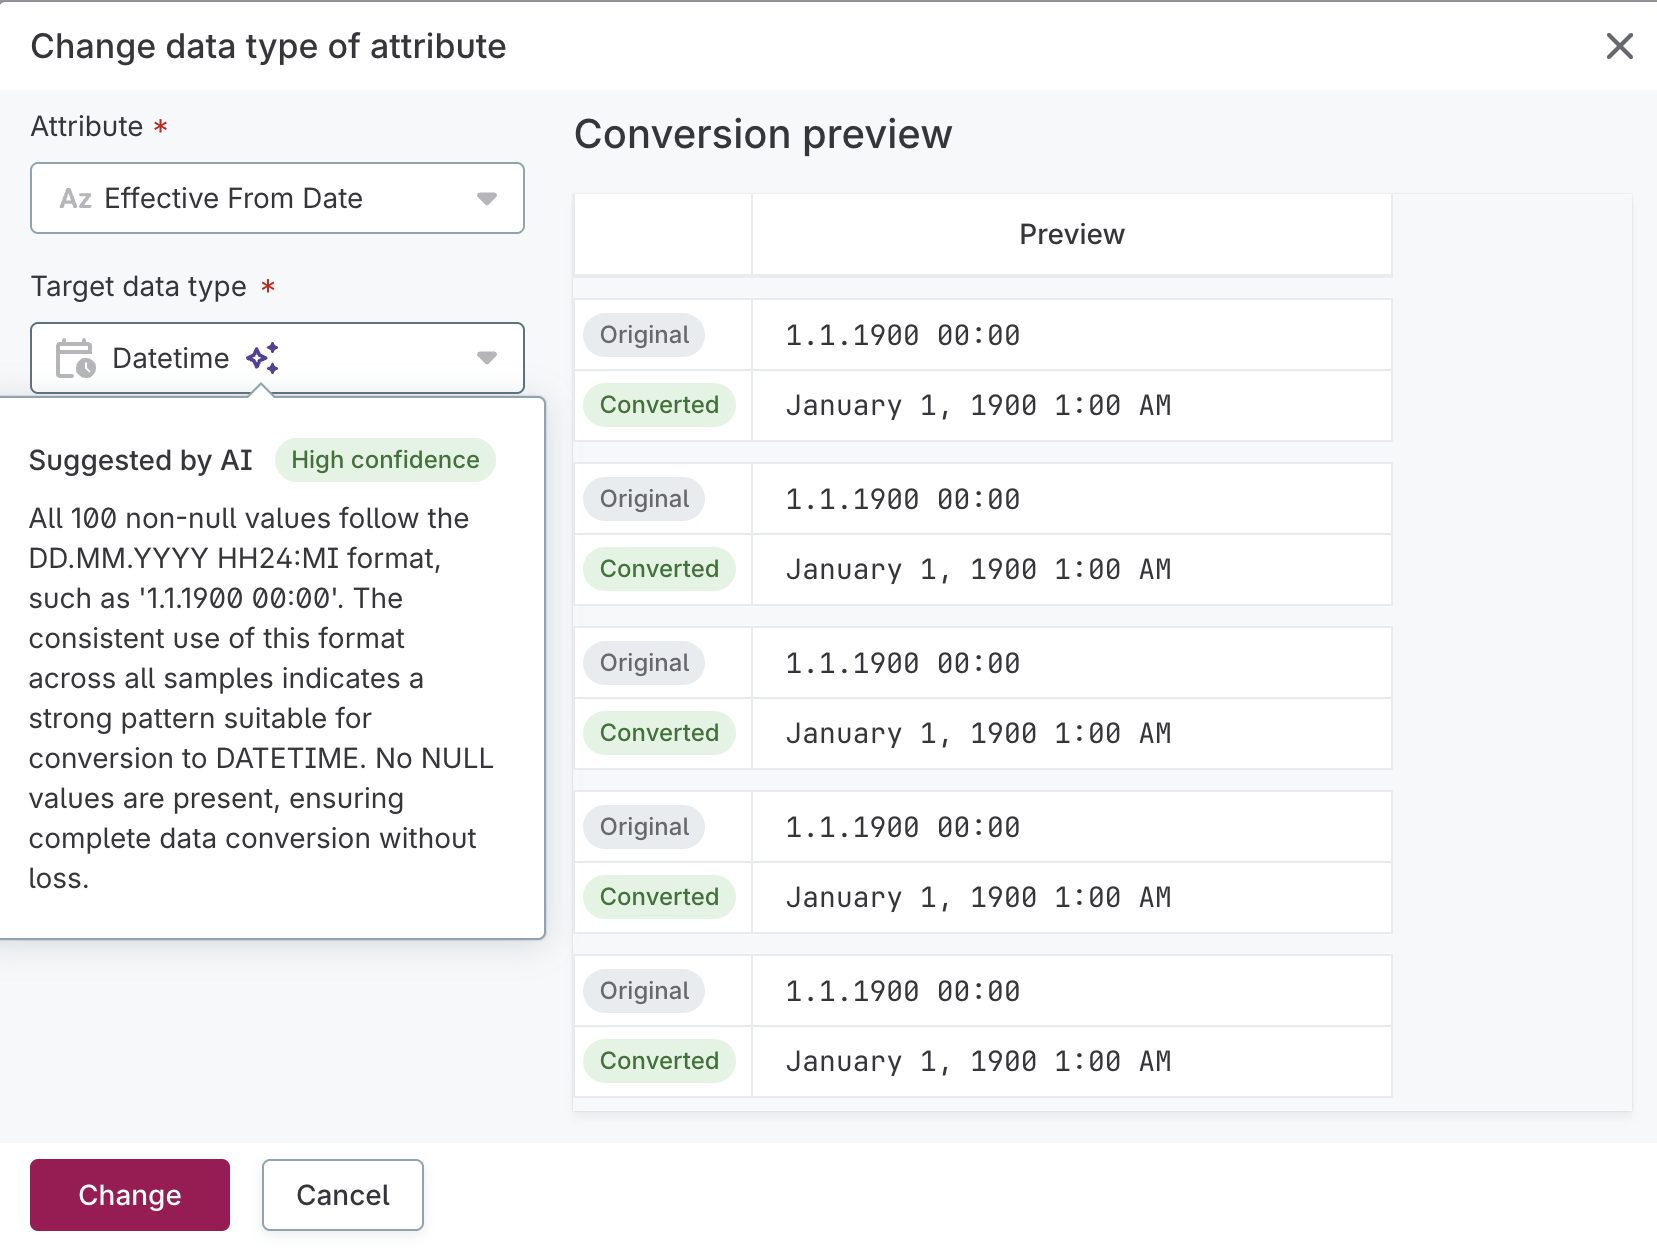
For Date time conversions:
-
ONE expects ISO 8601 format by default.
-
If your data uses a different format, ONE attempts to detect the pattern automatically.
-
You can specify a custom PostgreSQL-compatible format pattern (for example,
DD.MM.YYYY HH24:MI).
-
-
Review the Conversion preview on the right side of the dialog to compare the original values with their converted counterparts.
-
Review the Validation regex constraint if applicable.
This regular expression shows the pattern that values must match for the conversion.
-
Once you’re finished, select Change to apply the data type change.
To discard your changes, select Cancel.
-
The attribute data type is changed and existing data is converted.
Apply schema change
To apply a schema change:
-
On the Data structure tab of a changed table, you have the following options:
-
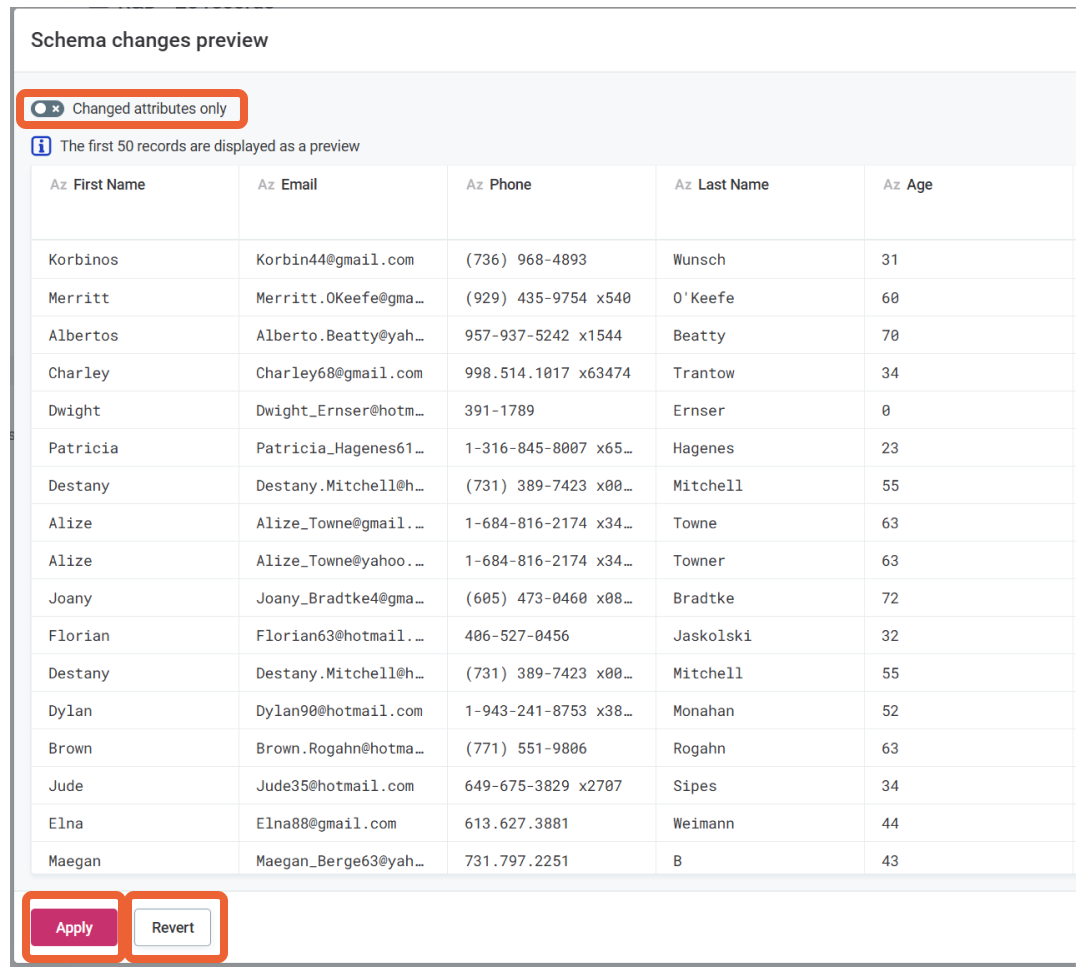
Review changes: Opens the Changes preview dialog where you can review the changes before applying them.
Only the first 50 records are displayed as a preview. To only preview changed attributes, enable the Changed attributes only toggle. From this dialog, you can select Apply to accept the changes or Revert to discard them.
-
Apply: Accepts all changes without previewing.
-
Revert: Discards all changes.
-
Changes to reference data table structure will be reflected in published catalog items after applying and publishing the schema change. For more information about how reference data is used in Catalog, see Work with Published Reference Data.
Next steps
-
Publish data: Publish Changes to update Catalog.
-
Update validation rules: Ensure data quality rules account for structural changes.
-
Test integrations: Verify downstream systems handle structure changes correctly.
Was this page useful?