
Configuring an Advanced Matching Step
Use the Advanced Matching Step if you need more than one matching operation (for example, matching and deduplication of unique People vs unique Households).
To achieve this you have two options:
-
Use default matching step, and an additional matching configuration.
-
Use multiple custom matching steps.
Add an Advanced Matching Step
-
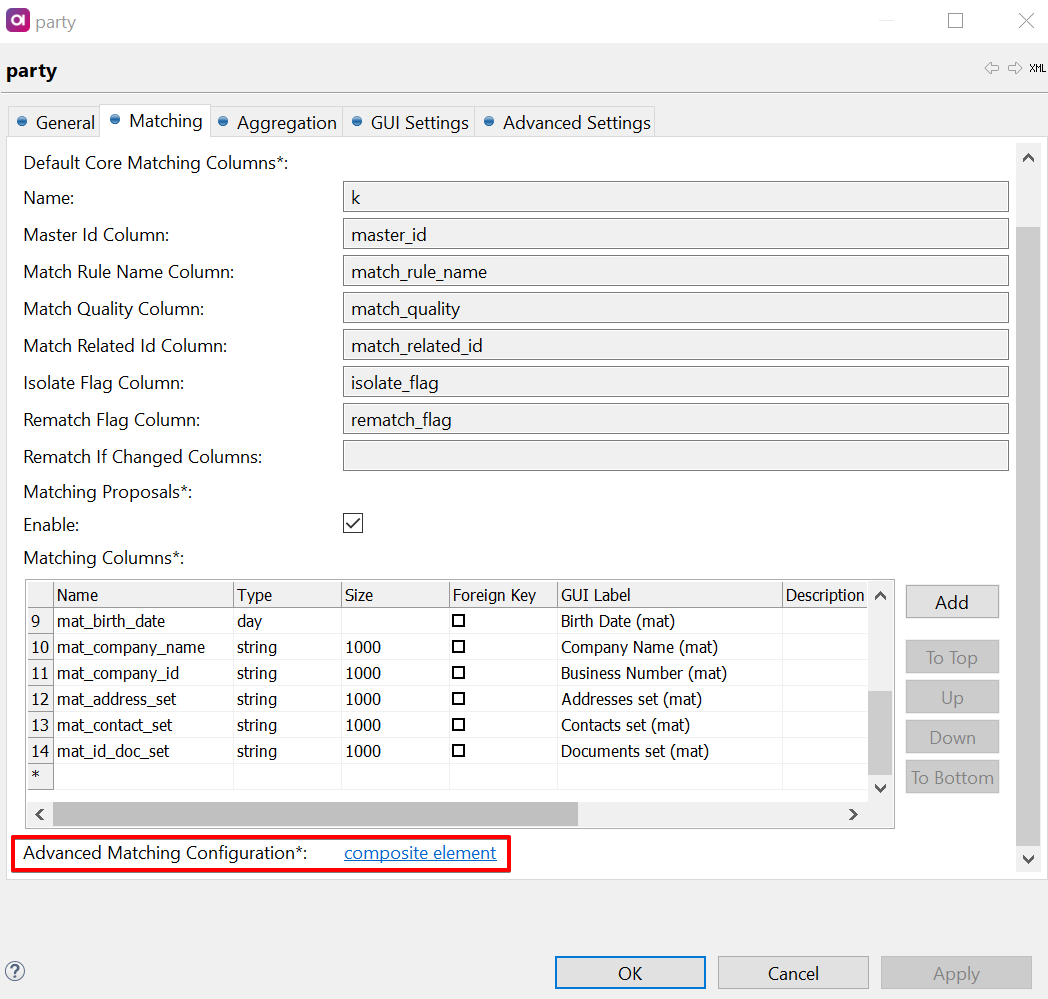
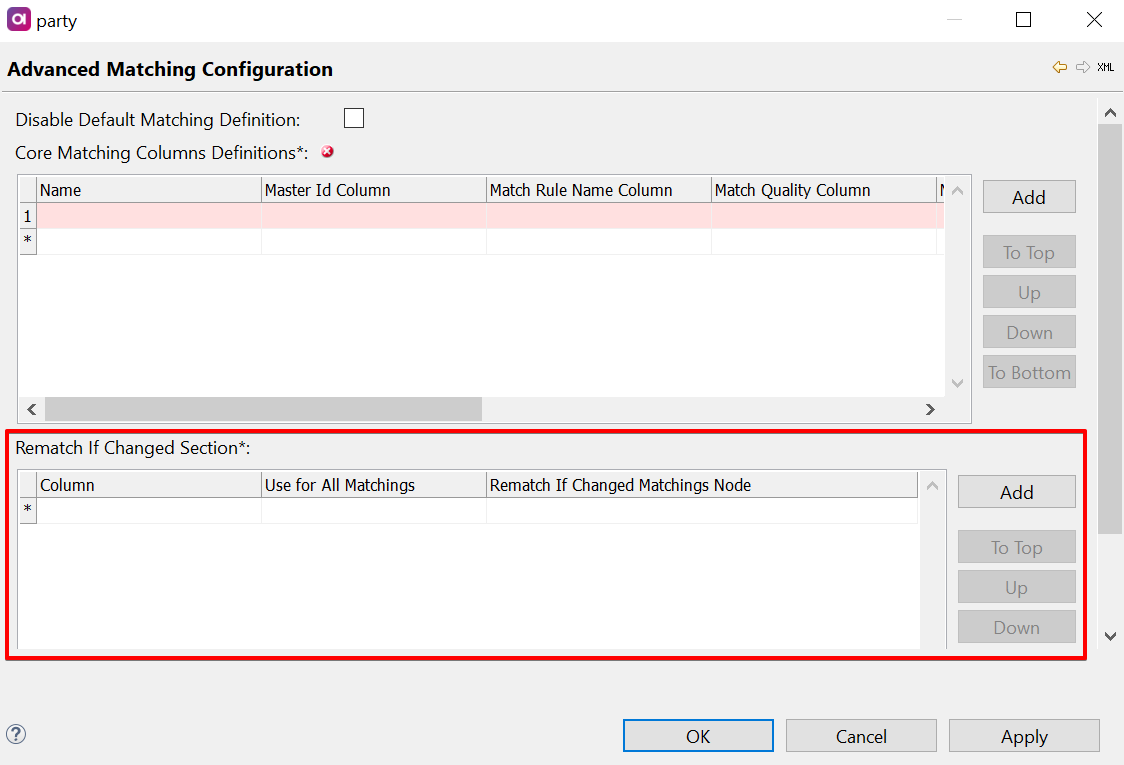
In Logical Model > Instance Layer, select the required entity. Navigate to the Matching tab and select Advanced Matching Configuration.
-
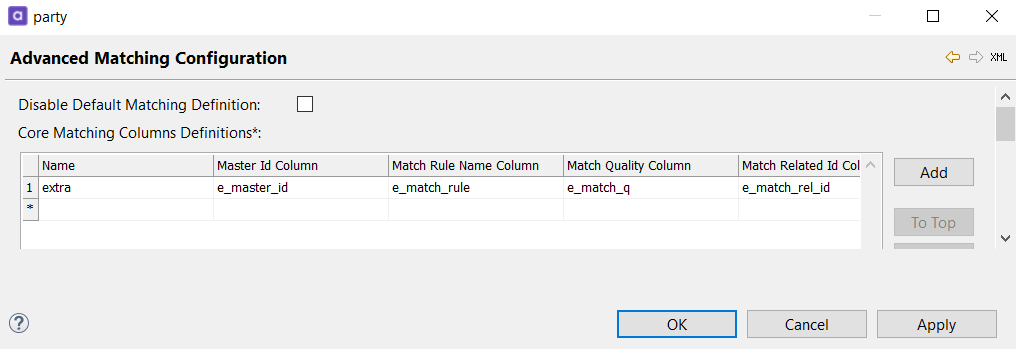
Name all columns, and apply changes.
-
Name: Name of the matching step.
-
Master Id Column: The column where the id for matching groups will be stored.
-
Match Rule Name Column: The column where the name of the first successful matching rule will be stored.
-
Match Quality Column: The column where the strength of the match will be stored (a number between 0 and 1, where 0 is a perfect match).
-
Match Related Id Column: The column where the id of the record to which another record was matched to will be stored.
-
Isolate Flag Column: The column in which the Boolean value for isolate will be stored. Records with isolate flag set to true do not take part in matching.
-
Rematch Flag Column: The column in which the Boolean value for rematch will be stored. Records with rematch flag set to true will be included in the next rematch operation.
-
Proposals (Boolean): If enabled, the MDM engine will generate another integration output in the matching plan to accept the pairs of proposed records (based on the defined rules).
-
Rematch If Changed Columns: See Define Rematch Conditions.
-
|
If you want to use multiple custom matching steps you will need to first disable default matching by checking the Disable Default Matching Definition option in Advanced Matching Configuration. 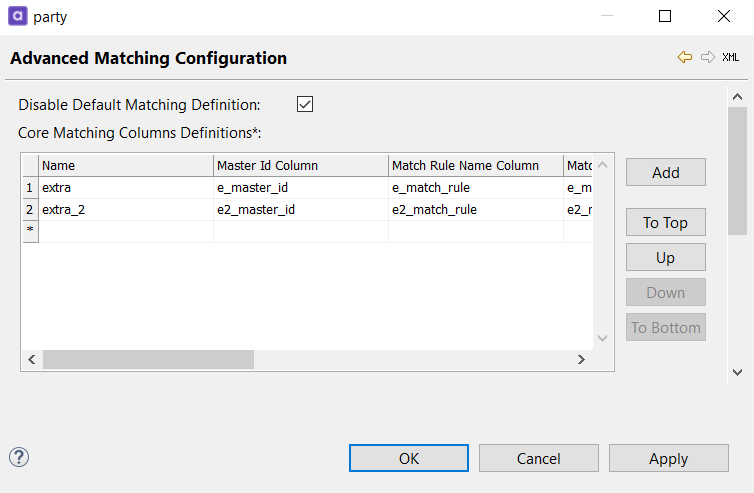
|
Define Rematch Conditions
Every matching step has optional configuration of columns. If any attributes in the column changes, the rematch flag for that matching will be set to true.
For example, if you have a golden entity 'party' and silver entity 'address' (that is, matching of address is done by party_master_id), a change of master_id on party will not be propagated to the relevant address records.
To ensure it is, you need to define rematch conditions for each new matching step (rematch conditions are predefined for the default matching step).
Only columns of origin source, clean, copy_source and copy_clean can be used to trigger a rematch.
|
Configuration of rematch conditions can be done in two ways, either within each individual advanced matching step configuration (Core Matching Columns Definition), or by defining columns in which changes will trigger rematch in all/selected matching steps (Rematch if Changed Section).
Define rematch columns for an entity within the individual matching step configuration
-
Select the entity, and in the Matching tab go to Advanced Matching Configuration.
-
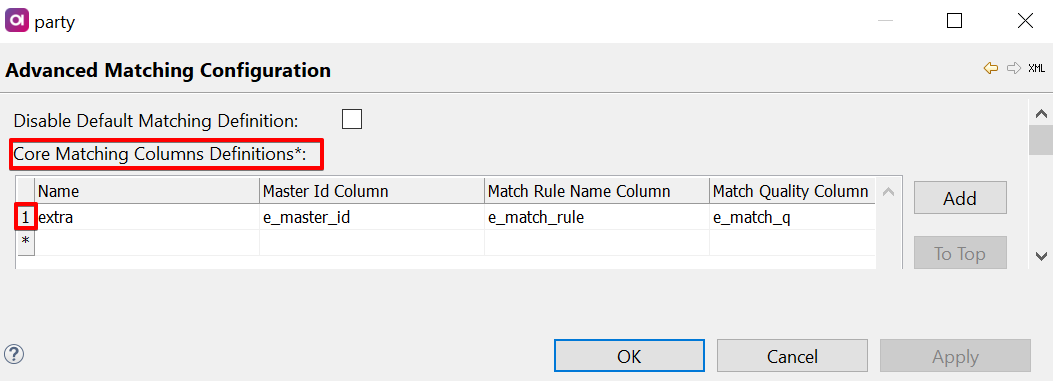
In the Core Matching Columns Definitions section, open the advanced matching step properties by double clicking on the number next to the name of the desired step.
-
Select list element next to Rematch if Changed Columns.
-
Define the name of the columns in which a change should trigger the rematch process.
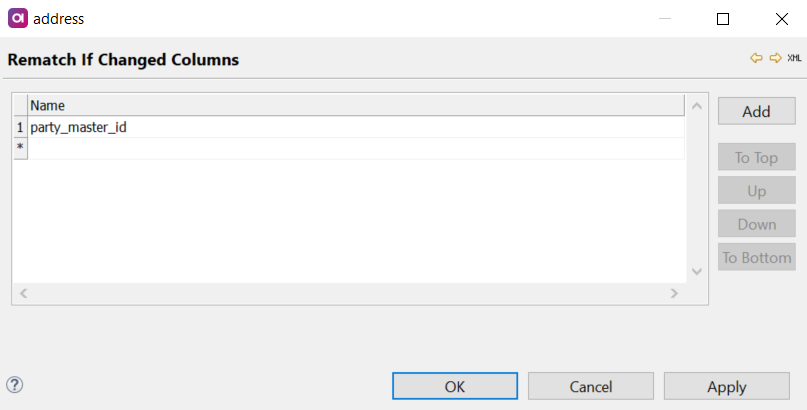
| You cannot define rematch if changed columns for the entity party in this way. To define rematch columns for party, use Rematch If Changed section (see below). |
Define columns to be used to trigger rematch for more than one matching step
-
Select the entity, and in the Matching tab go to Advanced Matching Configuration.
-
In the Rematch If Changed Section, define the desired columns.
-
To use the columns for all configured matching steps, select Use for All Matchings (Boolean).
-
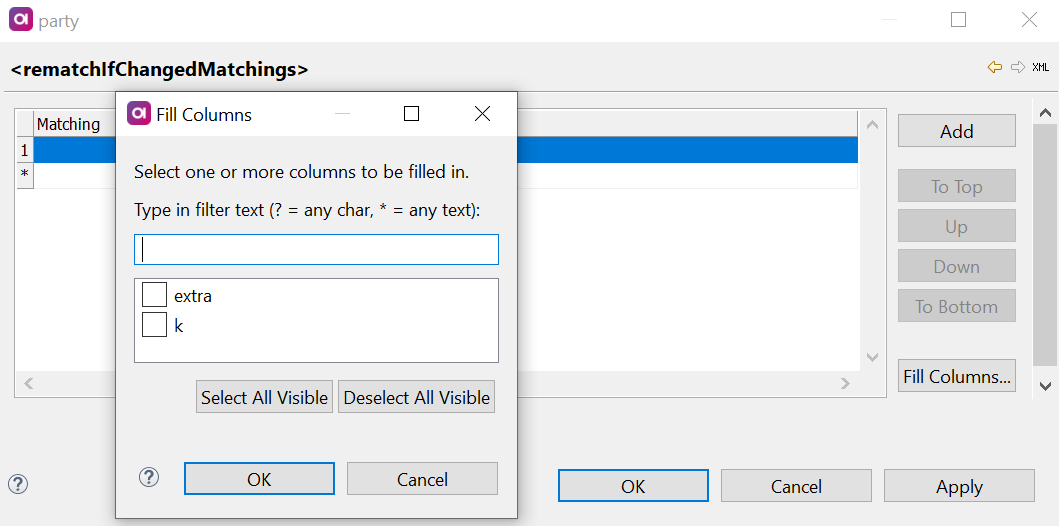
To use the columns for selected matching steps, expand the Rematch If Changed Matchings Node element by double-clicking, and select the desired matching steps.
Here you can also define additional rematch conditions for default matching.
For example, default matching on address entity has party_master_id predefined in Rematch If Changed Columns in the entity matching tab.
If you would like to add additional columns in which changes would trigger rematching of the records, select Advanced Matching Configuration, and in Rematch If Changed Section, define the desired columns and select the repository 'k' in Rematch If Changed Matchings Node.
|
Apply an Advanced Matching Step to an Entity
-
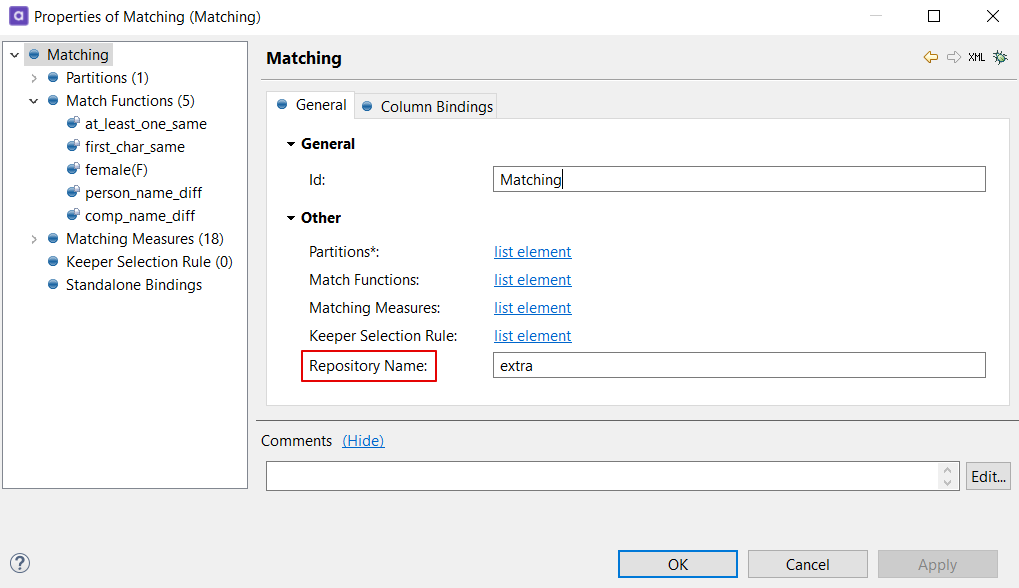
Select the matching step in the matching plan for that entity, and enter a Repository Name. For custom matching steps, the Repository Name should match the name defined in the Advanced Matching Configuration. For the default matching step, Repository Name should always remain as 'k'.
-
Select the golden entity on the master layer and go to Advanced Settings. Set the unique identifier for the group by defining Custom Grouping Column. For the default matching step this will be
master_id, for custom matching configurations this will be whatever you defined in Master Id Column in the Advanced Matching Configuration.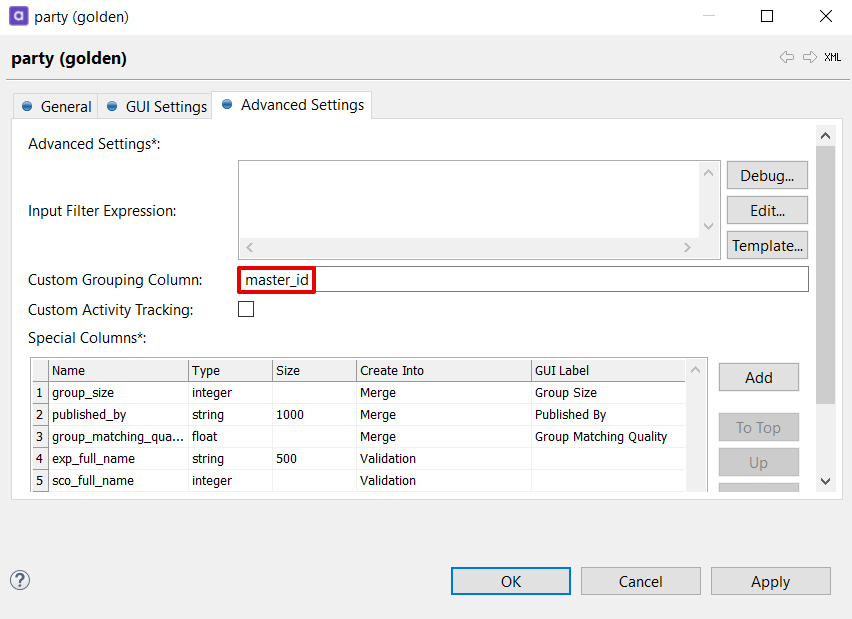
Was this page useful?