Configuring a Custom Action
A custom action plan in MDM allows you to call on a ONE plan to prepare data for a custom action or process on any entities of your choice.
Define the inputs through the custom action configuration and the process and outputs within your ONE plan.
This is useful, for example, when exporting record details with additional information (such as related entities and record description) and formatting (such as client template and logo) to PDF.
Configuring custom actions
Custom actions are available on both master and instance layer entities.
-
Open the MDM project in ONE Desktop and navigate to the desired entity.
-
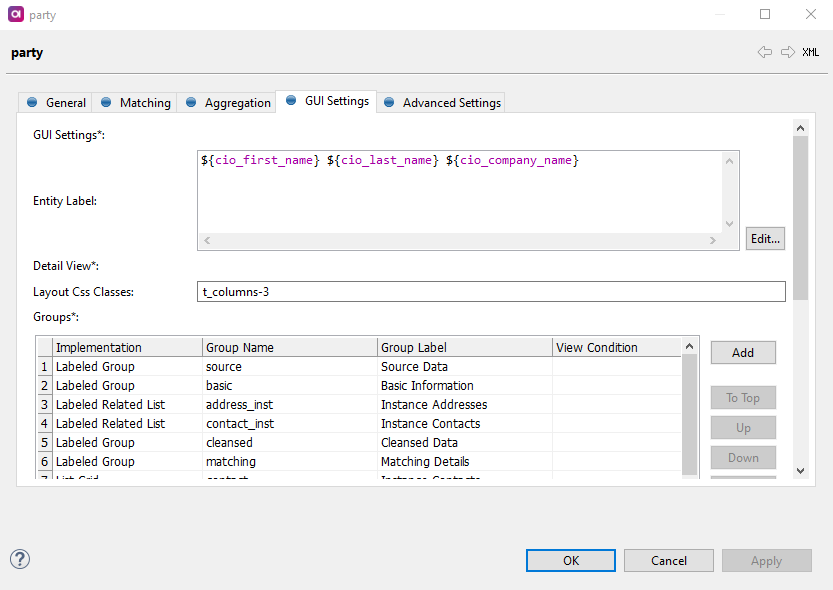
Open the entity settings and then GUI Settings.
-
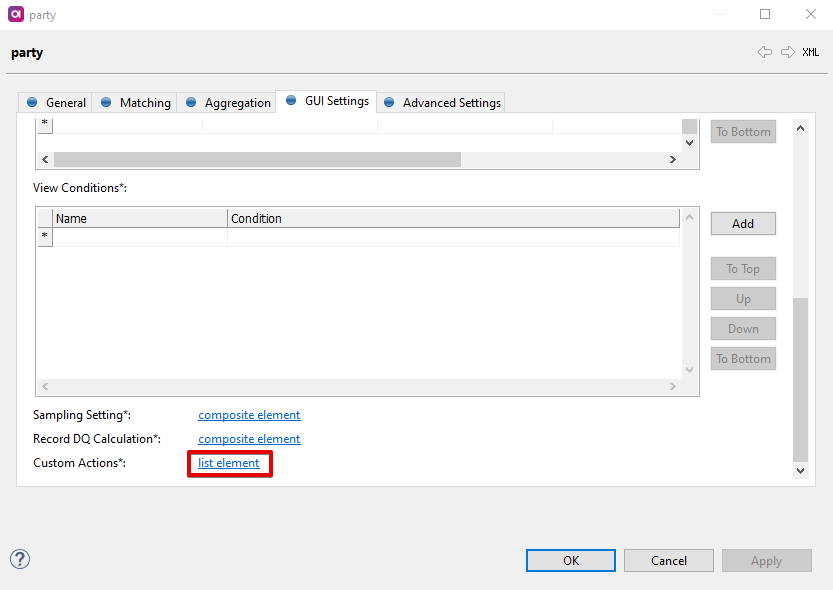
Next to Custom Actions, select list element.
-
Define Name, Label and Description.
Name will be visible in the configuration. Label and Description will be visible in the web application.

-
Define the columns that should be included in the plan.

-
Define related entities to be included in the plan. In the configuration, press kdb:[Ctrl+Space] to choose columns from your parent entity or to choose related entities.
-
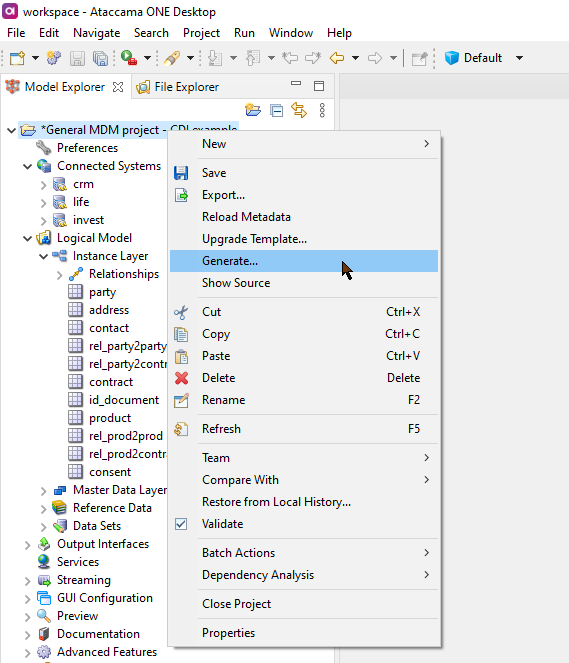
Generate the custom action plans by right-clicking your project and selecting Generate.
-
The plans are now available in Files > engine > custom_actions.
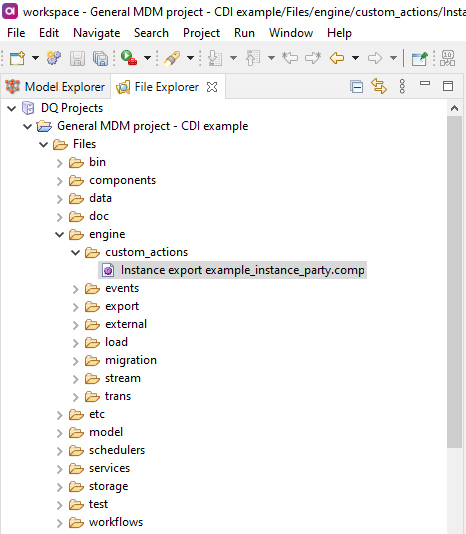
Plan names follow the convention [name]_ [layer]_[entity].comp.
Setting permissions for custom actions
Permissions are configured in the mda-permissions.xml file.
Define the entity name and custom action name (as specified in the GUI settings) within for each role as required, for example:
<entity name="party" customActions="custom_action_instance_party">
When adding multiple custom actions, use a comma (,) as a separator.
|
Configuring your plan
At this point, your plan contains only the components Integration Input (with columns and relationships as defined in the GUI settings) and Integration Output (containing message and error message).
You then need to configure the plan depending on the intended use for your custom action. For more information, see Building Plans and Working with Component Steps.
| Currently, MDM Reader step is not supported for custom actions. |
For the example, the following configuration would take inputs (columns and relationships from custom action configuration), use the Multiplicator and Join step and output as a text file (which in turn would then be available in Files > data > out_custom_actions).
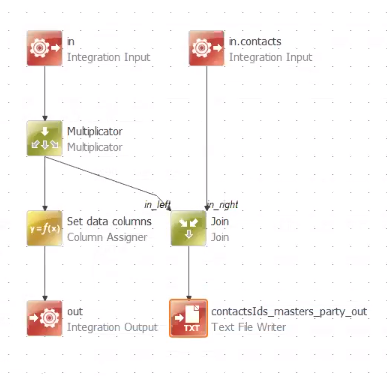
Once configured, use Ctrl+S to save the plan and regenerate your project by right-clicking your main project file and selecting Generate.
Enabling custom actions
The configuration defined according to this article will be generated to Files > etc > nme-custom-actions.gen.xml.
To enable custom actions, add a new parameter <customActions> to the <model> node of the nme-config.xml file.
Specify the generated configuration file in the parameter, as shown in the example.
<model>
   <models>
      <consolidation>
         <persistenceLayer class="com.ataccama.nme.persistence.vldb.VldbPersistenceFactory">
            <dataSource>mdc_db</dataSource>
            <prefix>C_</prefix>
         </persistenceLayer>
         <configFile>nme-model.gen.xml</configFile>
         <datasets>nme-datasets.gen.xml</datasets>
         <customActions>nme-custom-actions.gen.xml</customActions>
         <eventHandlersConfigFile>nme-event_handler.gen.xml</eventHandlersConfigFile>
         <executionPlanConfigFile>nme-consolidation-plan.xml</executionPlanConfigFile>
      </consolidation>

   </models>
</model>
Using custom actions
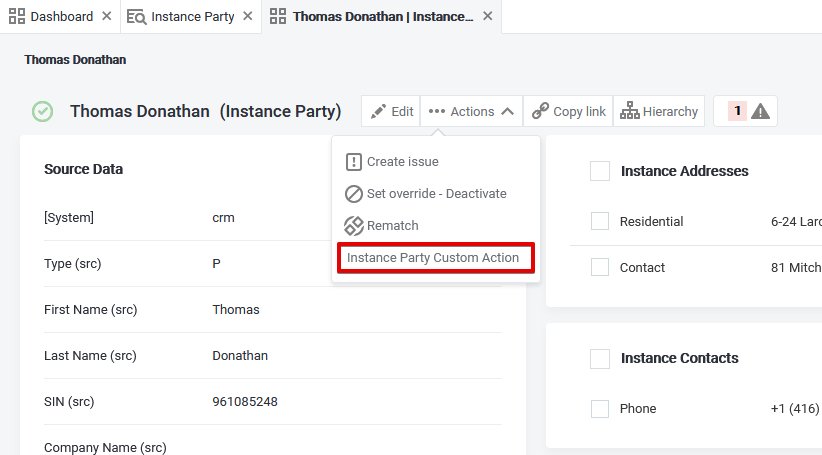
In the web application, select the desired entity and open the entity details. In Actions, select the custom action from the list available, for example, Instance Party Custom Action.
Was this page useful?
