
Share Assets
Managing access for all entities that can be shared with other users or groups of users is done following the same procedure. These entities include catalog items, glossary terms, data sources, DQ rules, lookups, roles, and more. For any of these entity types, sharing permissions can be viewed on the Access tab.
| assets can only be shared by users with Owner rights. |
By default, there are three user roles in ONE:
-
Owner
-
Can publish changes on the specific asset
-
Can manage access to the asset
-
Provides full permissions for the metadata asset.
-
Can access assets in all workflow states.
-
-
Editor
-
Can access assets in all states.
-
Provides view access and the ability to edit the metadata asset.
-
Can’t publish changes
-
Can’t manage access to the asset
-
-
Viewer
-
Basic role providing view access to the metadata asset. Editing the asset is not allowed.
-
Can access assets in published state only
-
Has no permissions for workflow transitions.
-
The user roles and their permission can be customized during the initial setup or by changing the permissions configuration by power users.
Manage the top-level default access for entities
With the top-level configuration of any array embedded entity (such as sources, rules, terms), it is possible to set the default permissions, which are propagated to all root entities (to all sources, all rules all terms).
To assign the default permissions on the top-level entity, do the following:
-
Navigate to the entity you want to change permissions for (in the example below, the array embedded entity is source, which refers to the Sources page), expand the more options menu and click Manage default access:

-
Configure the default access on the right-side window:
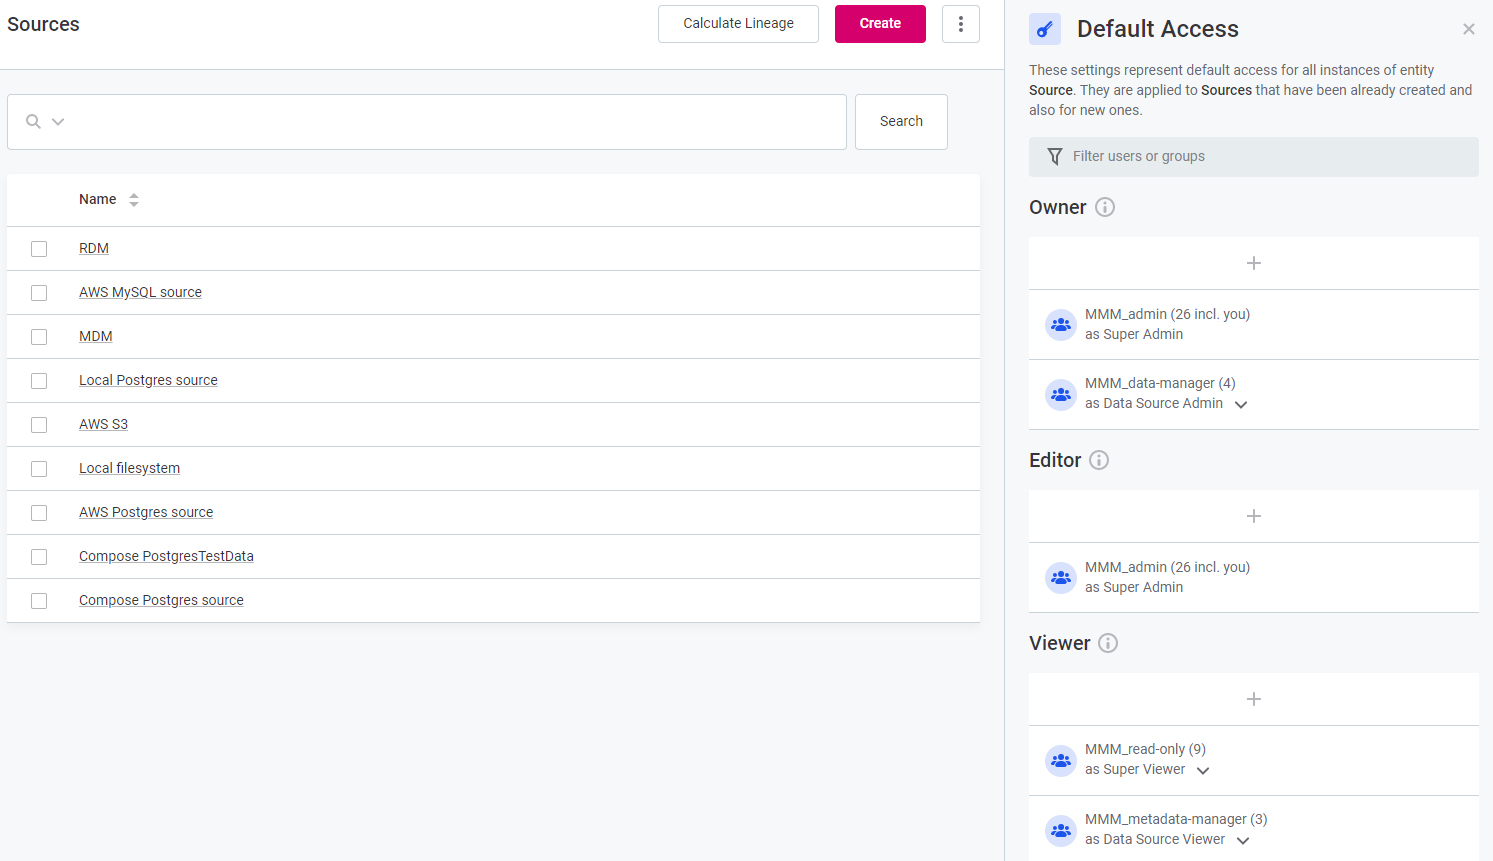
All changes will be propagated similarly on all available sources in the list. -
To add the user to the role, click on the role’s corresponding plus icon and select the user.
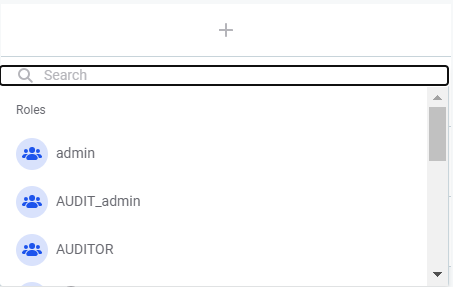
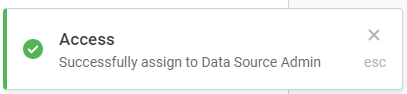
Click on the user to add. The user will be added to the list after the process centre notification on the successful assigning.
-
To delete the user, hover over the user name and click on the appearing Bin icon. Confirm the removal.
-
Manage access to assets
To change the access settings navigate to the Access tab of the asset you would like to change settings for. You will be presented with the Access tab screen:
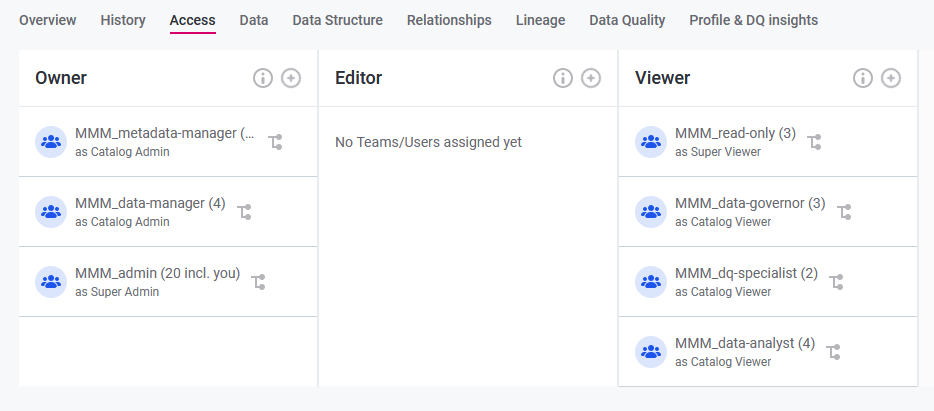
The roles marked with the Hierarchy icon are inherited from the metadata model.
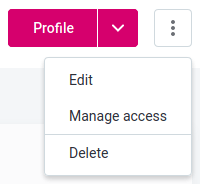
The permissions can be quickly edited from the three dots menu in the upper-right corner of the entity overview page, typically next to the Edit or Profile option, and selecting Manage access.
Add new users
To add a user, or a group of users, to one of the three roles, click on the Plus icon next to the required role.
Alternatively, you can select Manage access option from the three dots menu of the general upper right corner menu.
| To see the role’s rights description, click on the Info icon. |
The Manage Access tab will appear:
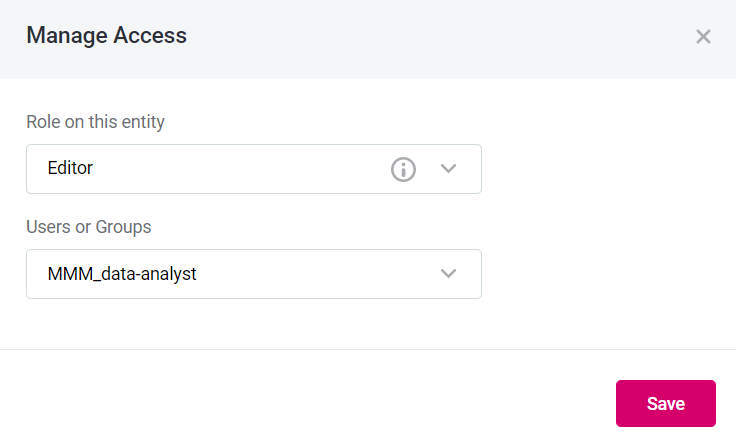
Select the role you want to add a new user for. Then, select one or more users from the list provided and click Save.
|
To add a single user, type in the name of the person until it appears in the list: 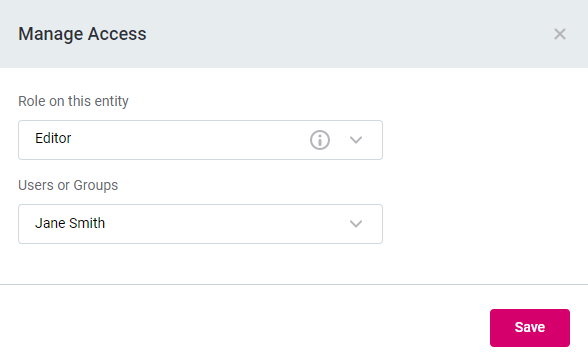
|
Was this page useful?