
Environments
Environments make it easier to develop and test your solutions for different operational environments (for example, DEV, TEST, or PROD). As such, they are particularly useful for the following:
-
Testing your plans on multiple databases without having to configure separate plans.
-
Testing your plans, workflows, or web services with testing and production servers.
-
Preparing and exporting runtime configurations for different environments (especially relevant for folder shortcuts).
How environments work
Environments reuse the names of database connections, server connections, and folder shortcuts, and uniquely configure them for each environment. Even though you still run your plans or workflows locally from ONE Desktop, environments let you easily switch between resources that you associate with different environments.
This way, your plans or workflows use the resource definitions corresponding to the environment you select. The following types of environments are available:
-
Local launch
-
ONE Data Processing launch
-
Hadoop launch
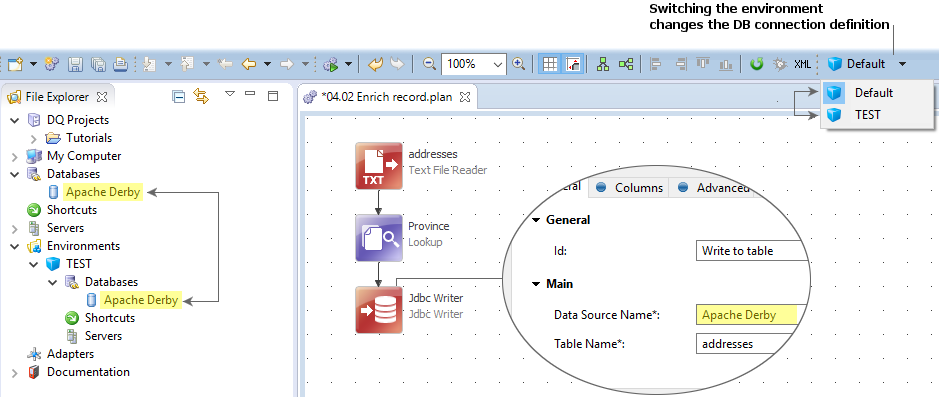
Local launch
The following images demonstrate how you can reuse a database connection name and define it differently based on the environment when using the Local launch environment.
The default environment
There is always one environment called Default. It is the fallback environment for other environments that do not have all resources uniquely configured.
For example, if you have a database connection and a folder shortcut configured in the Default environment but only a folder shortcut on your Test environment, then the Test environment uses the database connection from the Default environment.
| You cannot create a resource definition in a custom environment unless it is already created in the Default one. |
ONE Data Processing launch
With this type of launch, your plans are sent and executed on the Ataccama ONE Platform server. In this case, Data Processing Module (DPM) is responsible for managing jobs while data processing itself happens in Data Processing Engine (DPE).
For more information, see Remote Plan Execution.
Hadoop launch
When using this type of launch, your plans are sent and executed on the Hadoop cluster.
How to change clusters
If you are working with two or more instances of Data Processing Engine (DPE) with different cluster setups for each instance (for example, one DPE with the Hadoop cluster and another one with Databricks), follow these steps to choose the correct DPE instance that should run the job execution.
-
Select the ONE Data Processing launch environment in ONE Desktop.
-
Navigate to your plan.
-
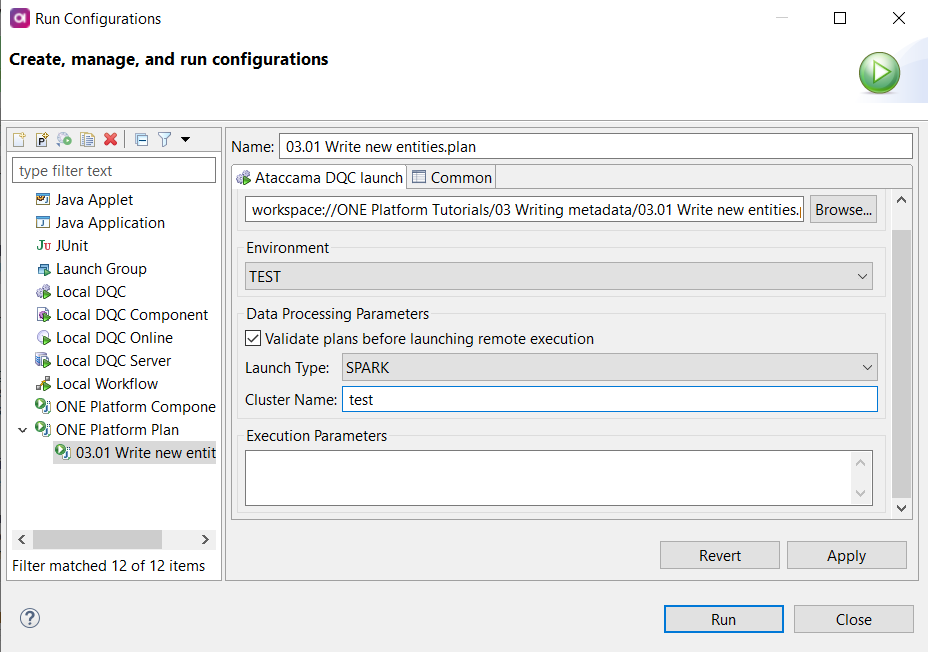
In the toolbar, find Run and select Run Configuration.
-
In Data Processing Parameters, specify the Launch Type (SPARK) and Cluster Name.
In this context, launch types refer to the following processing options:
-
LOCAL: In this case, a suitable DPE is selected automatically. The plan is first preprocessed and checked for any steps requiring the Spark engine.
If any such steps are found, the plan is executed on Spark.
-
SPARK: All jobs are sent to the Spark engine.
-
-
Select Run to execute the plan.
Add a new environment
To create a new environment:
-
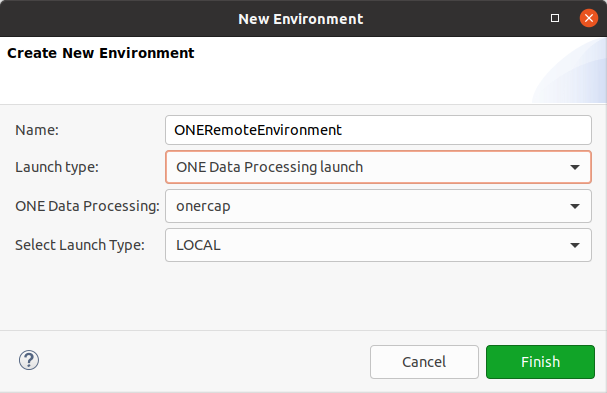
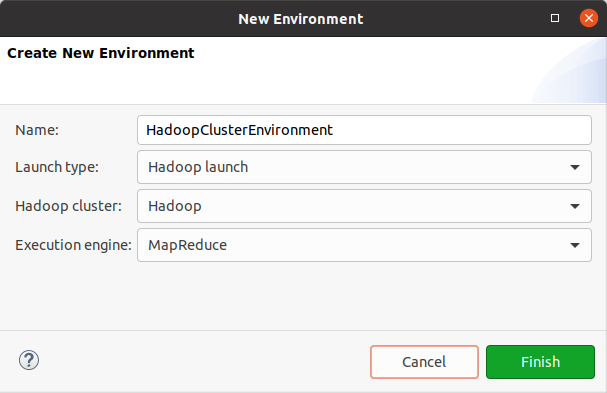
From the File Explorer, right-click Environments and select New Environment.
-
Fill in the name of the environment.
-
Select the launch type:
-
Local launch: Plans are executed locally using the runtime engine distributed with ONE Desktop.
-
ONE Data Processing launch: Plans are sent to the Ataccama ONE Platform for further processing. For more information, see Remote Plan Execution.
In this case, you also need to select the ONE Platform server that you want to use.
-
Hadoop launch: For Hadoop processing, you also need to provide the name of the Hadoop cluster (Hadoop cluster) and the execution engine (MapReduce or Spark).
-
-
Select Finish. Your environment is now ready for use.
The currently selected environment is displayed in the toolbar. To change the resource definitions used, select a different environment from the toolbar.
You can switch between environments from the Plan Editor, Workflow Editor, or the Web Service Tester. 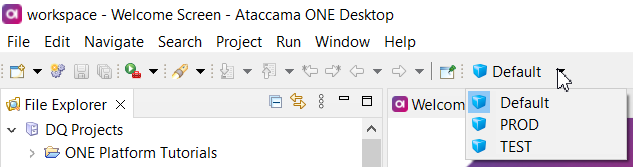
Create a resource definition in a custom environment
When creating a resource in a custom environment, instead of entering the resource name manually, you need to select the name of the resource defined in the Default environment.
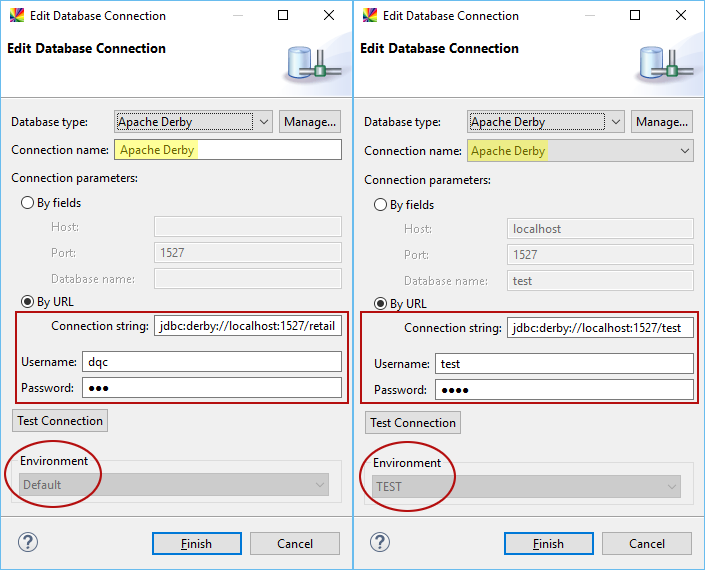
Example: Test a plan on different database schemas
Assume you have a plan that writes data into a database. For the purpose of this example, let’s call the database Apache Derby. You want to test this plan on a test schema before writing to the production schema.
Here is how you can do this without changing the plan definition.
-
Create a database connection to your production schema in the Default environment.
-
Create a new custom environment (for example, TEST).
-
Create a database connection to your test schema in a custom environment and bind it to the database connection name in the Default environment.
-
Open your plan and switch to the TEST environment.
-
Run your plan and check the results. Correct the plan if necessary.
-
Switch to the Default (production) environment and run your plan again.
Example: Runtime configuration with OS-dependent folder shortcuts
Assume you are developing your solution on a Windows desktop, but it later needs to be deployed to a Linux server. In this case, your folder shortcuts configured for Windows are not going to work on a Linux system.
Provided that you know the locations that your folder shortcuts should point to on the Linux server, you can prepare the runtime configuration so that you don’t need to manually edit it after generating the configuration.
Here is how you can prepare a runtime configuration for any system from ONE Desktop:
-
Create an environment for your Linux system.
-
Configure your folder shortcuts for the new environment.
-
Export the runtime configuration for the new environment.
Your solution is ready to be deployed to your Linux environment.
| A customized runtime configuration can be provided as a base64-encoded string to DPM using the Configuration Service. This way, you can extend the configuration with additional parameters, which are merged with the generated configuration during job execution. For more information, see DPM Configuration, section Global runtime configuration. |
Was this page useful?