
SVN
This topic provides information about installing the SVN plugin for Eclipse and working with SVN repositories from the IDE.
For detailed usage of SVN, see Help > Help Contents > Subversive User Guide (available after installation) or read the online SVN documentation.
Install the SVN plugin and connector
-
Start ONE Desktop.
-
Select Help > Install New Software.
-
In the Work with field, select one of preconfigured URLs to the Eclipse software repository (that is,
http://download.eclipse.org/releases/<eclipseVersion>) and type svn in the search field. Wait for Eclipse to fetch results. -
In the results pane, select Collaboration > Subversive SVN Team Provider and then Next.
The SVN Team Provider and Connector can also be installed from a downloaded package. See Install from a package. 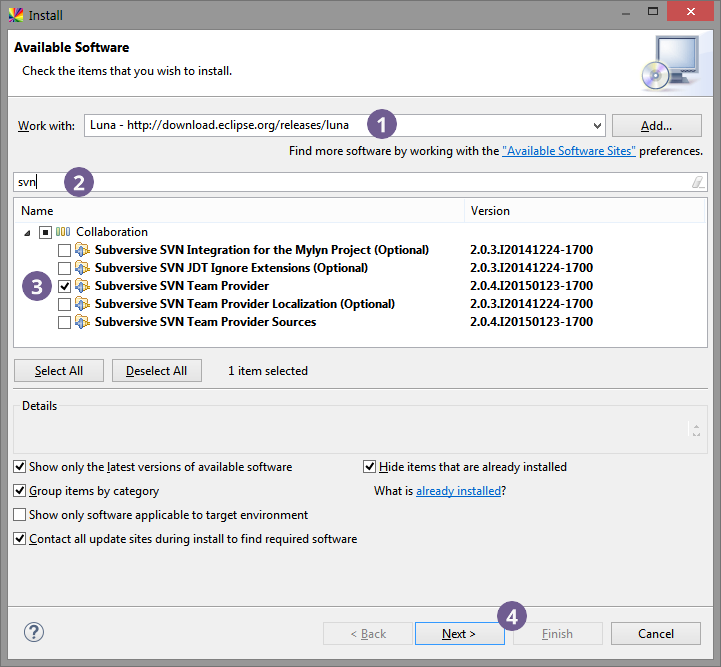
-
On the review screen, select Next.
-
In Review Licenses, accept the terms of the license agreement and select Finish.
-
After the installation is complete, select Yes when prompted to restart the IDE.
-
After the IDE restarts, select Window > Preferences in the main menu.
-
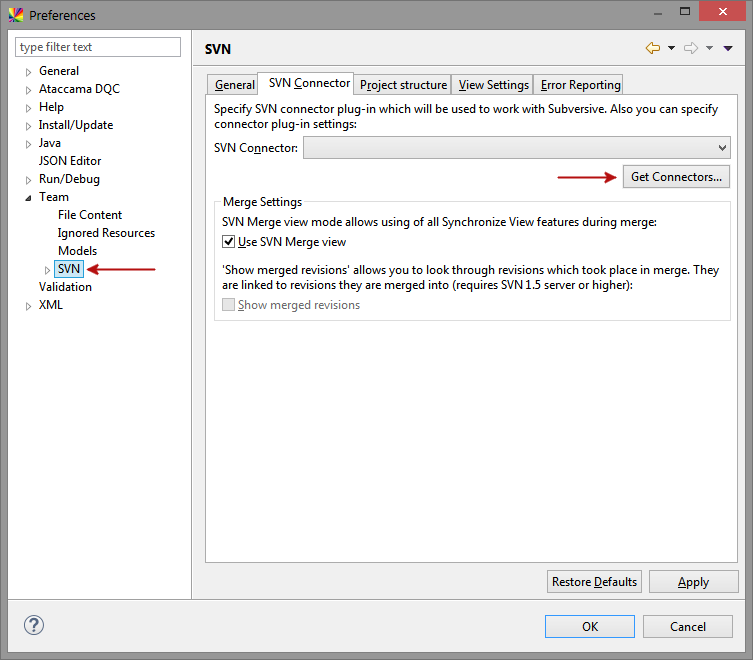
Go to Team > SVN.
-
Switch to the SVN Connector tab and select Get Connectors.
-
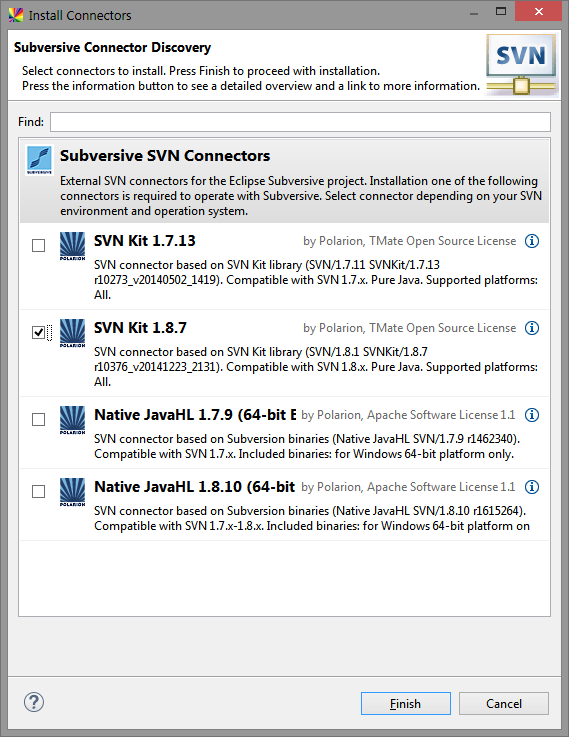
Choose SVN Kit 1.8.7 and select Finish.
-
Select Next and keep both items selected.
-
On the review screen, select Next.
-
In Review Licenses, accept the terms of the license agreement and select Finish.
-
Select OK in case a warning appears.
-
After the installation is complete, select Yes when prompted to restart the IDE.
Install from a package
It is also possible to install both plugins by manually downloading them and installing from a local folder.
-
Download the Team Perspective package: www.eclipse.org/downloads/download.php?file=/technology/subversive/2.0/builds/Subversive-2.0.4.I20150123-1700.zip.
-
Download the SVN Connector package: community.polarion.com/projects/subversive/download/eclipse/4.0/builds/Subversive-connectors-4.1.3.I20150214-1700.zip.
-
Select Help > Install New Software.
-
Next to the Work with field, select Add.
-
Select Archive and provide the path to the package with the Subversive SVN Team Provider plugin.
-
From the available items, select Subversive SVN Team Provider Plugin > Subversive SVN Team Provider and continue with steps 4-6 from the previous procedure.
-
Repeat steps 3-6 of the current procedure to install the Subversive SVN Connector. In step 6, select Subversive SVN Connectors > SVNKit 1.8.7 Implementation (Optional).
Share a project using SVN
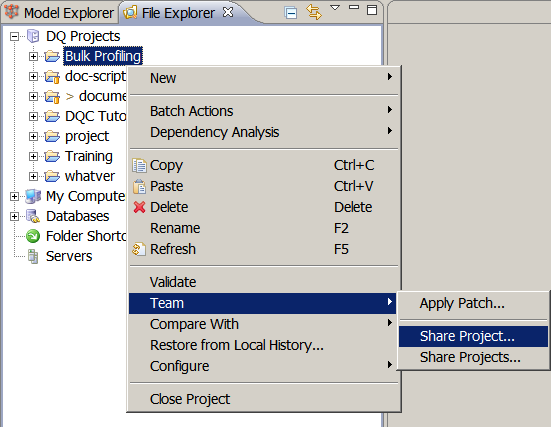
To share a project, you need to copy it to a remote location.
-
Right-click the project, select Team > Share Project.
-
Choose SVN and select Next.
-
Choose Create a new repository location and select Next.
-
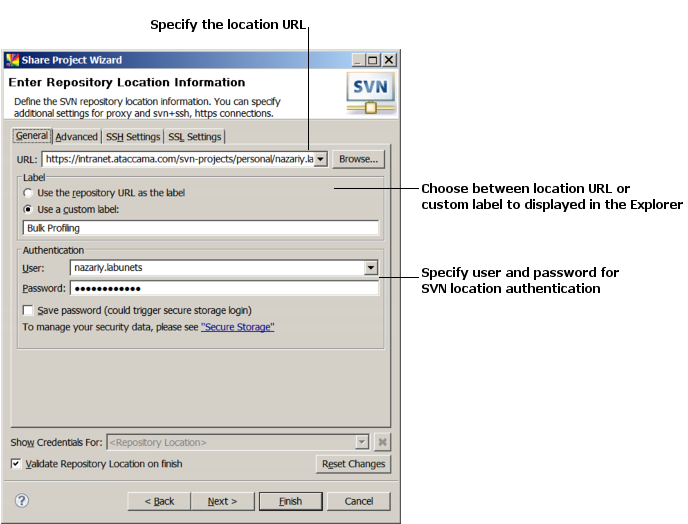
In Share Project Wizard, fill in the location URL, choose the label displayed in the Explorer (location or custom), and enter the username and password for authentication. Select Finish.
-
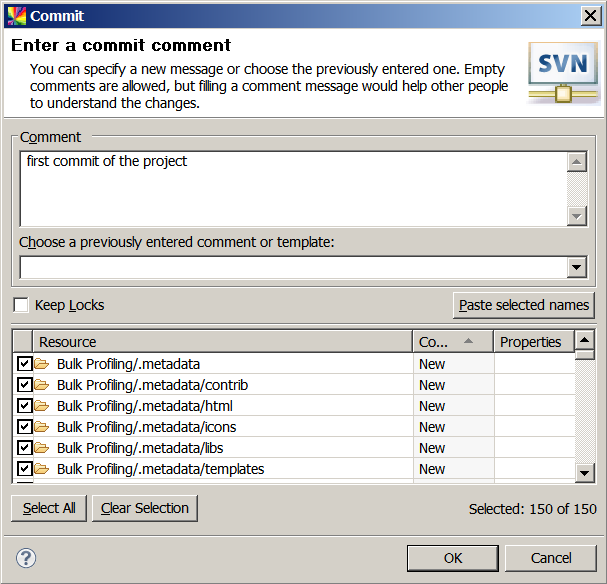
After you share the project with default settings, the Commit window appears. Enter a commit comment, choose the files to be shared, and select OK.
-
The project is now shared and committed. It contains the repository icon, version number (12465), and location.

Import a project using SVN
To import an existing project from a remote location:
-
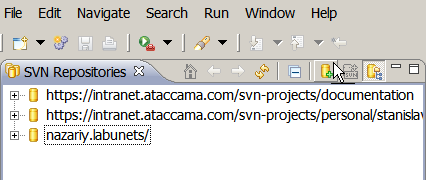
Open the SVN Repository Exploring Perspective. If it is not added as one of your perspectives, select the Open Perspective icon and then Other and choose SVN Repository Exploring from the list.
A corresponding icon appears in the Perspective Switching Panel, and the view is changed to SVN Repositories.

-
To add a new repository, select the New Repository Location icon in the Navigation Panel.
-
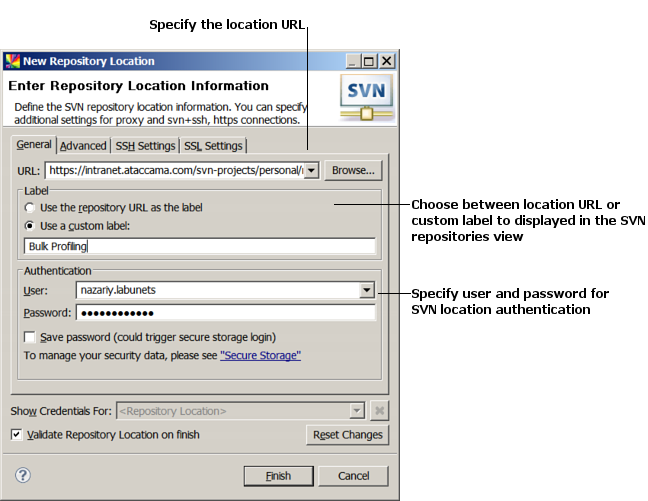
Fill in the location URL, choose the label displayed in the Explorer (location or custom), and enter the username and password for authentication. Select Finish.
-
The repository is now visible in the SVN Repositories perspective and needs to be checked out, that is, the contents of the remote repository need to be copied to your local machine.
To do that, right-click the repository and select Check Out. After this, the files are copied to your local repository. How long this takes depends on the number of files checked out, their size, and the connection speed.+ image::svn-check-out.png[Check out files,400]
Update and commit
The most convenient and secure way of sharing changes you have made to a project locally (committing) and downloading the changes made by other users (updating) is through Synchronize perspective.
Team synchronizing perspective
To add the Team Synchronizing perspective, select the Open Perspective icon and then Other and choose Team Synchronizing from the list. A corresponding icon appears in the Perspective Switching Panel, and the view is changed to Synchronize.

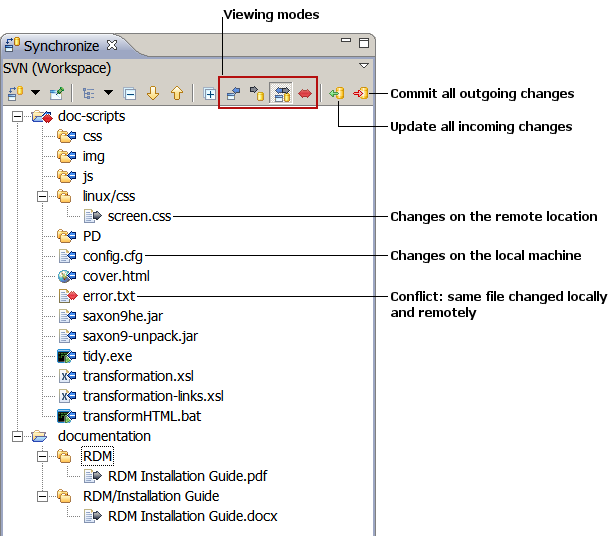
Synchronize view
The Synchronize view can show local and remote changes on all added repositories. This is determined by the selected viewing mode:
-
Incoming mode (
 ) - Shows only incoming changes.
 -
Outgoing mode (
 ) - Shows only outgoing changes.
 -
Incoming and outgoing mode (
 ) - Shows both incoming and outgoing changes, including conflicts.
 -
Conflict mode (
 ) - Shows only conflicts.
For more details, see Help > Help Contents > Subversive User Guide.
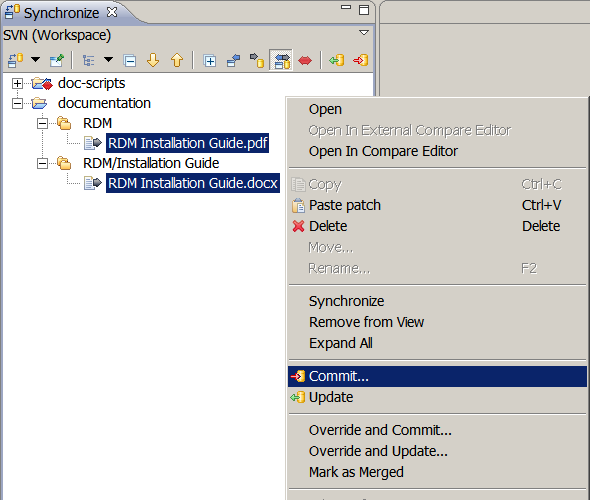
Commit changes
To commit changes to one or several files in SVN:
-
Select the files (using Ctrl+Shift), right-click, and select Commit.
-
Enter a commit comment and select the files to commit.

-
Select OK.
Update changes
Updating changes is similar to committing: select the files, right-click, and select Update. This completes the process.
| If you are working with a model project, we recommend reloading its metadata after the update. To do this, switch to the Model Explorer view, right-click the updated project, and select Reload Metadata. |
Troubleshooting
SSL handshake error when connecting to SVN without SSL certificates
If you are not using SSL certificates when trying to connect to SVN but the connection fails with a handshake alert error, you can configure the connection so that any SSL certificate errors are ignored.
To do this, add the following JVM parameter -Djsse.enableSNIExtension=false to the one-desktop.ini file.
Was this page useful?