
Join Tables for Cross-Entity Checks
It is possible to join two or more tables from any compatible sources to compare data via cross-entity checks. For example, if the content of two or more columns in different tables needs to be the same and it should be monitored, you can apply rules on the joined data to achieve this.
In general, comparing data from different sources entails the following:
-
Create a virtual catalog item (VCI) in ONE Desktop. See Virtual Catalog Items.
-
Join the tables from the different sources which can be merged. For more information about these steps, see Frequently Used Steps and Plans.
-
Sync the virtual catalog item with ONE.
-
Create a rule to compare data across different tables. See Create DQ Evaluation Rule.
-
Create a monitoring project to periodically compare values from the two tables. See Monitoring Projects.
Example
In the following example, we are comparing the customernumber and customername columns from catalog items Customers and Orders to make sure these values are the same in both catalog items.
Prerequisites
-
A connection to ONE Ataccama Platform is set up and running. See Connect to a Server, section Ataccama ONE Platform.
Steps
-
Launch ONE Desktop.
-
In the File Explorer, find the ONE server you’re connected to and right-click Catalog Items.
-
Select New > Virtual Catalog Item.

-
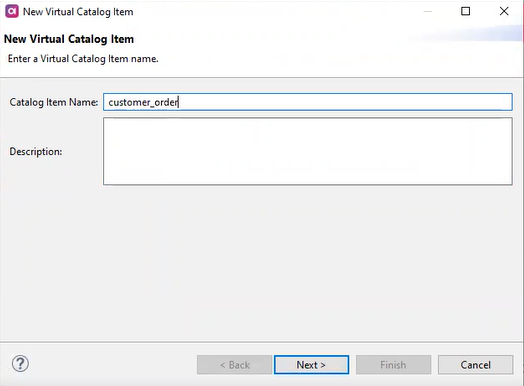
Enter a name and description for the virtual catalog item and select Next.
-
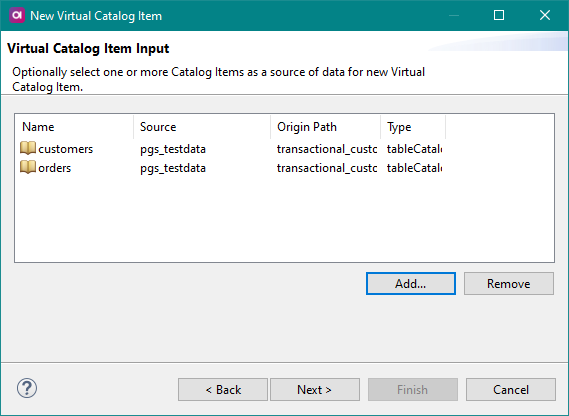
Select Add to add an existing catalog item.

-
Find and select the catalog items you want to compare and select OK. In this example, we are using the catalog items Customers and Orders.
-
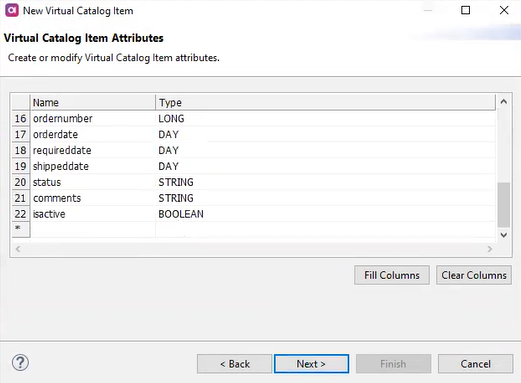
Select the columns that should be in the virtual catalog item and then Next.
-
Select Next.
-
Define the folder (workspace) name or select an existing one and select Finish.
You have now created the virtual catalog item.

-
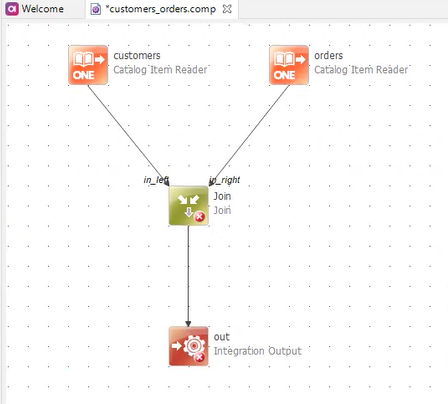
In the VCI plan that opens, add a Join step and connect it with the catalog items and the Integration Output step.
-
Configure the Join step:
-
On the General tab, select which columns from the two catalog items should be the Left Key and the Right Key respectively. In our example, the Left Key is customername, the Right Key is customernumber, converted to string.
-
Next, select the Join Type (
INNER) and the Match Strategy (MERGE).
-
Switch to the Columns tab and specify which columns should be present after the join is performed. Delete any duplicates.
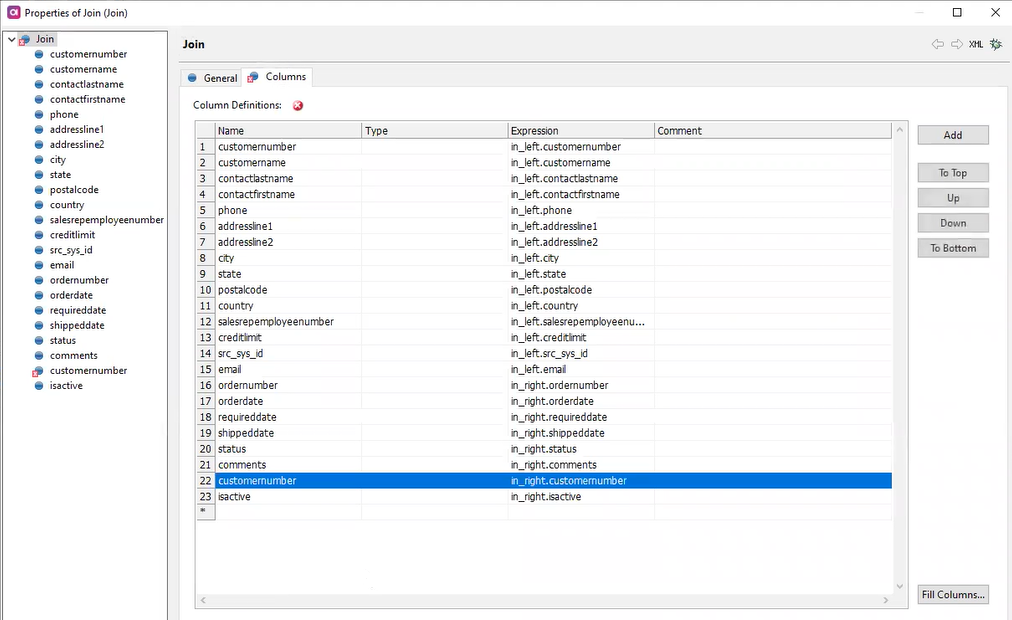
-
Select OK.
-
-
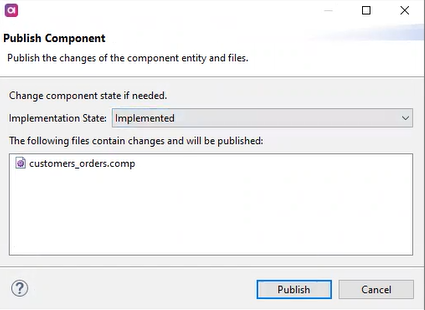
Publish the virtual catalog item. In ONE Explorer, find the virtual catalog item in Components and right-click it. Select Publish.
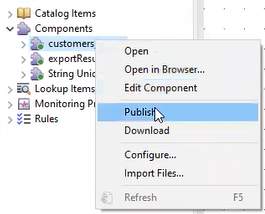
-
Make sure the Implementation State is set to Implemented and select Publish again.
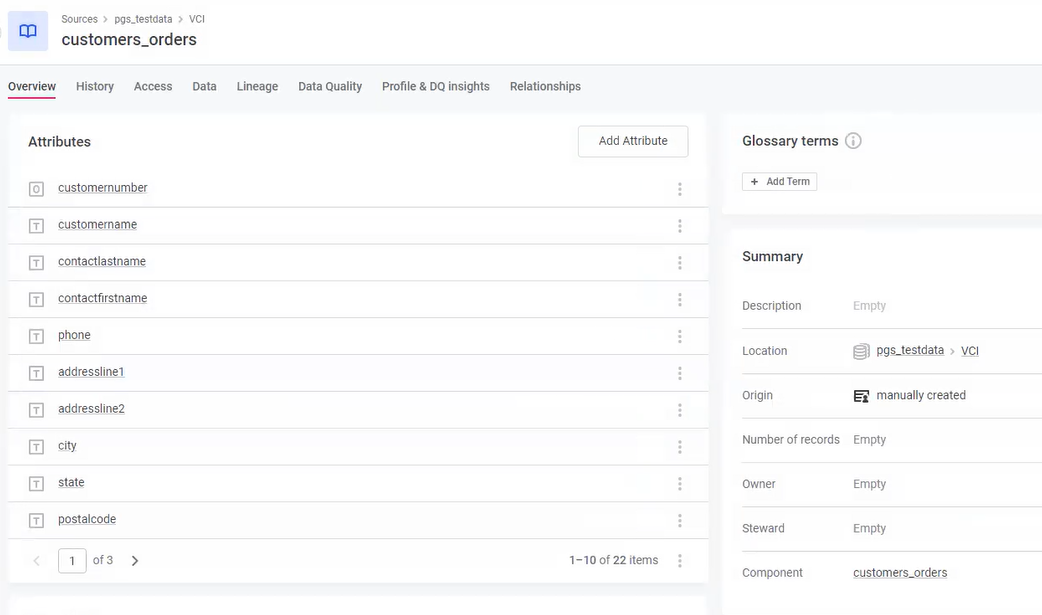
The virtual catalog item is now available in Data Catalog in ONE:
-
Run profiling on the table.
-
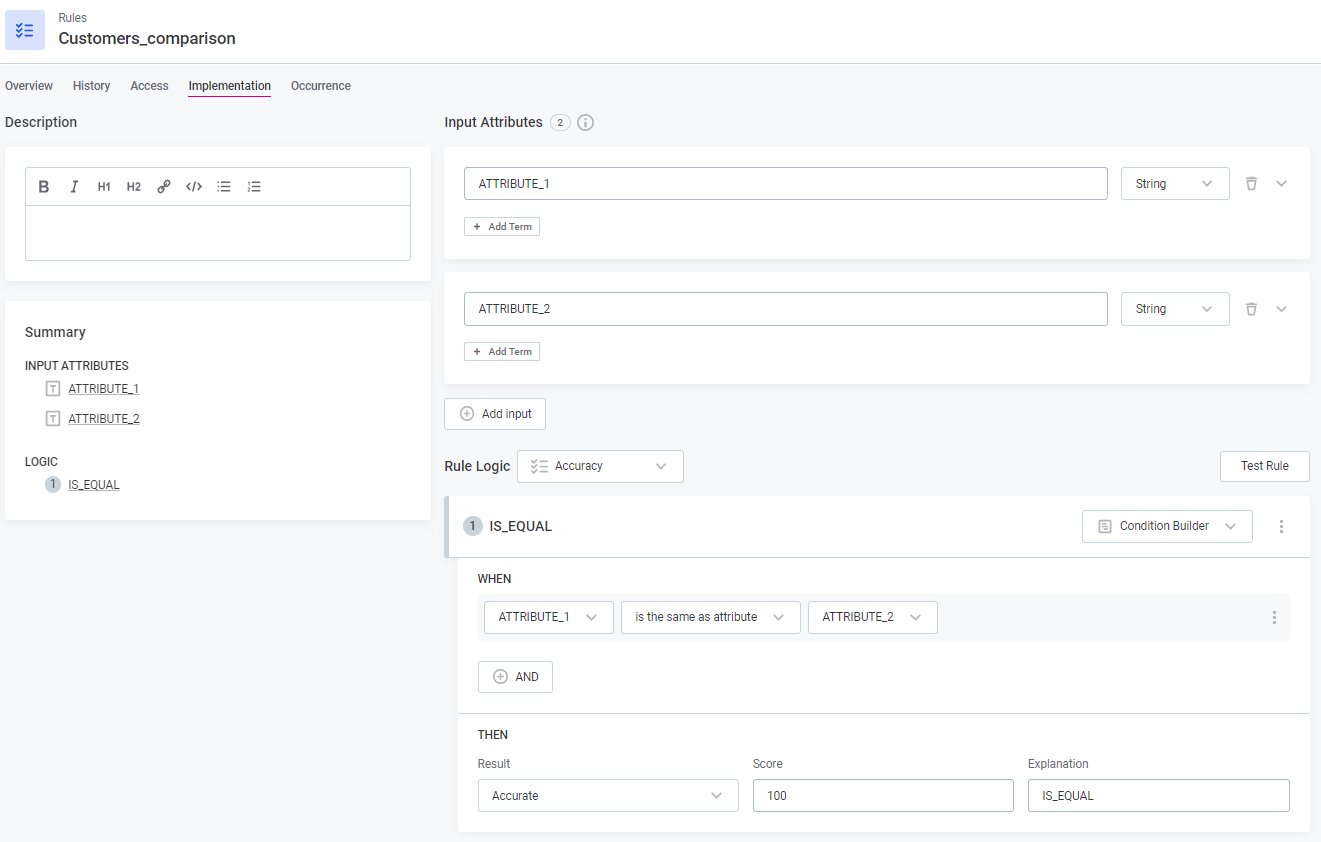
Create a rule to compare whether two attributes have the same values (rule logic: Attribute1 is the same as Attribute2). For more detailed instructions, see Create DQ Evaluation Rule.
-
Publish the rule. See Publish Changes.
-
Create a new monitoring project using the virtual catalog item as input.
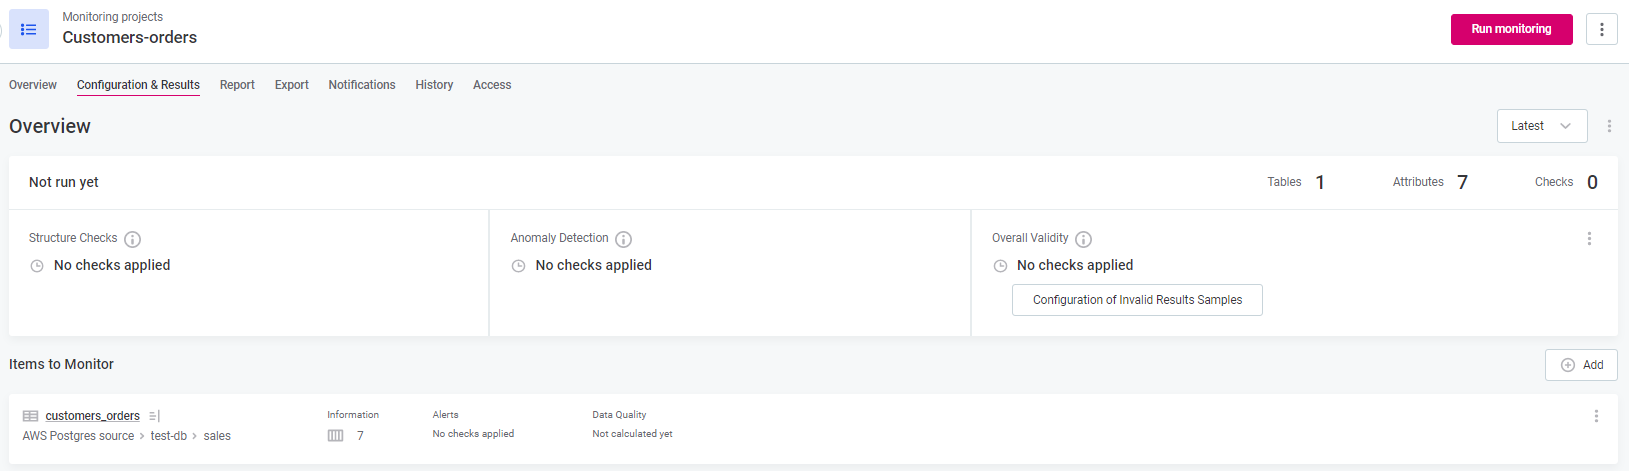
-
Configure the monitoring project to apply the DQ rule you created to the attributes you want to compare.
-
Run the monitoring.
The comparison results are now available on the Configuration & Results tab of your monitoring project.
Was this page useful?