
Import Terms from ONE Desktop to ONE
Using ONE Desktop you can batch import terms into ONE. This is useful when you need to import terms that are already defined outside of ONE.
This tutorial shows how to import terms from a CSV file into your ONE instance using Text File Reader and ONE Metadata Writer steps. Instead of Text File Reader, you can use a different input step such as JDBC Reader or ONE Metadata Reader.
As a prerequisite, make sure you are connected to ONE. See Connect to Ataccama ONE Platform.
-
Prepare your file with terms. The following example shows a
.csvfile with several terms. For each term, we will import its Name, Abbreviation, and Definition.Terms.csv"Name";"Abbreviation";"Definition" "00 Address";"ADD";"Postal address" "00 First name";"FN";"Person's First Name" "00 Last name";"LN";"Person's Last Name" "00 Phone number";"";"Personal phone number"When preparing the file with terms, keep in mind:
-
The file must contain the Name column. This is the term name that will be displayed in ONE. Other columns are not mandatory.
-
Properties of RTF data type (for example, Definition) can be formatted.
-
The list of all available fields corresponds to your current metadata model and can be found in the
termentity or using ONE Metadata Reader.
-
-
Create a new plan.
-
Drag and drop your file with terms to the plan to automatically create a new Text File Reader step that has your file as the step input.
When dragging the file onto the canvas for the first time, the Edit File Metadata screen appears, where you can adjust how the file and the data types are read. For example, set Data starts at line value to
2, since the first row contains column names and the data starts on the second row.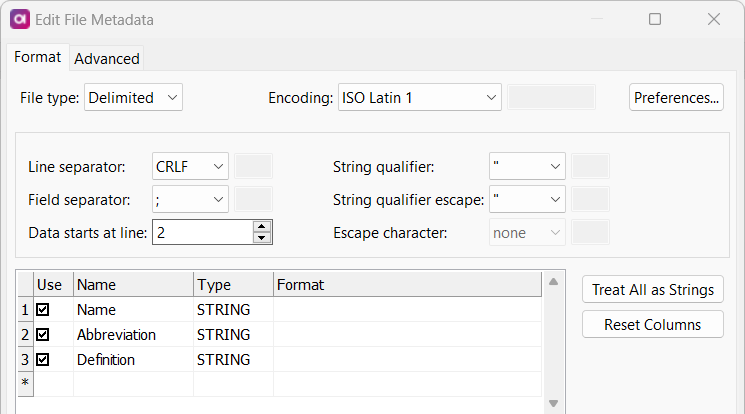
-
Add a new ONE Metadata Writer step and configure it. Use content-assist (Ctrl+Space) to help you enter the correct values.
-
In General:
-
Server Name: Select your ONE Platform Server.
-
Entity Type: Select your term type. In our case, this is
businessTerm. -
Workflow State: Select the state of your terms (
draftorpublished). -
Parent Type: Select
metadata. -
Parent Property: Select
terms.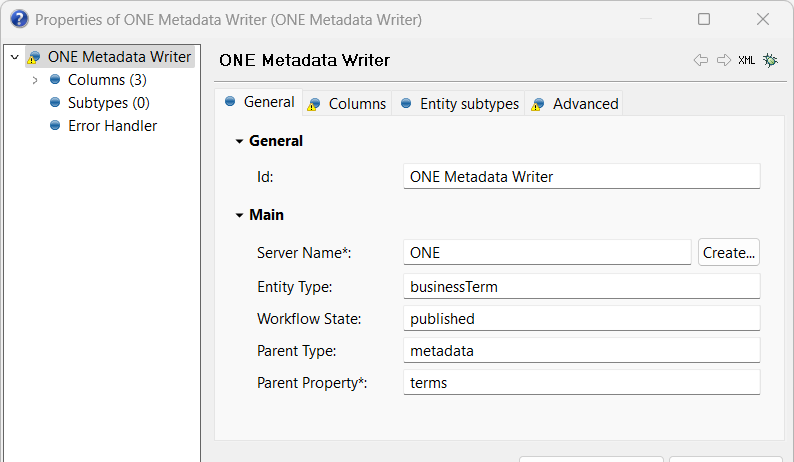
-
-
In Columns, add new columns with the following parameters:
-
Name: Name of the property in ONE. Select Load Entity Columns and choose which columns you want to use. In our case these are
name,abbreviation,businessDefinition. -
Expression: Value assigned to the property in ONE - either a value from the input, or an expression. Use the names of the columns from your CSV file. If you used the sample file, these are
Name,Abbreviation, andDefinition.Select a field in the Expression column and press Ctrl+Space twice to see the list of existing columns. Select the column and press Enter to confirm. 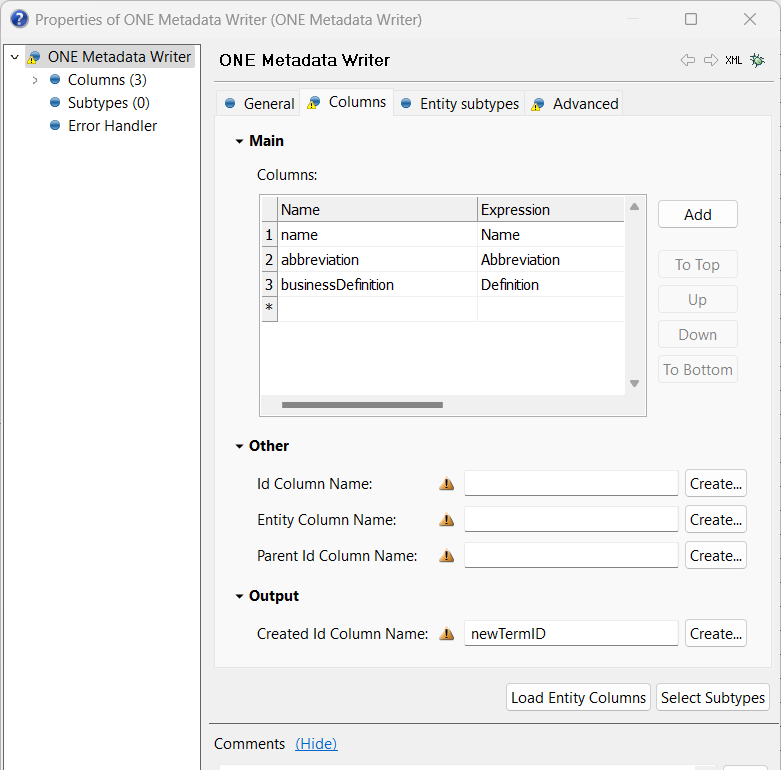
The properties in the Other and Output sections of the Columns tab might show warnings that the columns specified by the property should exist. You can ignore these warnings, since ONE Desktop will automatically create the non-existing columns.
-
-
(Optional) Define additional columns. For example, you can define Term definition source (to mark imported terms) and Stewardship columns:
-
Name:
termDefinitionSource,stewardship. -
Expression:
"Imported terms","<user_group_id>". The text within quotes is imported as is. This way you can import the same value for all terms.When importing stewardship, make sure you have an ID of the user group ready. The ID can be found in the URL in ONE, or using a plan in ONE Desktop. 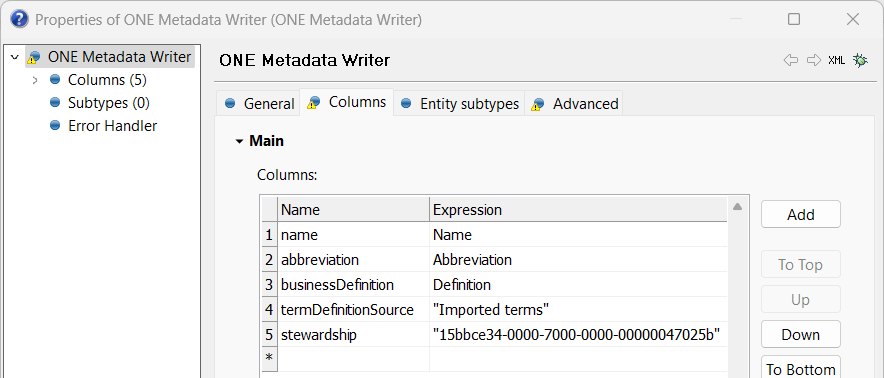
-
-
(Recommended) In the Output section, fill in Created Id Column Name. This is the column that stores IDs of newly created terms. The IDs can be used later for updating the terms.
-
-
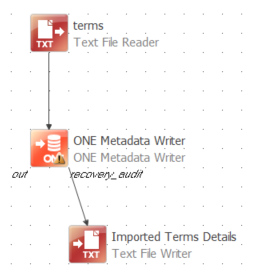
Add any Output step and connect it to the recovery_audit output of ONE Metadata Writer. The best practice is to use the Text File Reader step to write all output columns into a text file:
-
In General, provide the output file name.
-
In Columns, make sure Write All Columns is checked.
This way you can track whether the import was successful, as well as store IDs of new terms.
-
-
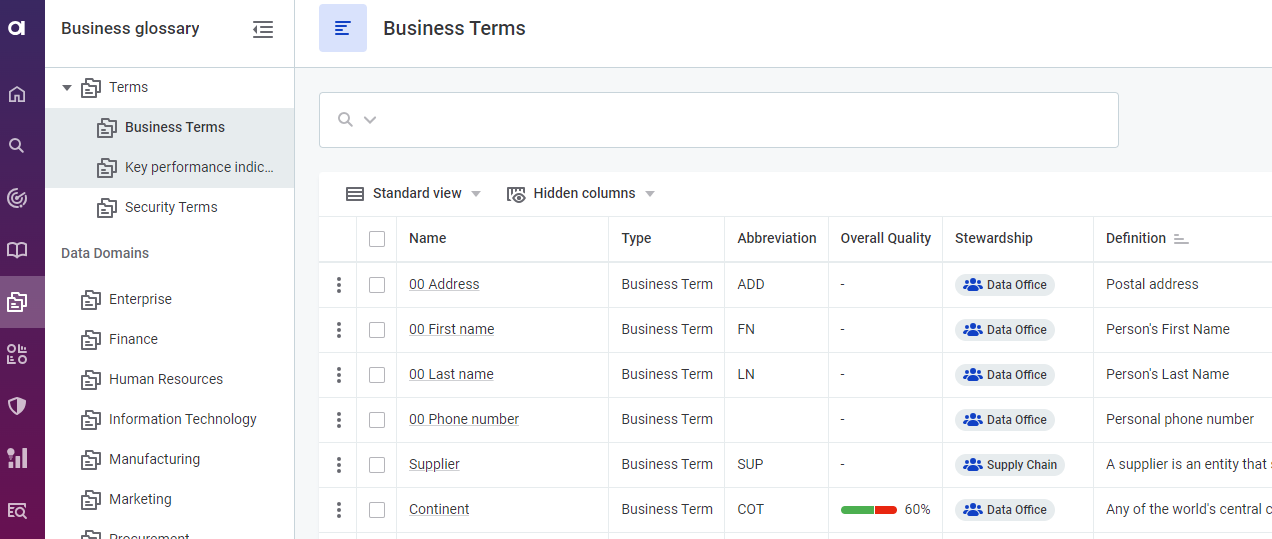
Run the plan to import the terms from your data file to ONE.
Imported terms in ONE:
Text file with all output columns from the recovery_audit output:

Was this page useful?