Connect to Ataccama ONE Platform
Connecting ONE Desktop and Ataccama ONE lets you explore and modify metadata through ONE Desktop, combine data into virtual catalog items, or create complex DQ rules. The following guide describes how to connect to your ONE instance.
Prerequisites
-
ONE Desktop is set up and running.
-
ONE is running and can be accessed from the server where ONE Desktop is available.
-
ONE Desktop and ONE are using the same product version.
Create a new connection
-
Open ONE Desktop.
-
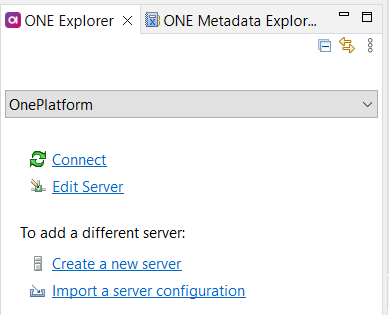
In ONE Explorer, select Create a new server.
If you are adding a second ONE server, do this instead: in File Explorer > Servers, right-click Servers and select New > ONE Platform.
The same option is available on the Servers and Databases tab that is by default part of your workspace.
-
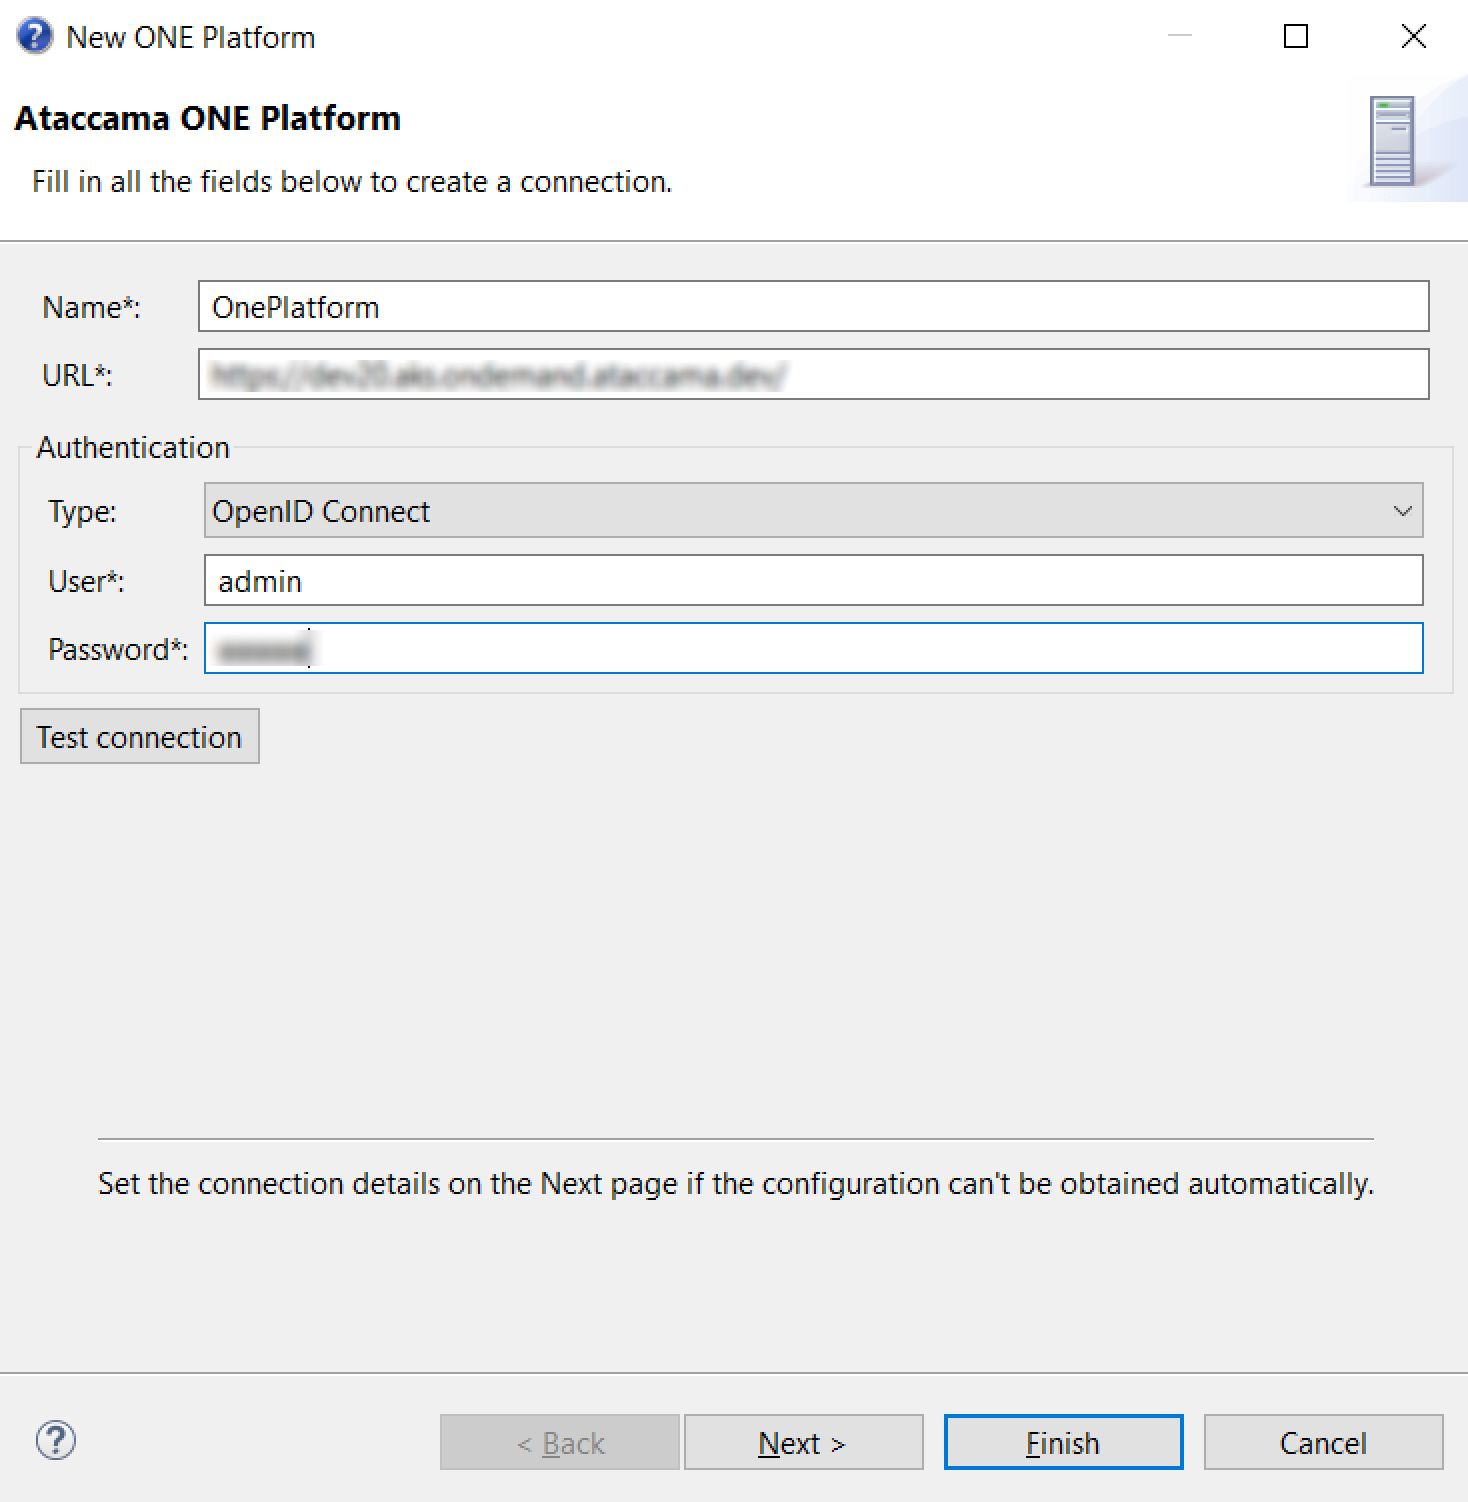
Provide a meaningful name for the server (Name) and the URL of your Ataccama ONE Platform (URL).

-
Select an authentication option and configure it:
-
OpenID Connect or Basic
We do not recommend using Basic authentication as in this case credentials need to be sent with every request, which makes it less secure. If possible, use OpenID Connect.
With OpenID Connect, users are authenticated and authorized through Keycloak for the duration of their session. User credentials are only used to retrieve the necessary identity and access tokens at the beginning of the session.
-
Provide your username and password.
-
-
OpenID Connect via Web Browser
-
Select Login and confirm when prompted.
-
Provide your credentials in the browser. If you are already authenticated, no action is required.
-
Check the status of the connection in ONE Desktop. If the login was successful, the following message is shown: Authentication to ONE Platform through the browser succeeded.
-
-
-
Once you have provided your credentials, test your connection.
-
If no issues were detected, select Finish.
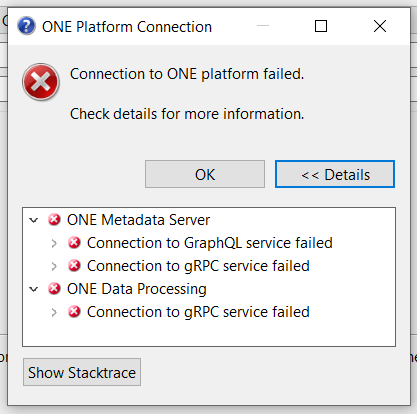
If the connection could not be established, check Details for more information. To view the full error, select Show Stacktrace.

-
The new server now appears in ONE Explorer. To establish a connection to ONE, select Connect.

You can now browse your data and metadata through ONE Desktop and use them in ONE plans.

To disconnect from your ONE server, in File Explorer > Servers, right-click the server and select Disconnect. The same option is available on the Servers and Databases tab that is by default part of your workspace.
Manual server configuration
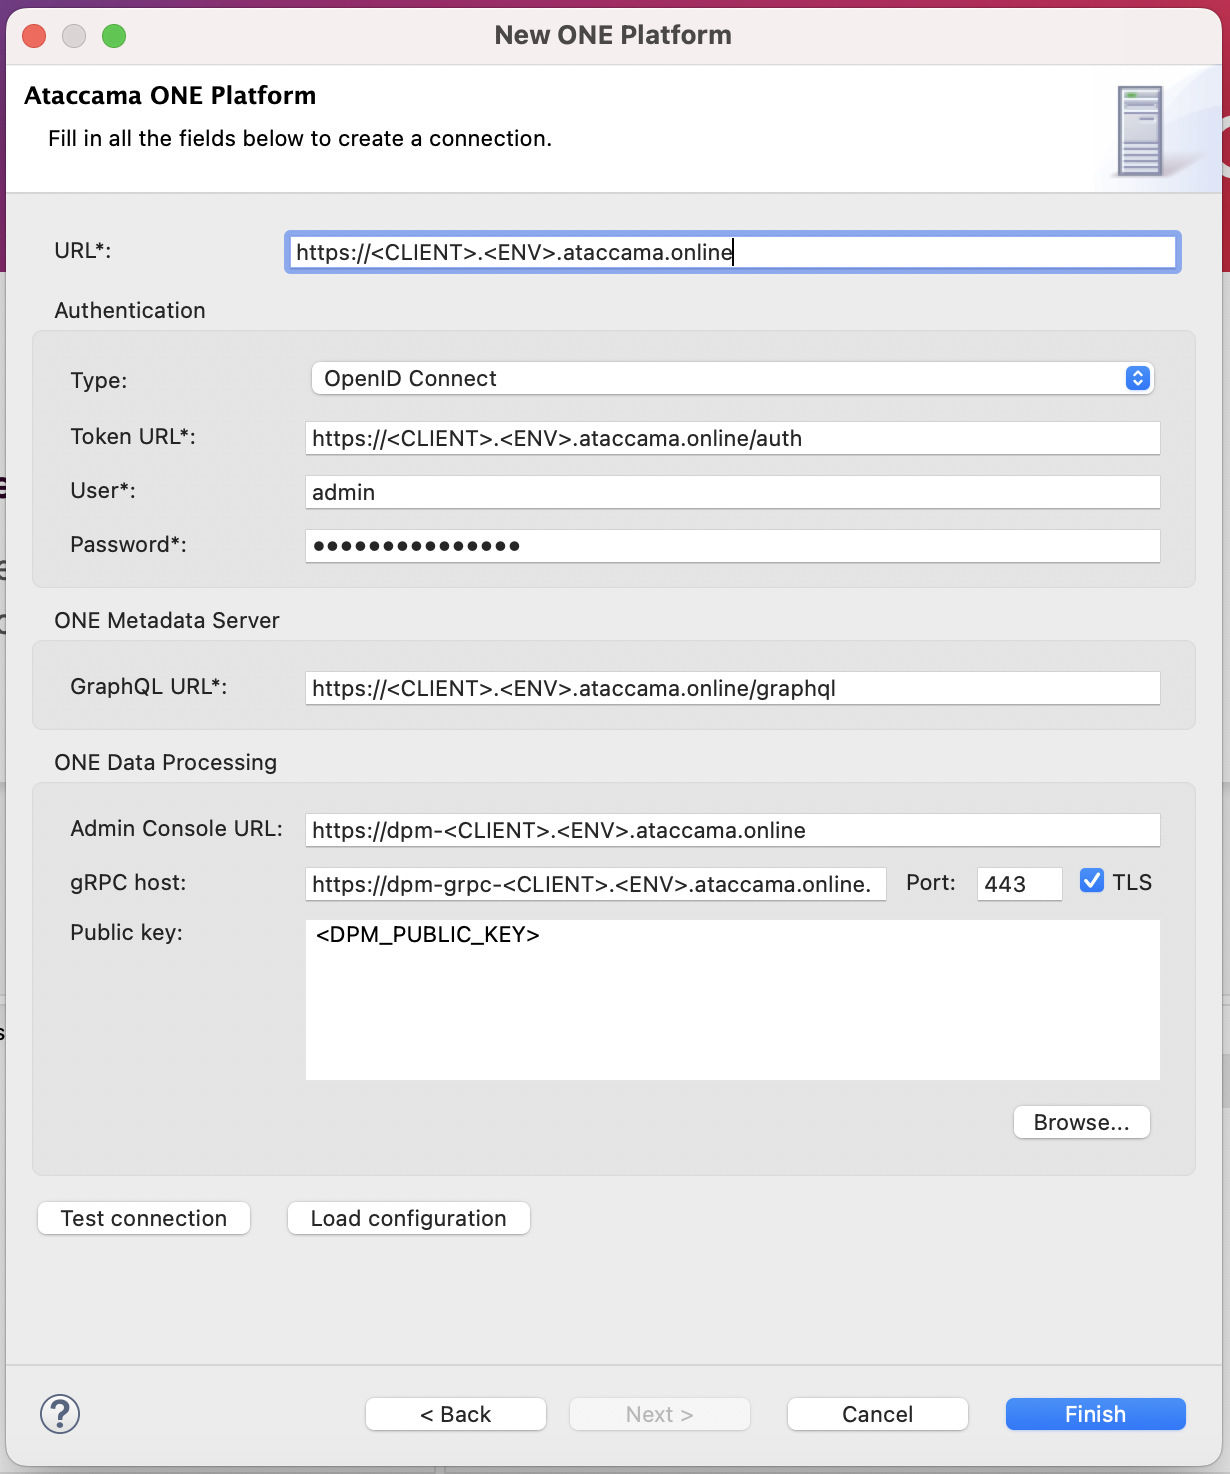
In some cases, the server configuration cannot be loaded automatically after providing the ONE URL. When this occurs, in the server configuration dialog, select Next to enter the information yourself.
| As this approach is more error-prone and takes more time, it should only be used as a fallback option. |

| Property | Description |
|---|---|
URL |
The URL where ONE is running.
For example, |
Authentication |
Select the authentication option and provide the necessary information.
|
ONE Metadata Server |
The following information needs to be specified for Metadata Management Module (MMM).
|
ONE Data Processing |
The following information needs to be specified for Data Processing Manager (DPM).
|
Was this page useful?
