
Nested Components
Nested components are complex components in which the main (parent) component uses multiple component files, allowing you to define sophisticated logic in a single entity. For example, this can involve using one of the predefined components delivered with ONE Desktop to cleanse, filter, or standardize specific data, while keeping the original data intact.
|
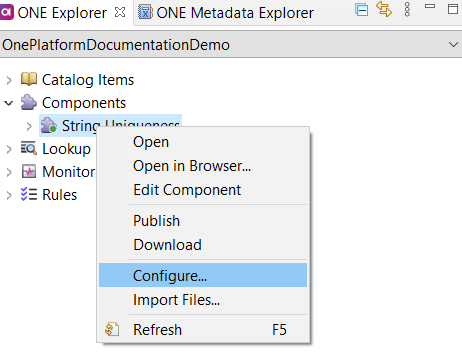
In ONE Desktop, after you import files and other components to a ONE component, you can select which component file is the main file of the component:
|
| Currently, nested components can only be used in transformation components (for example, virtual catalog items). |
Create a nested component
The following example shows how to create a nested transformation component. The use case is as follows: we have a catalog item with an attribute containing email addresses that we want to cleanse without modifying the existing catalog item.
-
Create a virtual catalog item (see Virtual Catalog Items). In the example, we are using a virtual catalog item vci_test that was generated based on emailaddress catalog item. The virtual catalog item attributes have not been modified.
-
Make sure that the component you want to use is installed. In this case, the component name is
___email_complex.comp. To do so, see Component Steps, section How to install paid components and modules. -
Make sure that you are working in the correct environment.
-
Configure an environment for ONE Data Processing launch, which is compatible with ONE Platform. For more information, see Environments.
-
In your workspace, switch to this environment from the toolbar.
-
-
Start by opening the virtual catalog item that you created as a prerequisite (vci_test).
In ONE Desktop, go to ONE Explorer > Components, right-click the component name, and select Edit Component. The component also opens automatically after it has been created.
Alternatively, you can access the component through the File Explorer (Servers > one20 > Components).
-
To import a component, in ONE Explorer > Components, right-click the component name, and select Import Files.
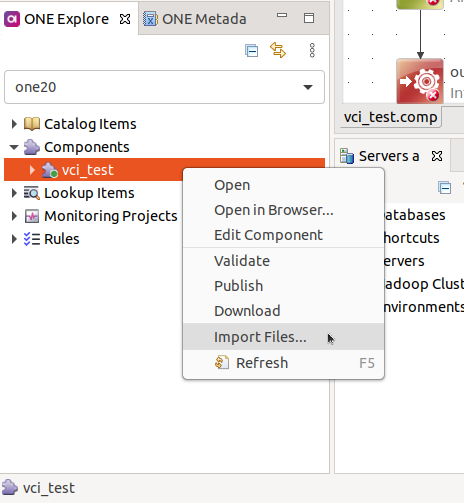
Drag and drop action is currently not supported for nested components. Use the Import Files action instead: to access it, find the component in ONE Explorer > Components and right-click the component name. -
In the dialog that opens, navigate to
DQ Projects/___email_complex/components. -
Select
___email_complex.compand then Ok. -
Confirm importing external files to the virtual catalog item.
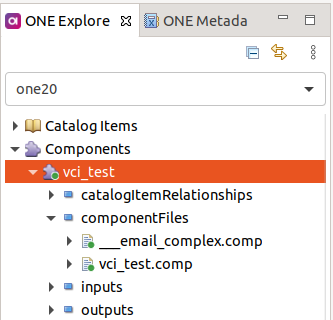
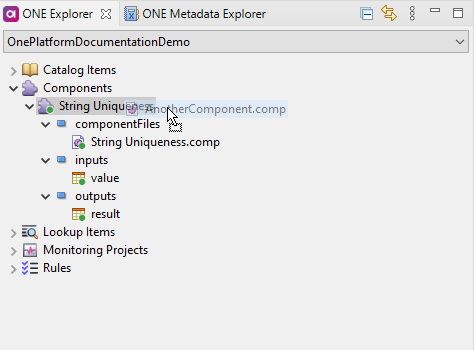
The imported component is shown in ONE Explorer under Components > vci_test > componentFiles.
-
Import the additional files that are used in the components. To do so, repeat the procedure described in steps 2-5.
Select all the files found in the following locations:
-
DQ Projects/___email_complex/components/data/ext/build: ONE plans used in the component. -
DQ Projects/___email_complex/components/data/ext/lkp: Lookup files used in the component. -
DQ Projects/___email_complex/components/data/ext/src: Component test data.
-
-
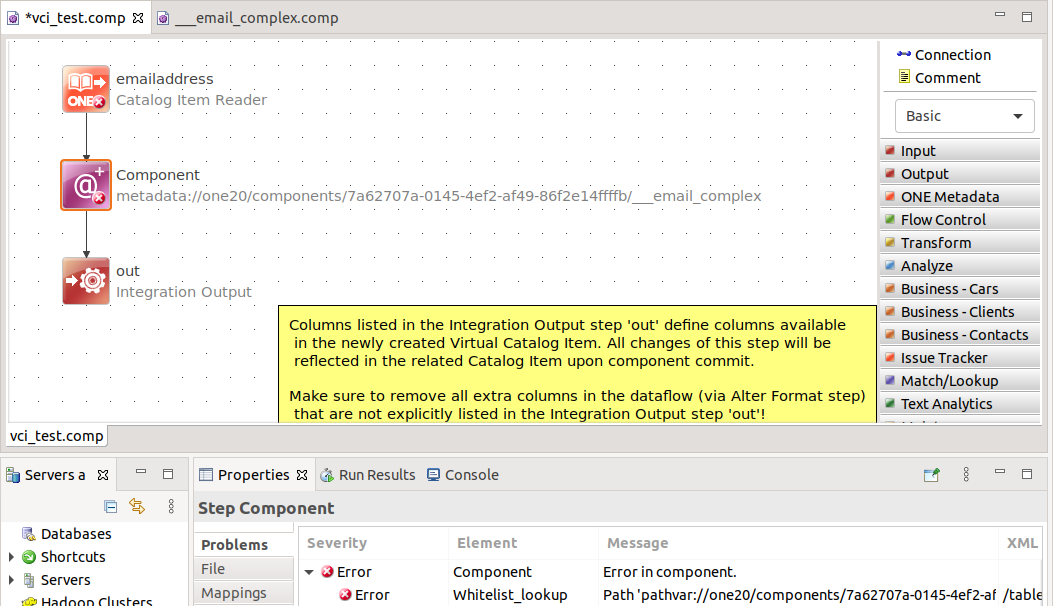
From ONE Explorer > Components > vci_test > componentFiles, drag
___email_complex.compto the canvas of the virtual catalog item. -
Connect the component to the existing Catalog Item Reader and Integration Output steps.
-
Edit the
___email_complexcomponent:-
Map the component columns. Double-click the component name and go to the Columns tab. For the purpose of this tutorial, we are using the following mapping:
-
in_email:emailaddress -
out_email:emailaddress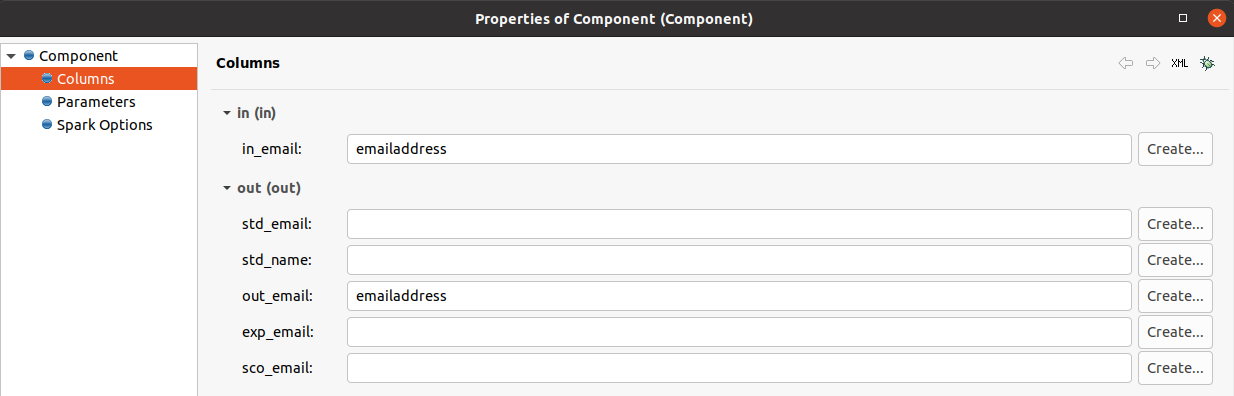
As a result of this mapping, the values of the emailaddressattribute in the virtual catalog item are replaced with the component’s output, that is, the cleansed version of the email address.
-
-
Update the paths in the steps used in the component. See Update unresolved paths in component steps.
-
-
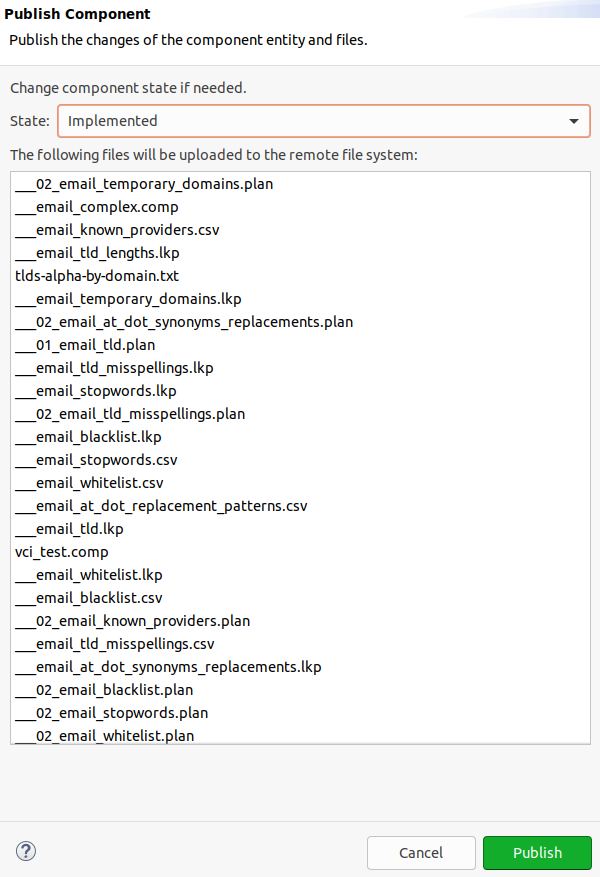
To publish the nested component, go to ONE Explorer > Components and locate the vci_test component.
-
Right-click the component and select Publish. Make sure that the component state is set to Implemented, then click Publish.
The component is now ready for use.
Update unresolved paths in component steps
The following steps should be repeated for each affected step until there are no more issues reported for the component in the Status panel > Properties.
-
On the canvas, right-click the
___email_complexcomponent and select Edit Component Definition. -
Locate the step for which there is an error reported, for example,
Stopword_lookupand double-click the step. -
On the General tab, next to Table File Name, select Browse.
-
If you have imported all the necessary files, the correct file should be preselected. Confirm your choice.
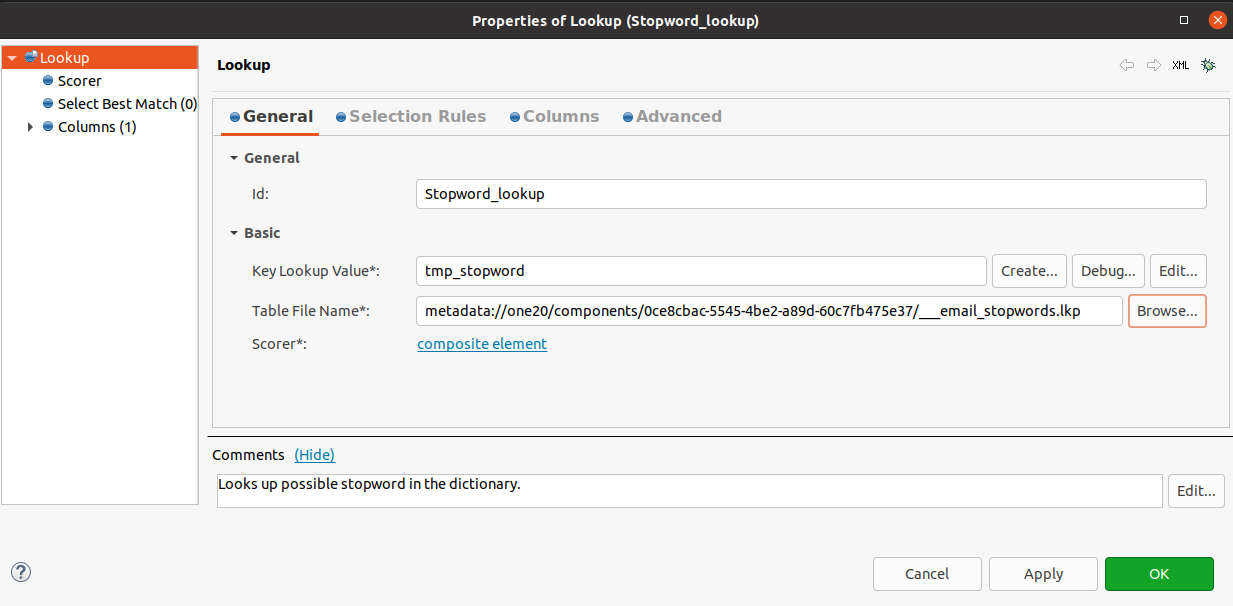
-
Select Ok.
Import a nested component to ONE
Your nested components can be easily imported and converted into ONE components.
The component file and all files to which it is linked are then imported to the componentFiles folder on your ONE platform server.
All paths to external files in the component file are converted to relative paths so that they continue working regardless of your local naming.
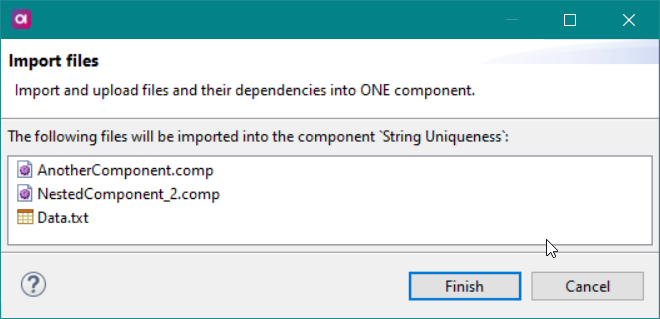
To import a nested component to ONE, drag a component from File Explorer on any ONE component in ONE Explorer.
You are then shown a list of any related external files that will be imported too:
You can also import nested components by dragging them directly onto a ONE component canvas area:
-
In ONE Explorer, double-click the component that you want to edit in canvas.
-
Drag and drop any files and components that you want to nest in the component and import to the ONE platform server.
-
When you are ready, save your changes: right-click your ONE component and select Publish to apply changes to the server.
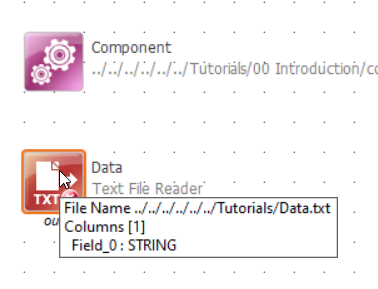
When you drag and drop a file or component onto the ONE component canvas, the file paths appear local until you publish the changes to the server. All paths in the component are converted to relative when the component is published.
Was this page useful?