
Virtual Catalog Items
Data virtualization combines data on demand into virtual views for analytics, data preparation, and data science. Virtual catalog items (VCIs) can be created by joining catalog items from multiple sources. As such, they provide flexibility for users working with data in ONE in cases when they cannot work with the raw data (directly with a physical table or file).
When to use virtual catalog items?
There are two main use cases for virtual catalog items:
-
When instead of working with raw data, you want to apply ONE Desktop or in-source (SQL) transformation logic first. For example:
-
Filter a subset of the table (records for specific reporting date, manually determined delta).
-
Joining tables (normalization, joins including business logic, and data enrichment).
-
Value preparation (simple parsing, standardization).
-
-
When you want to integrate non-natively supported sources using APIs and other connectors. That is, when you want to connect to sources that are available in ONE Desktop but not in ONE.
Notes and limitations
-
At this point, viewing data from virtual catalog items is not supported.
-
Terms can be assigned to virtual catalog items the same way as to any other catalog item.
-
Virtual catalog items can only be processed using full profiling (not sample or custom). The same applies to virtual catalog items with partitions.
-
In monitoring projects, structure checks cannot be set on virtual catalog items.
-
Policies can be applied to virtual catalog items the same way as to any other catalog item.
-
For virtual catalog items, permissions do not apply to specific catalog items but to the whole Workspace in the source. As such, permissions should only be changed for the whole workspace.
-
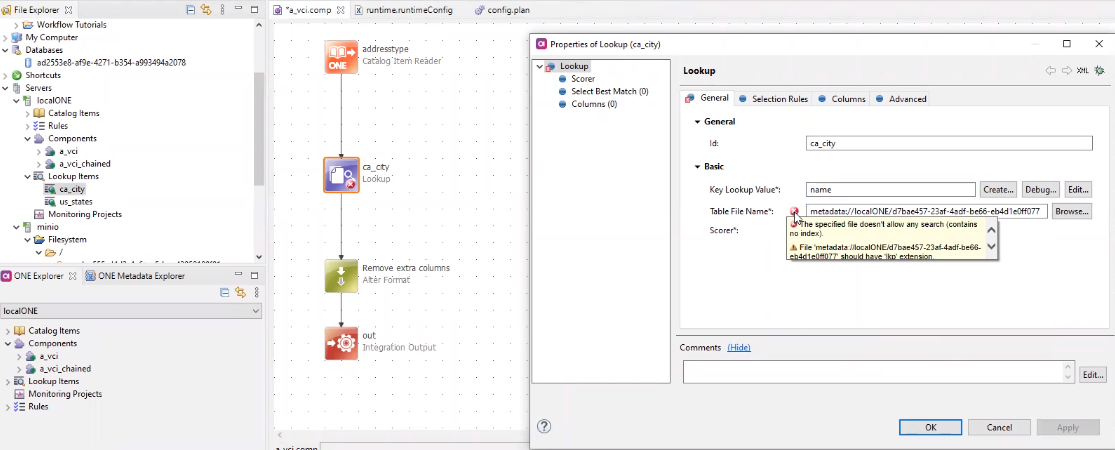
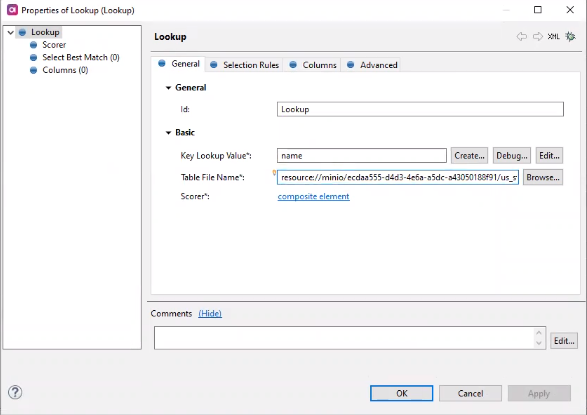
Any lookup files can be used in components. To use a lookup file, upload it to ONE and access it through ONE Desktop. For more information about lookup files, see Lookup Items.
In ONE Desktop, specify the key lookup value for the lookup file. No further configuration is required.
Even though ONE Desktop reports that the path is not correctly configured (as shown in the image), the project can be published and all the actions will be available and work correctly in ONE.
Create a virtual catalog item
Prerequisites
-
ONE Desktop is up and running.
-
ONE is up and running and is connected to ONE Desktop (see Connect to a Server, section Ataccama ONE Platform).
Create a new virtual catalog item
|
It is possible to create a virtual catalog item based on the already created virtual catalog items. To combine virtual catalog items from different sources, use the Catalog Item Reader step. In that case, make sure that the published components have the Catalog Item Reader workflow state set to published unless you are aware of other users who are working with the same items. Unlike other catalog items, a virtual catalog item based on another virtual catalog item in the draft state actually uses unfinished metadata and components with changes that have not been published. |
To create a virtual catalog item:
-
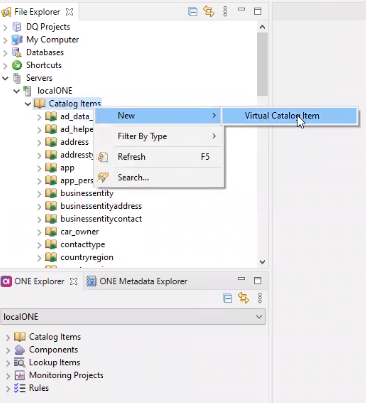
In ONE Desktop, go to File Explorer and right-click Catalog Items.
-
Select New > Virtual Catalog Item.
-
In the dialog that opens, enter the name and description for the VCI and select Next.
-
Define VCI attributes manually, or select Add to choose existing catalog items to add to the transformation. In the latter case, the columns are prefilled based on attributes of the selected catalog item.
What you select when creating a VCI (catalog items, columns) only represents the starting point for your implementation. Both the data and attributes in your new VCI ultimately reflect the implementation changes performed at a later point, when you modify the logic behind your VCI. 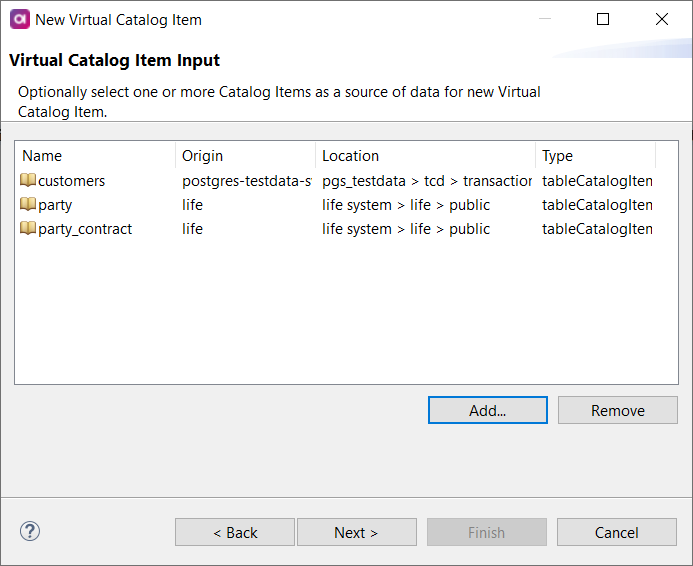
-
Search for the catalog items that you want to add. Select the catalog items that you want to use and then OK.
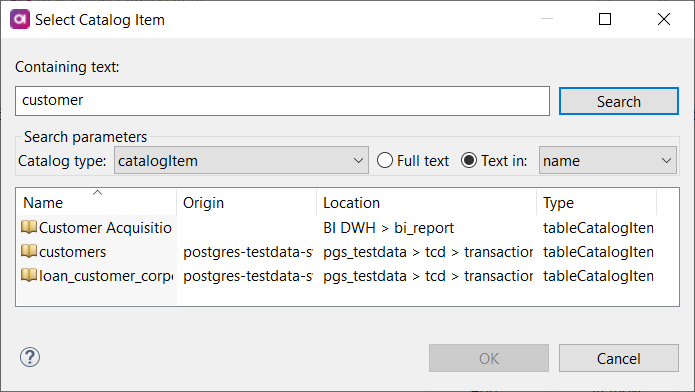
For each catalog item that you added, you can see the catalog item name, origin, location, and type.
-
If needed, modify the attributes of the virtual catalog item and select Next.
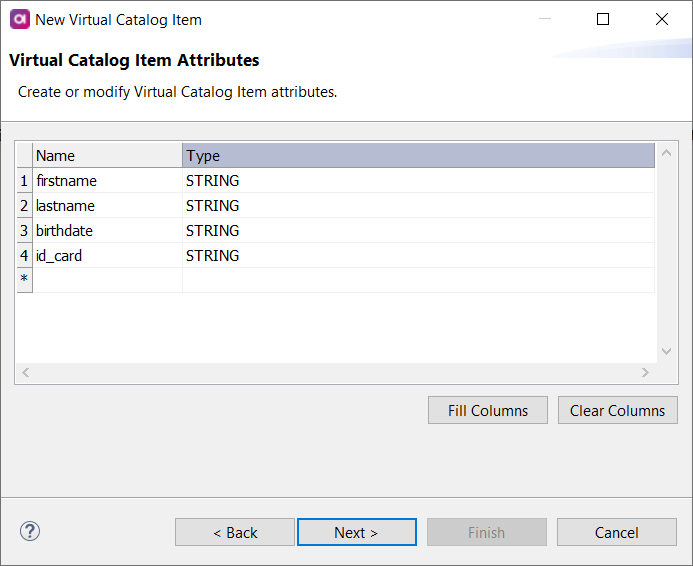
Select Clear columns to remove all columns from the list. Then, select Fill Columns to choose which attributes to use.
You can also rename attributes or change the attribute data type.
-
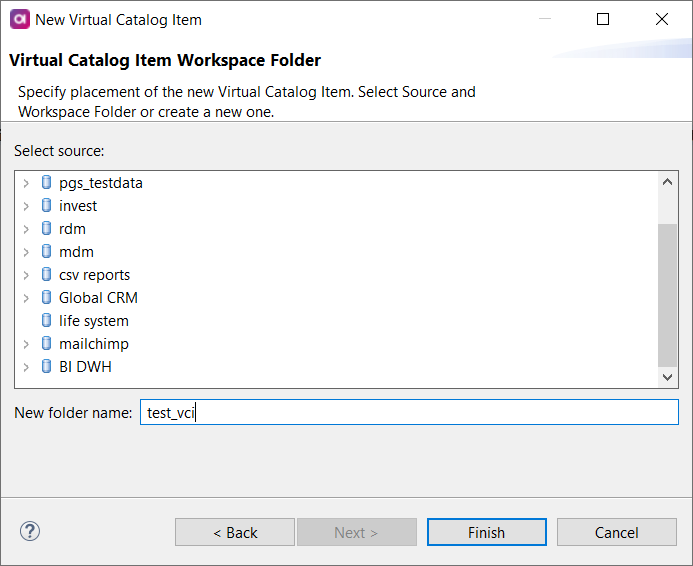
Specify the source and workspace folder where the new virtual catalog item should be placed. Select an existing folder or create a new folder within the data source by providing New folder name, and click Finish.
The virtual catalog item is now created:
-
In ONE Desktop, a new plan is created with the same name as the VCI. The plan consists of a reader step (the type of reader depends on the data source from which you created the VCI) and an Integration Output step that contains all columns that you defined when creating the VCI .
-
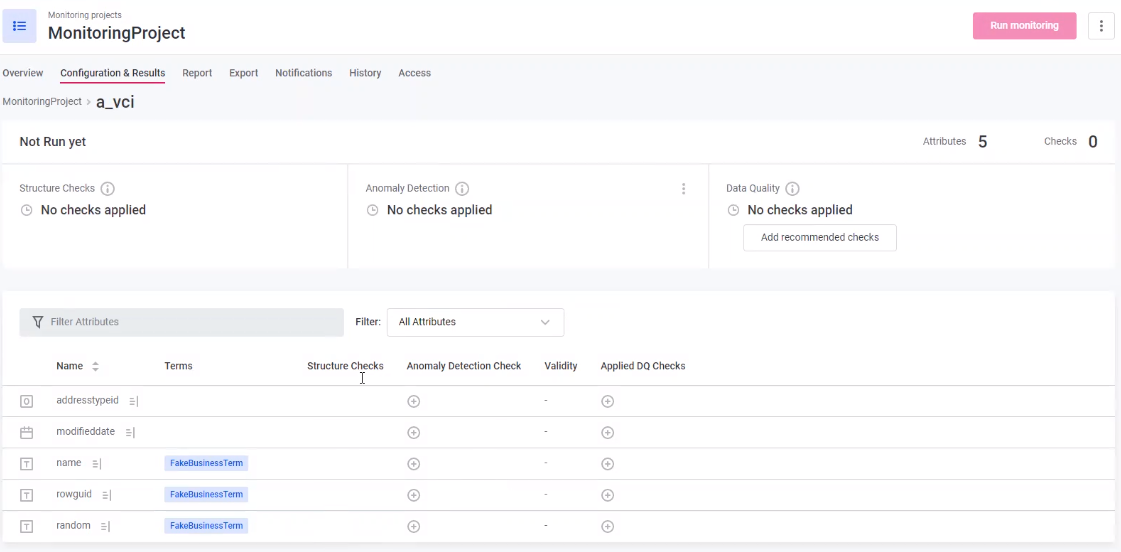
In ONE, catalog item is created and is displayed as
Othercatalog item type.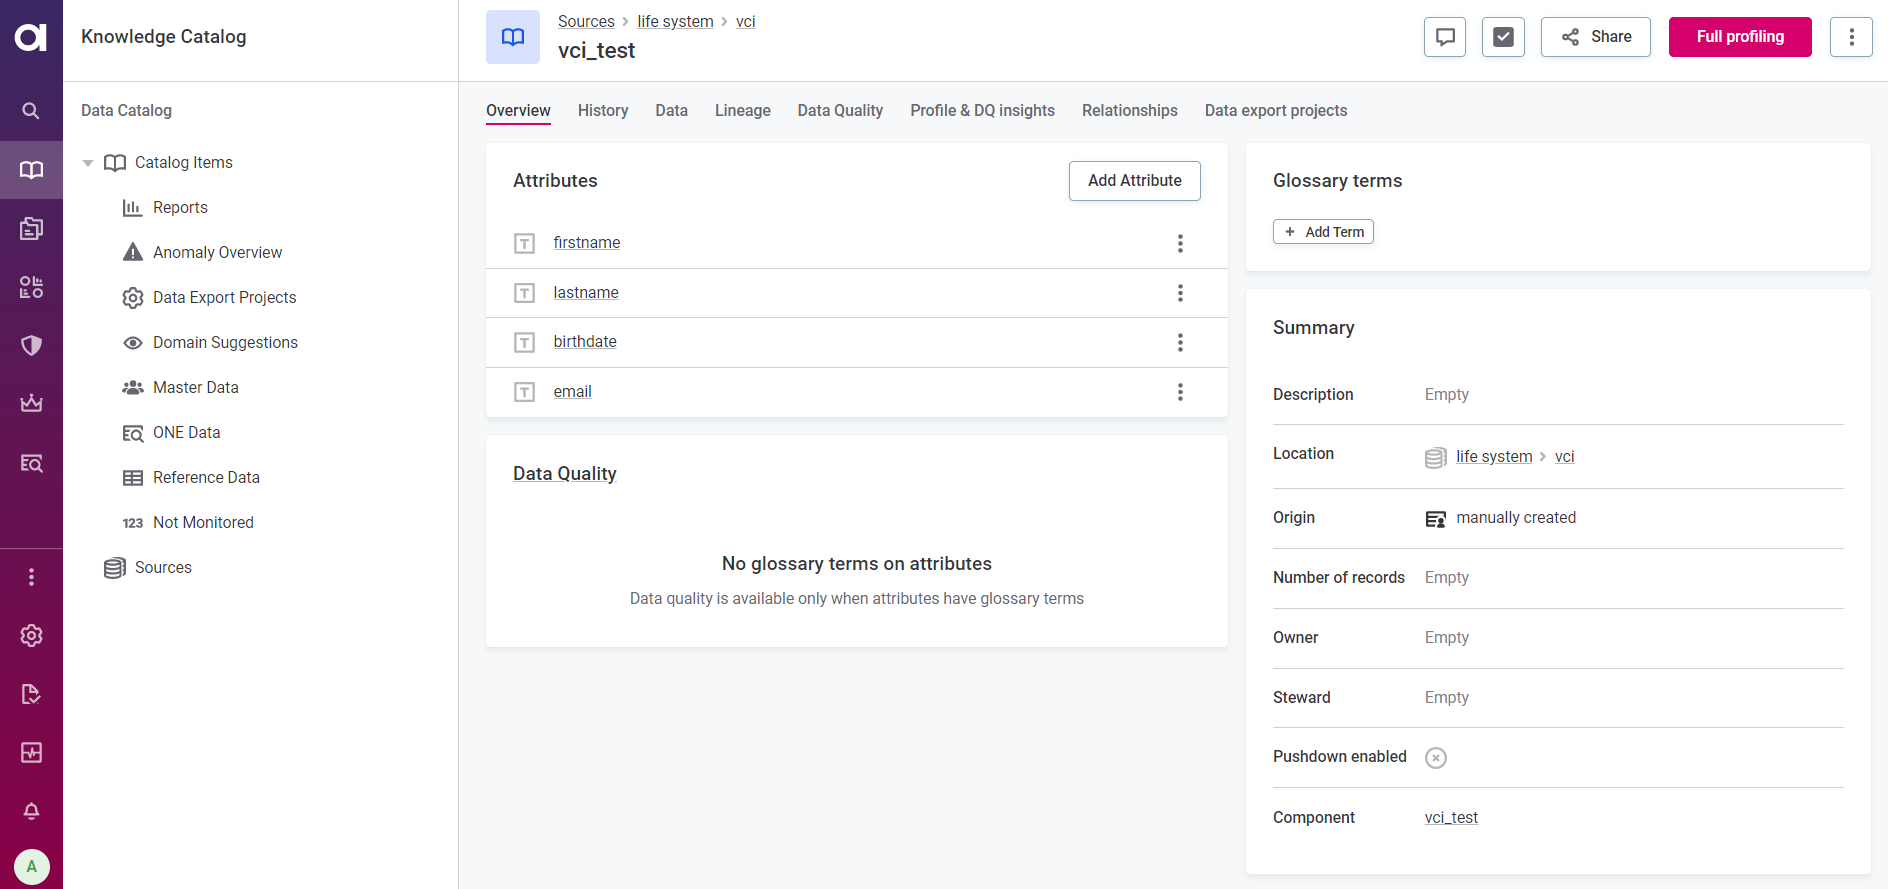
To be able to profile the catalog item or perform other actions on it, it must be first published in ONE Desktop. See Publish changes.
In addition, a transformation component is created under Data quality > Components > Transformation components.
To view all virtual catalog items created for a specific data source, open the source details and check the Workspace section on the Overview tab.
-
Transform the virtual catalog item
Once you have created the virtual catalog item, go to ONE Explorer > Components, and under Components, select the newly created component and then Edit Component.
Transform the item as needed using the newly created draft plan for the virtual catalog item. For the possible transformation options, see Plans.
Publish changes
-
In ONE Explorer, find your new virtual catalog item in Components. New virtual catalog items are by default pinned to the top of the folder.
-
Right-click your virtual catalog item and select Publish.
If the Publish option is not available, you either need to Validate or Update the component first:
-
Validate checks if the component is valid. If a red icon appears in front of your component, Publish is not available unless all errors are fixed.
-
Revalidate starts a secondary check to verify whether the component is valid. Publish is not available unless all errors are fixed.
-
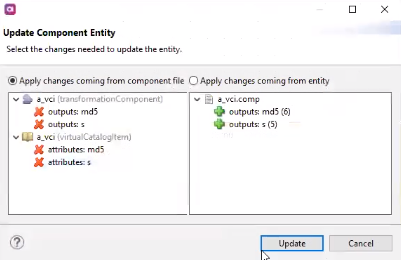
Update opens the Update Component Entity dialog where you can choose between two options: Apply changes coming from a component file or Apply changes from an entity. Select one of the options and then Update.
-
-
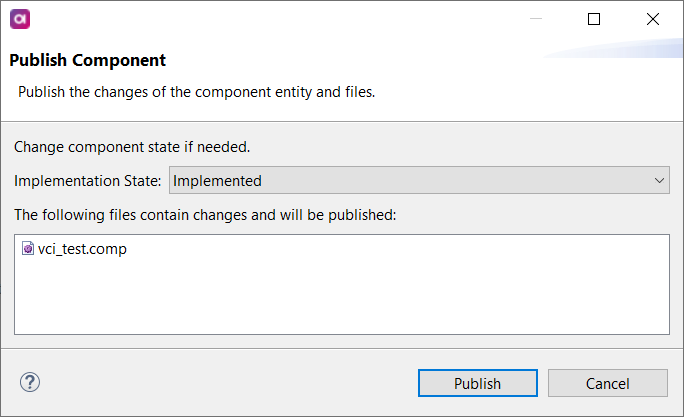
In the dialog that opens, change the Implementation State to Implemented and select Publish. After publishing, the state of VCI transformation component in ONE changes from Ready for implementation to Implemented . The virtual catalog item is fully available in ONE and can be profiled.
The Ready for implementation state saves the component in ONE without publishing the virtual catalog item. This is useful when several users are working on the same component, as this way they are able to access it before it is published. Virtual catalog items and virtual catalog items with partitions can only be processed using full profiling.
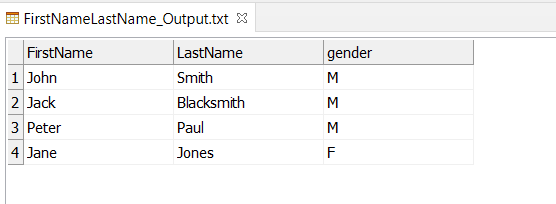
Example: Create VCI from catalog item and use it to transform raw data
The following example shows how to create a new virtual catalog item from an existing catalog item.
Using the virtual catalog item, we will parse the attribute Full Name into First Name and Last Name, which is more suitable for running data quality checks.
Procedure
-
Launch ONE Desktop.
-
Create a new virtual catalog item according to the instructions in Create a new virtual catalog item. The catalog item we are using to create a VCI contains an attribute
Full Name.Do not publish the changes yet. -
Once you have created the VCI, go to ONE Explorer and under Components, select the newly created component (
FirstNameLastName.comp) and then Edit Component.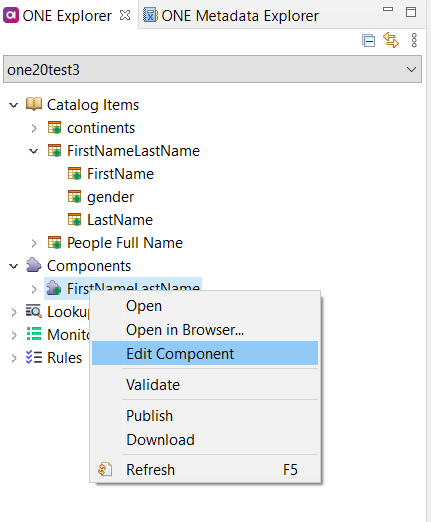
-
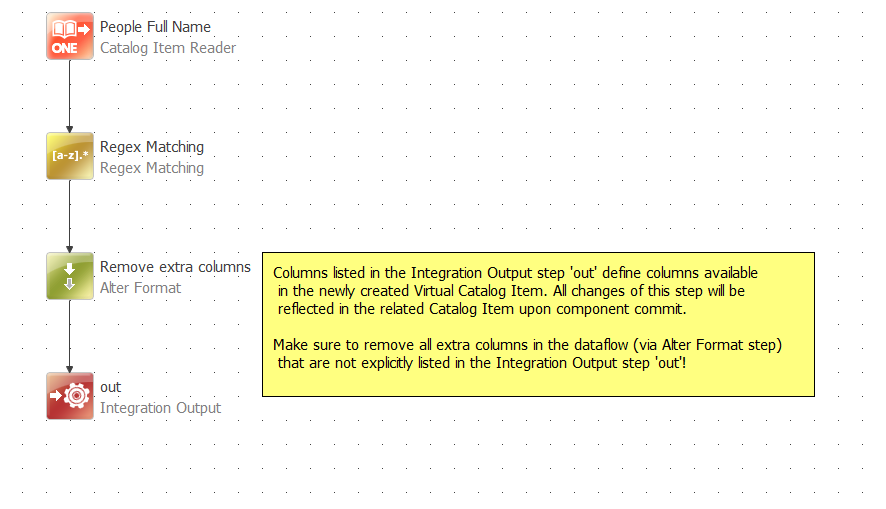
Edit the component as you would any other plan. For the purpose of this tutorial, we are adding the Regex Matching step: add the Regex Matching step and connect it to the Catalog Item Reader and the Alter Format steps.
-
Configure the Regex Matching step as follows:
-
Input: [Full Name].
-
Regular expression: Parsing, with the pattern
(.*)(\s)(.*).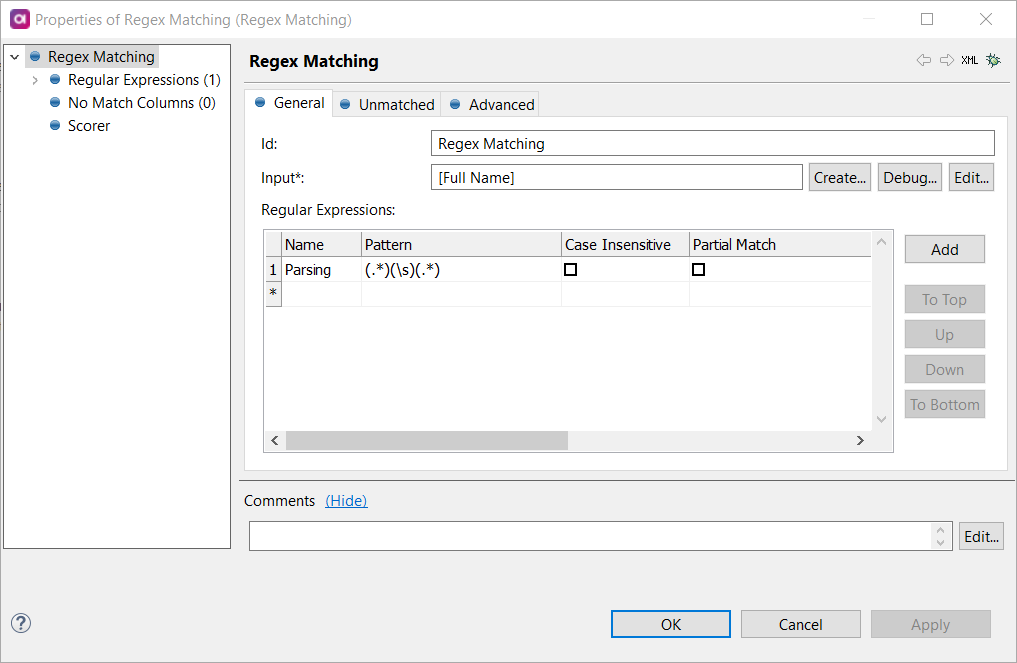
-
Define Result Columns so that you have two columns
FirstNameandLastName, with substitutions$1and$3respectively. -
Once you are finished, select OK.
-
-
Configure the Alter Format step as follows:
-
Keep Added Columns empty. These columns have been defined in the Regex Matching step.
-
In Removed Columns, select
Full Name.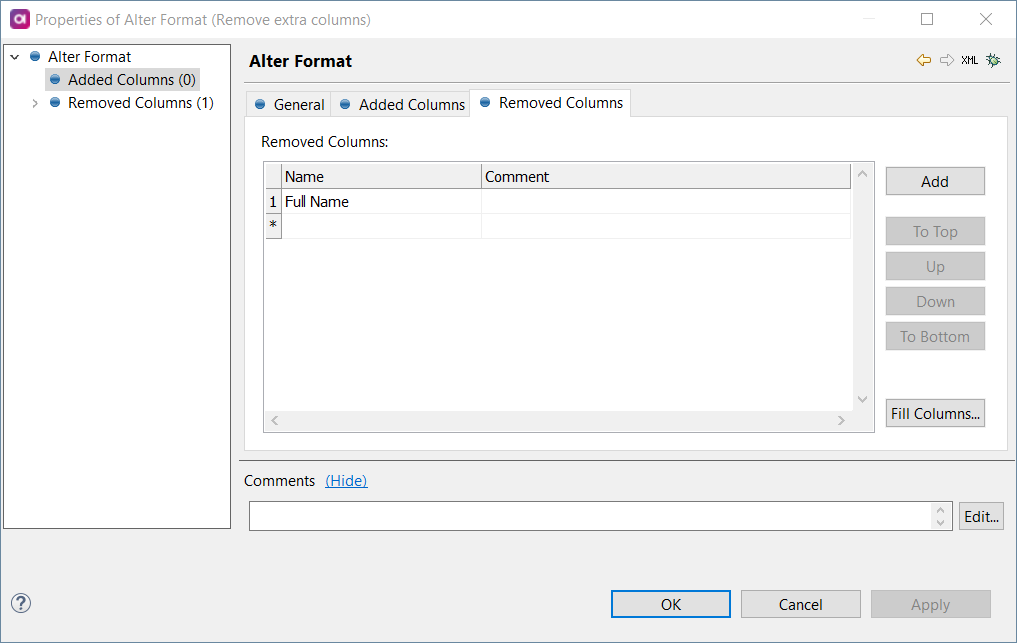 Remove Extra Columns
Columns listed in the Integration Output step define columns available in the newly created VCI. Any changes made to this step are reflected in the related catalog item once the component is published.
Make sure to remove all extra columns in the data flow that are not explicitly listed in the Integration Output step using the Alter Format step.
-
-
Define the attributes of the virtual catalog item using the Integration Output step. In this case, Required Columns include
FirstName,LastName, andgender. These columns will become attributes of the VCI we are creating.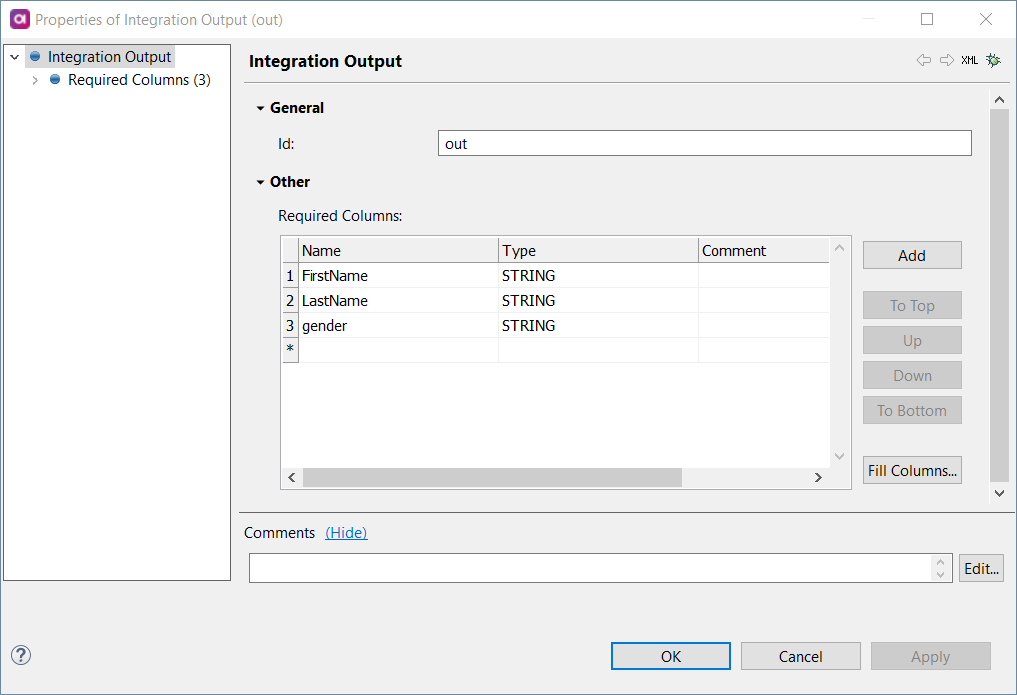
-
Once you have finished with the configuration, go to ONE Explorer and under Components, find your VCI.
-
Right-click the component (
FirstNameLastName.comp) and publish it according to the instructions in Publish changes.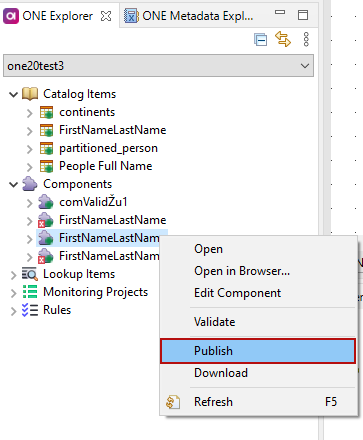
-
You can now retrieve the transformed data from your virtual catalog item in ONE Desktop. Use the Catalog Item Reader step and configure it to use the new virtual catalog item.
In-source transformations and integration with non-natively supported sources
You can read data from a source using either SQL for in-source transformations or other connectors, such as API, to integrate with non-natively supported sources.
Connect to natively supported source
-
In ONE Desktop, create a virtual catalog item, as explained in Create a new virtual catalog item.
-
Add the JDBC Reader step to the plan:
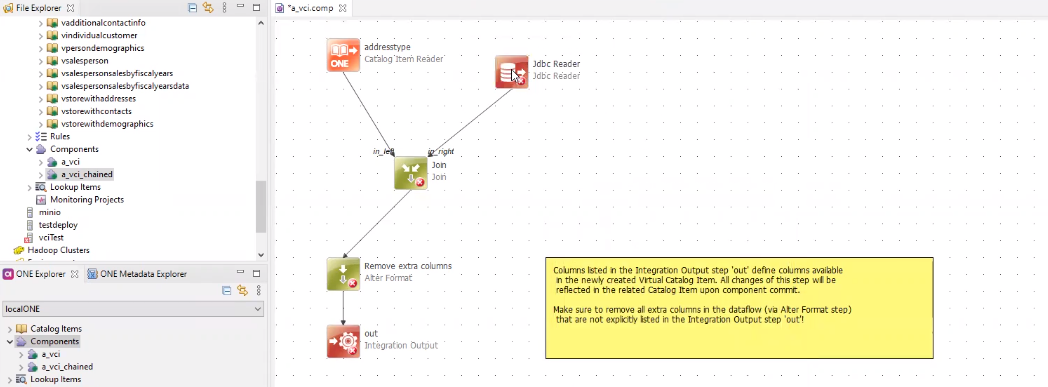
Depending on what the transformation should achieve, you can either use only the JDBC Reader step or combine it with the existing catalog items using the Catalog Item Reader step, as shown in the image. -
Configure the General tab of the JDBC Reader step:
-
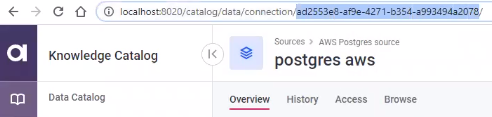
Data Source Name: Provide the source identifier of the connected database.

You can find the source identifier in ONE: in Sources, select the source that you want to work with and copy the identifier from the address bar:
-
Query String: Provide the SQL query for the transformation.
To write the SQL query, check the data source structure (such as schemas and tables): in Sources > <data source name>, select the Connections tab and open <connection name> connection browser. Select a schema to view the tables within.
-
Columns: Specify as needed. For more information, see Projects.
-
Select OK to confirm.
-
-
Publish the item, as described in Publish changes.
-
Edit the VCI in ONE:
-
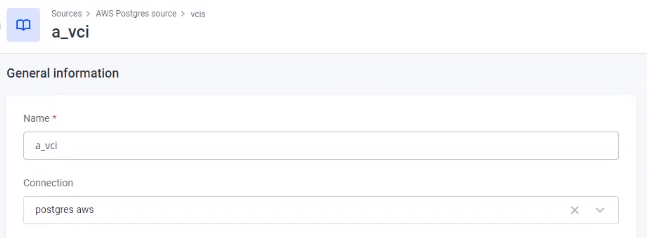
In ONE, open the VCI you are working with and select Edit.
-
Specify the connection to the source in Connection and select Save:
-
(Optional) Specify the Engine label to limit which Data Processing Engine (DPE) group is used for jobs that include this catalog item.
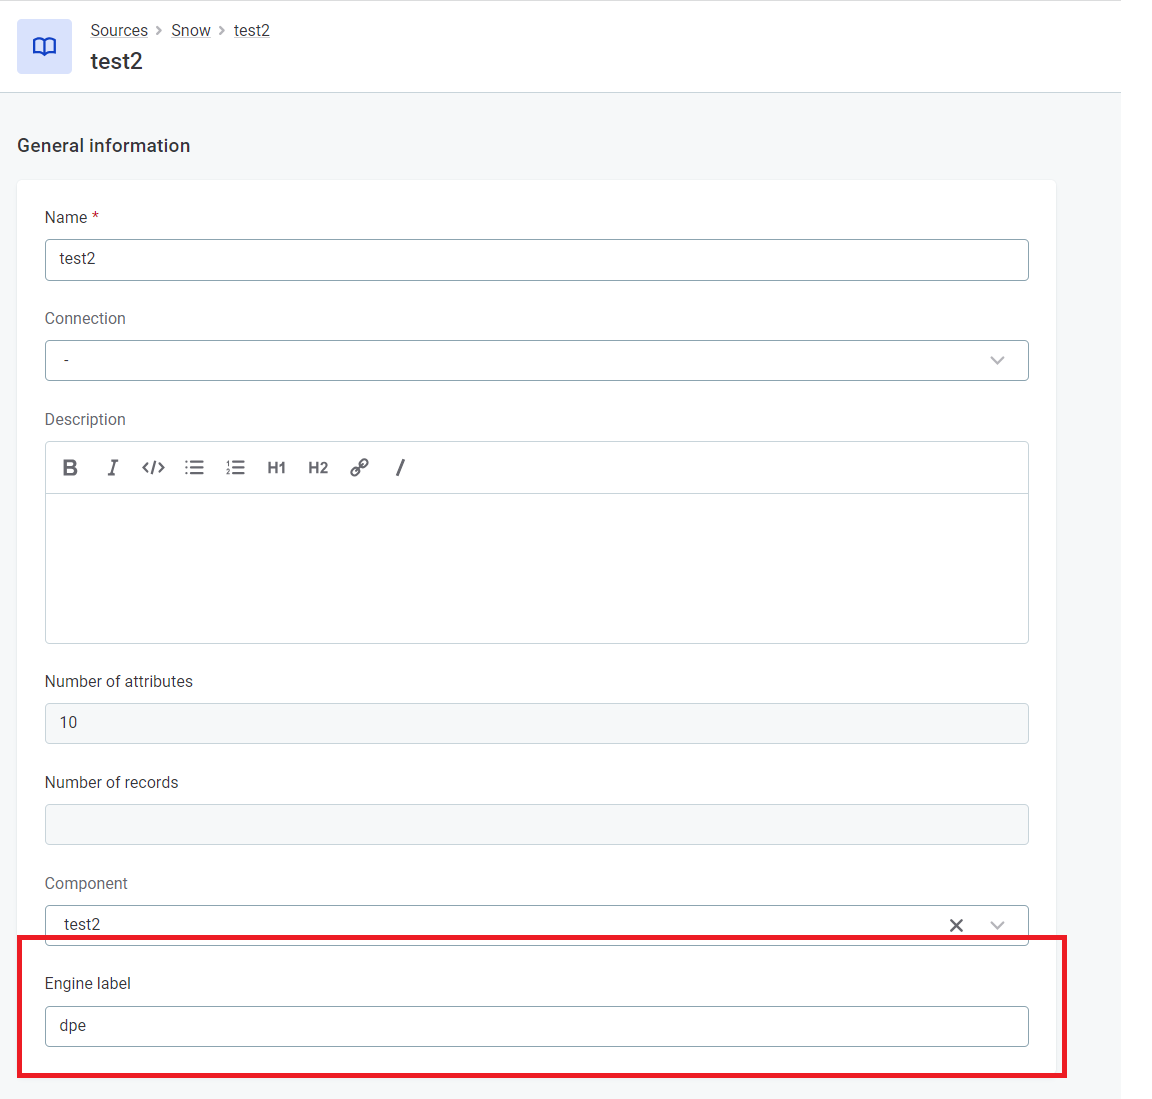
-
Publish the changes. The catalog item now has the Origin specified:
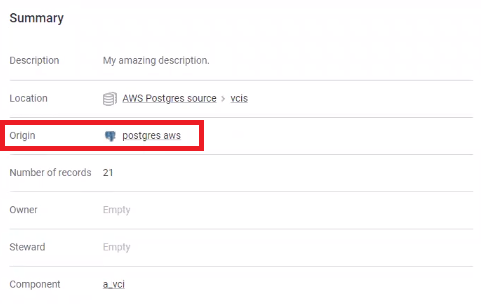
You cannot combine data sources that are not set up as combinable in Data Processing Engine. Even though you can create an item with such data sources in ONE Desktop, you will not be able to use this item in ONE.
For example, if you use two non-combinable data sources such as AWS PostgreSQL and Hadoop, it will pass validation in ONE Desktop, but it will be impossible to run any actions on this item in ONE (for example, running profiling or monitoring projects will fail).
-
Connect to non-natively supported source
To connect with a data source which is not supported by ONE but is supported by ONE Desktop:
-
In ONE Desktop, create a virtual catalog item, as described in Create a new virtual catalog item.
-
Add the necessary reader step to retrieve the data from the source. Depending on the source, this might be a JSON Reader step or API calls.
The compatibility of different sources depends on how the source was configured in Data Processing Engine (DPE). Before combining data from different sources, make sure that DPE supports the connection. -
Configure the selected reader step.
-
In ONE, create the data source connection. For more information, see Connect to a Source.
-
In ONE, open the virtual catalog item that you are working with and select Edit.
-
(Optional) Specify the Engine label to limit which DPE engine group will be used for jobs that include this catalog item.
-
Specify the newly created data source connection in Connection and select Save.
-
Publish the changes made. The catalog item now has the Origin specified.
Use global runtime configuration
To set up a connection to a data source that is not supported by ONE nor ONE Desktop, use Global Runtime Configuration. It can also be used to connect to both natively and non-natively supported sources.
Currently, this cannot be used with the JDBC Reader step configured for Spark.
The reason for this is that you cannot set the absolute driver path, only relative ones.
If they are not run on Spark, you can use data sources with the driverName referring to one of the JDBC data source configurations which then get mounted.
|
To use the global runtime configuration:
-
In ONE Desktop, connect to the source you want to read the data from, for example, MinIO:
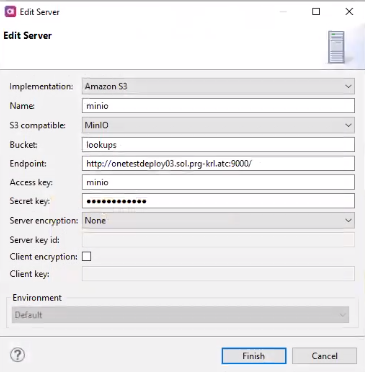
To use the files from the MinIO server, add the full file path. This can be found in the file properties description in the file reader.
For example, if the file name is
us_states.lkp, the full path in file properties would beresource://minio/<folder_identifier>/us_states.lkp.
-
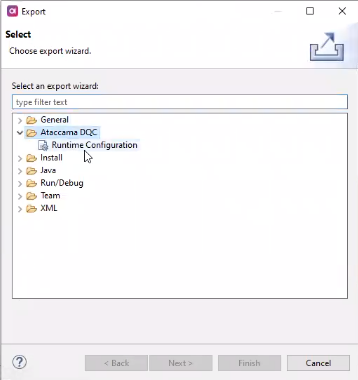
Launch ONE Desktop to export the runtime configuration.
-
Select File > Export > Ataccama DQC > Runtime Configuration, then select Next.
-
Specify the container and the name for the runtime configuration export.
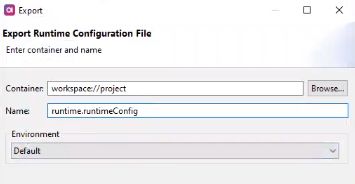
-
Select Finish.
-
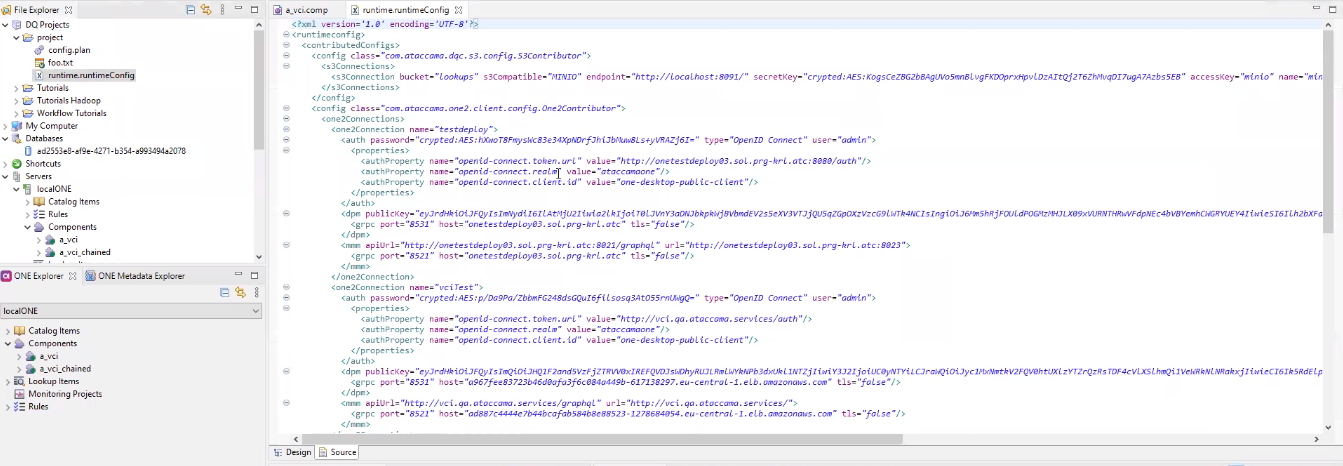
-
Navigate to your runtime configuration file and open it in ONE Desktop.
-
Switch to the Source screen and delete all the lines that do not refer to the necessary connection, for example to MinIO:
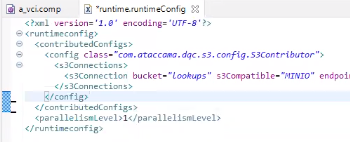
Ask your administrator for connection details such as name and password. -
Open DPM Admin Console in your browser and switch to Configuration > Runtime Configuration.
-
Copy the runtime configuration that you prepared in step 4 and select Save.
-
Publish the component in ONE Desktop with the connection to the source. Now the catalog item is updated in ONE and available for all actions.
Was this page useful?